Connect Your Custom Domain
Put the client portal on your own subdomain, such as portal.yourbrand.com, with a free SSL certificate.
Written By voiceaiwrapper
Last updated 26 days ago
Your clients log in to their portal on your own subdomain, such as portal.yourbrand.com, instead of a VoiceAIWrapper address. You set this up once by adding a DNS record with your domain provider. VoiceAIWrapper then checks the record and sets up a free SSL certificate for you.
Most setups take 2 to 5 minutes, plus however long your DNS provider takes to publish the change.
Available on: plans that include Custom domain. Without it, clicking Add subdomain shows an upgrade prompt.
Before you start
You'll need:
- A domain you own, such as
yourbrand.com. - Access to your DNS settings. This is usually wherever you bought the domain (GoDaddy, Namecheap and so on) or where its DNS is hosted (for example Cloudflare). If someone else manages your DNS, send them the record from Step 2.
- A subdomain name to use. Pick something your clients will recognise, like
portal,apporvoice.
What you can and can't use:
Use a subdomain that isn't already pointing somewhere else. If portal.yourbrand.com already has a record (for example, an old website), remove that record first or pick a different name.
Step 1: Add your subdomain
- In the sidebar, open Client Portal → Portal Configuration.
- Open the Domain Settings tab.
- Under Connect your subdomain, type your subdomain (for example
portal.yourbrand.com). - Click Add subdomain.
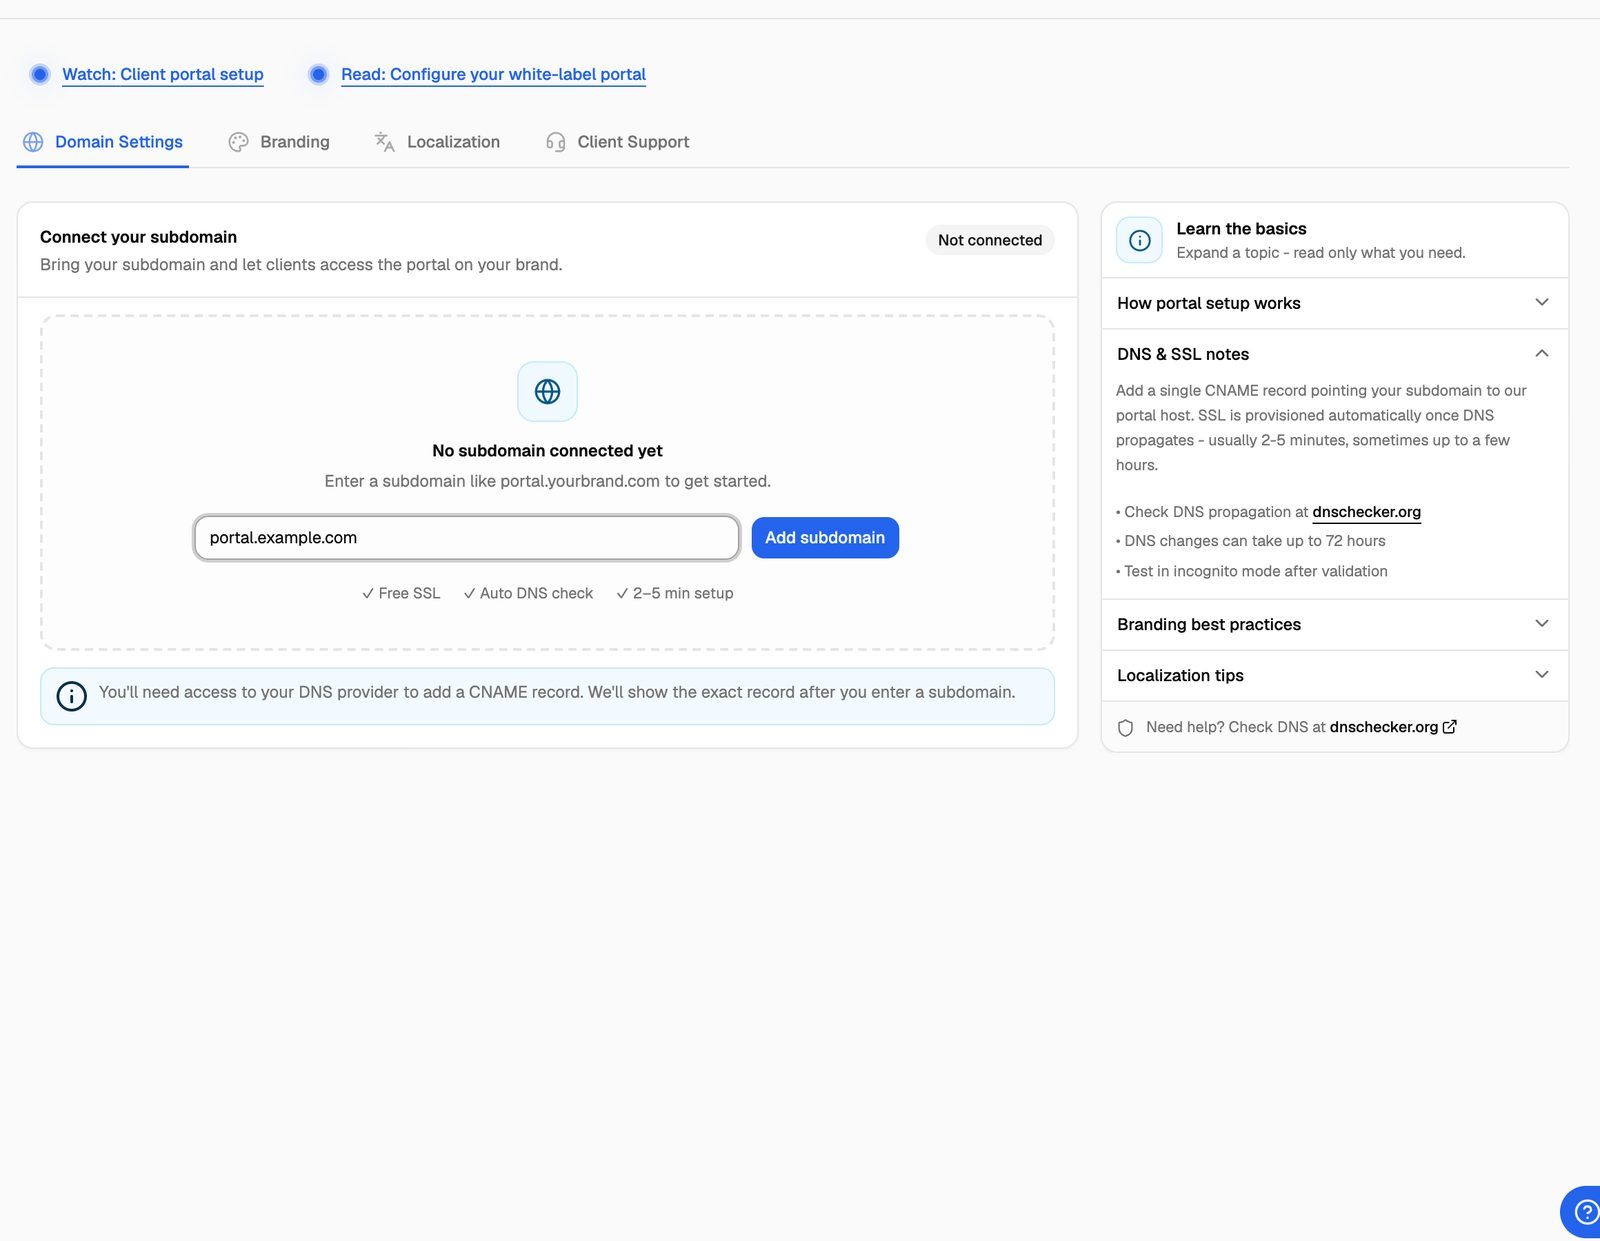
You'll see a confirmation, and the page changes to show the DNS record you need to add.
Step 2: Add the CNAME record with your DNS provider
VoiceAIWrapper shows one CNAME record with three columns:
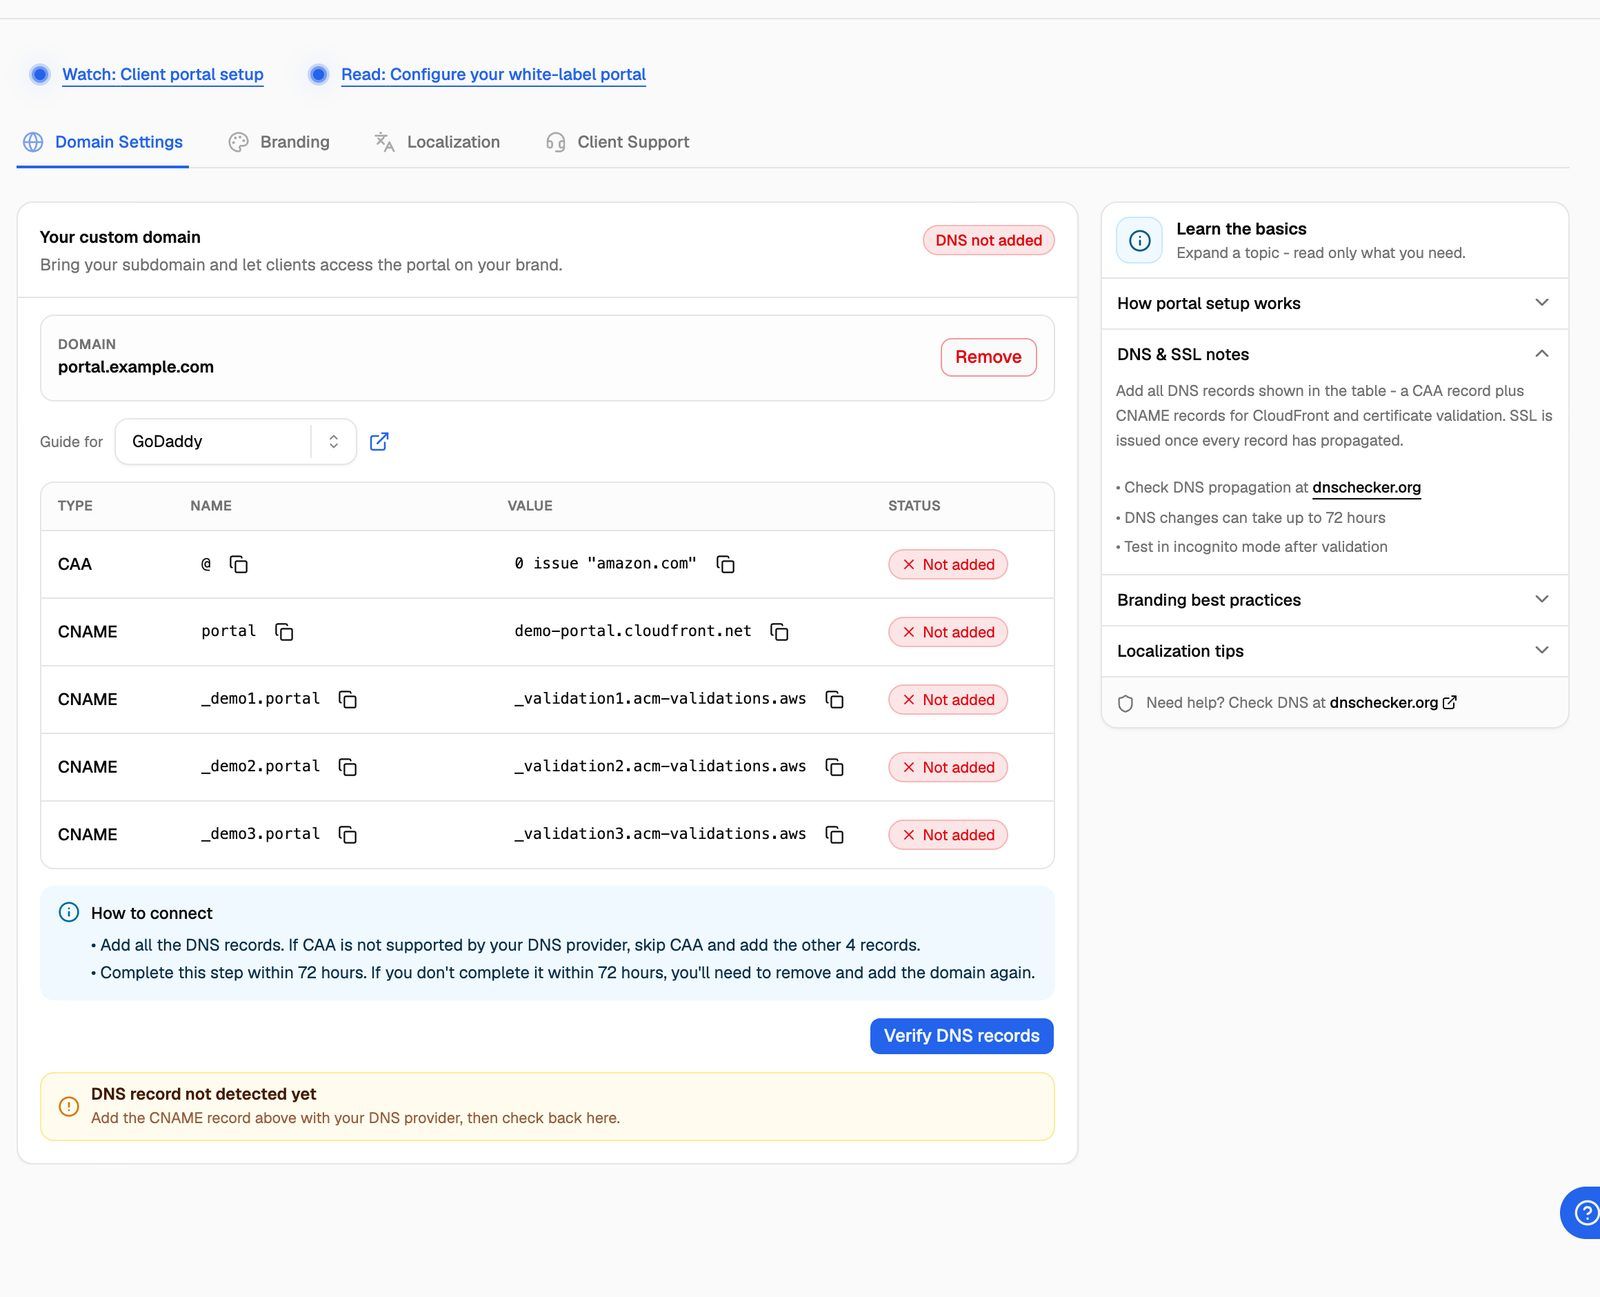
To add the record:
- Sign in to your DNS provider and open the DNS settings for your domain.
- Create a new record of type CNAME.
- Paste the Name and Value from VoiceAIWrapper.
- Save the record.
You don't need any other records. The SSL certificate is set up automatically once the CNAME is live.
Need provider-specific steps? Use the Guide for dropdown on the Domain Settings tab. It links to the instructions for GoDaddy, Namecheap, Cloudflare, Hostinger, DigitalOcean, Squarespace, Wix, Porkbun, Network Solutions, AWS Route 53, Strato, Microsoft 365 and Netlify.
Using Cloudflare for DNS? Set the record to DNS only (grey cloud). If the proxy is on (orange cloud), the SSL certificate can't be issued.
Step 3: Check the connection
Go back to Domain Settings. VoiceAIWrapper checks your DNS automatically, and you can click Refresh DNS Status to check again right away. After each refresh there's a short wait before you can refresh again.
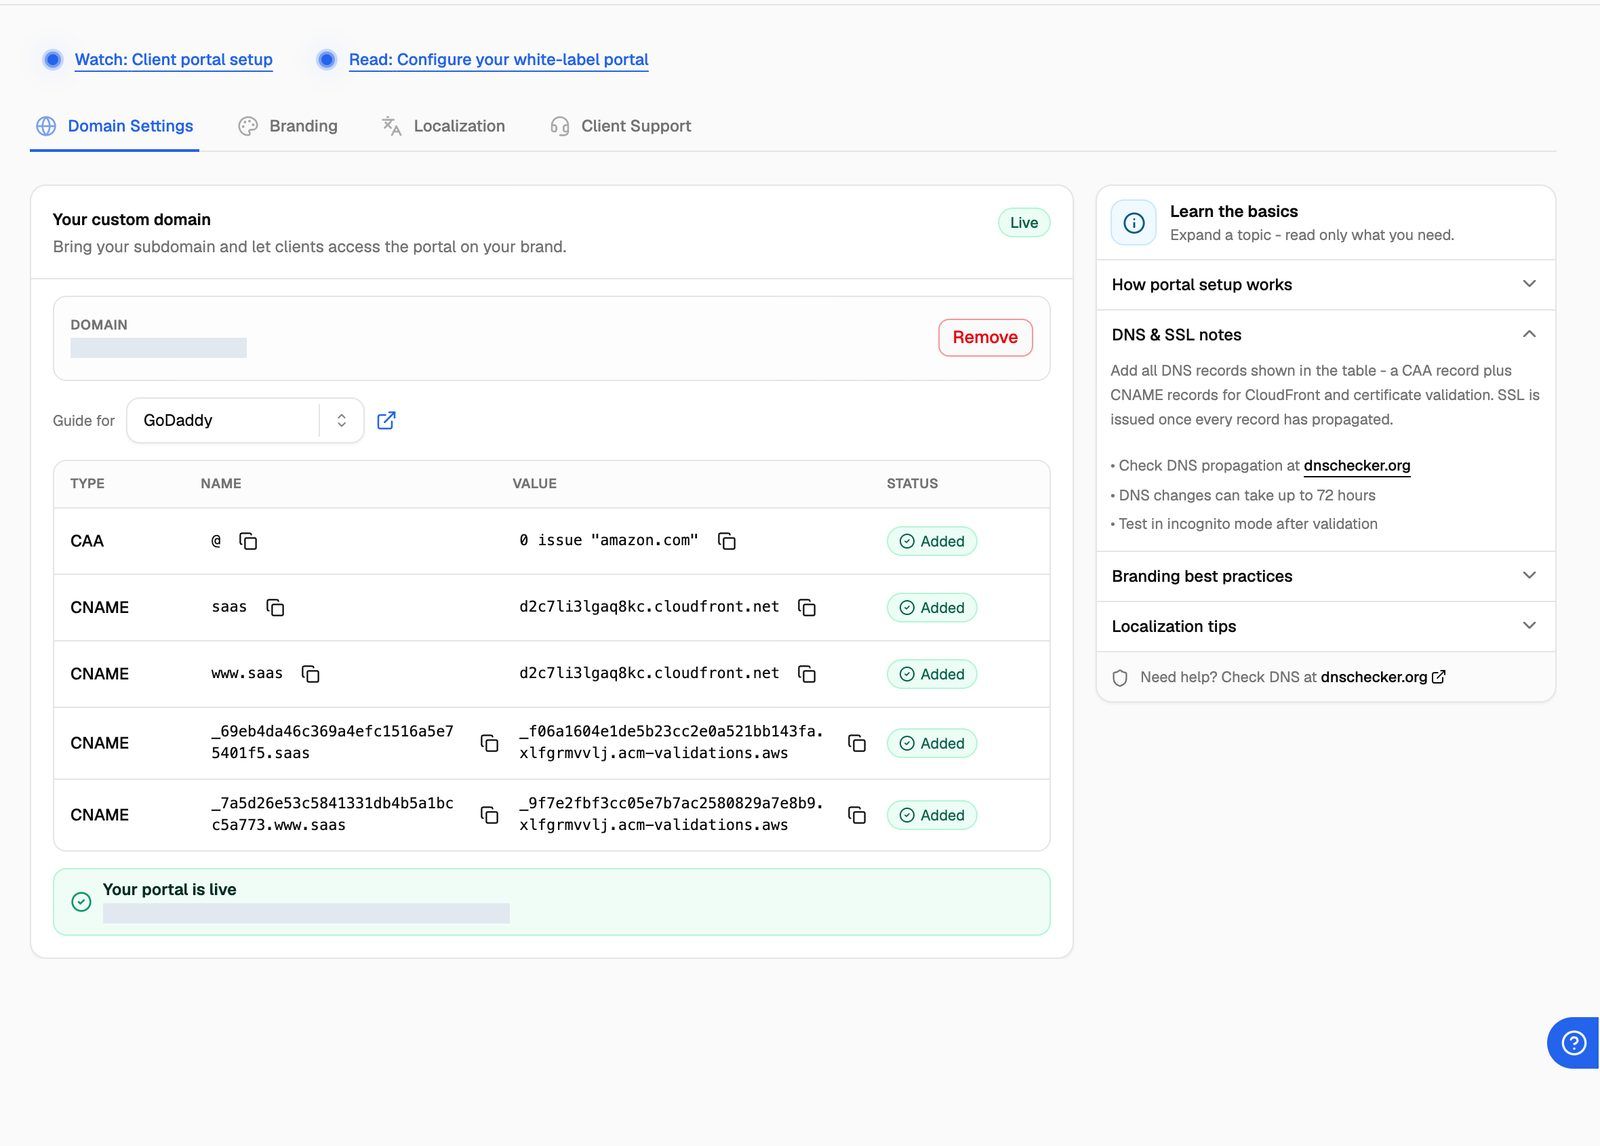
The badge next to your domain tells you where things stand:
When the badge shows Live, you'll see Your portal is live, and clients can open the portal at your subdomain.
Step 4: Finish setting up your portal
With your domain live, you can now:
- Add your branding. The Branding tab (logo, brand name, page titles, theme) unlocks once a domain is connected. See Brand Your Portal: Name, Logo, Meta and Theme.
- Choose portal languages on the Localization tab. See Offer the Portal in Multiple Languages.
- Bill clients through Stripe. Stripe billing for a client needs a verified custom domain. See Ways to Bill Your Clients: Stripe or External Billing.
- Preview the portal as a client before you invite anyone. See Log In as a Client to Preview Their Portal.
Troubleshooting
It still says "DNS not added" after I added the record.
It still says "DNS not added" after I added the record.
DNS changes can take anywhere from a few minutes to a few hours to show up. Check that:
- The record type is CNAME (not A or TXT).
- The Name is only the subdomain part. Some providers add your domain automatically, so entering
portal.yourbrand.comcan turn intoportal.yourbrand.com.yourbrand.com. - There isn't a second record (A, AAAA or another CNAME) on the same subdomain.
It says "Incorrect value".
It says "Incorrect value".
The CNAME is pointing somewhere else. Edit it so the value matches the Value column exactly, with no extra spaces, then click Refresh DNS Status.
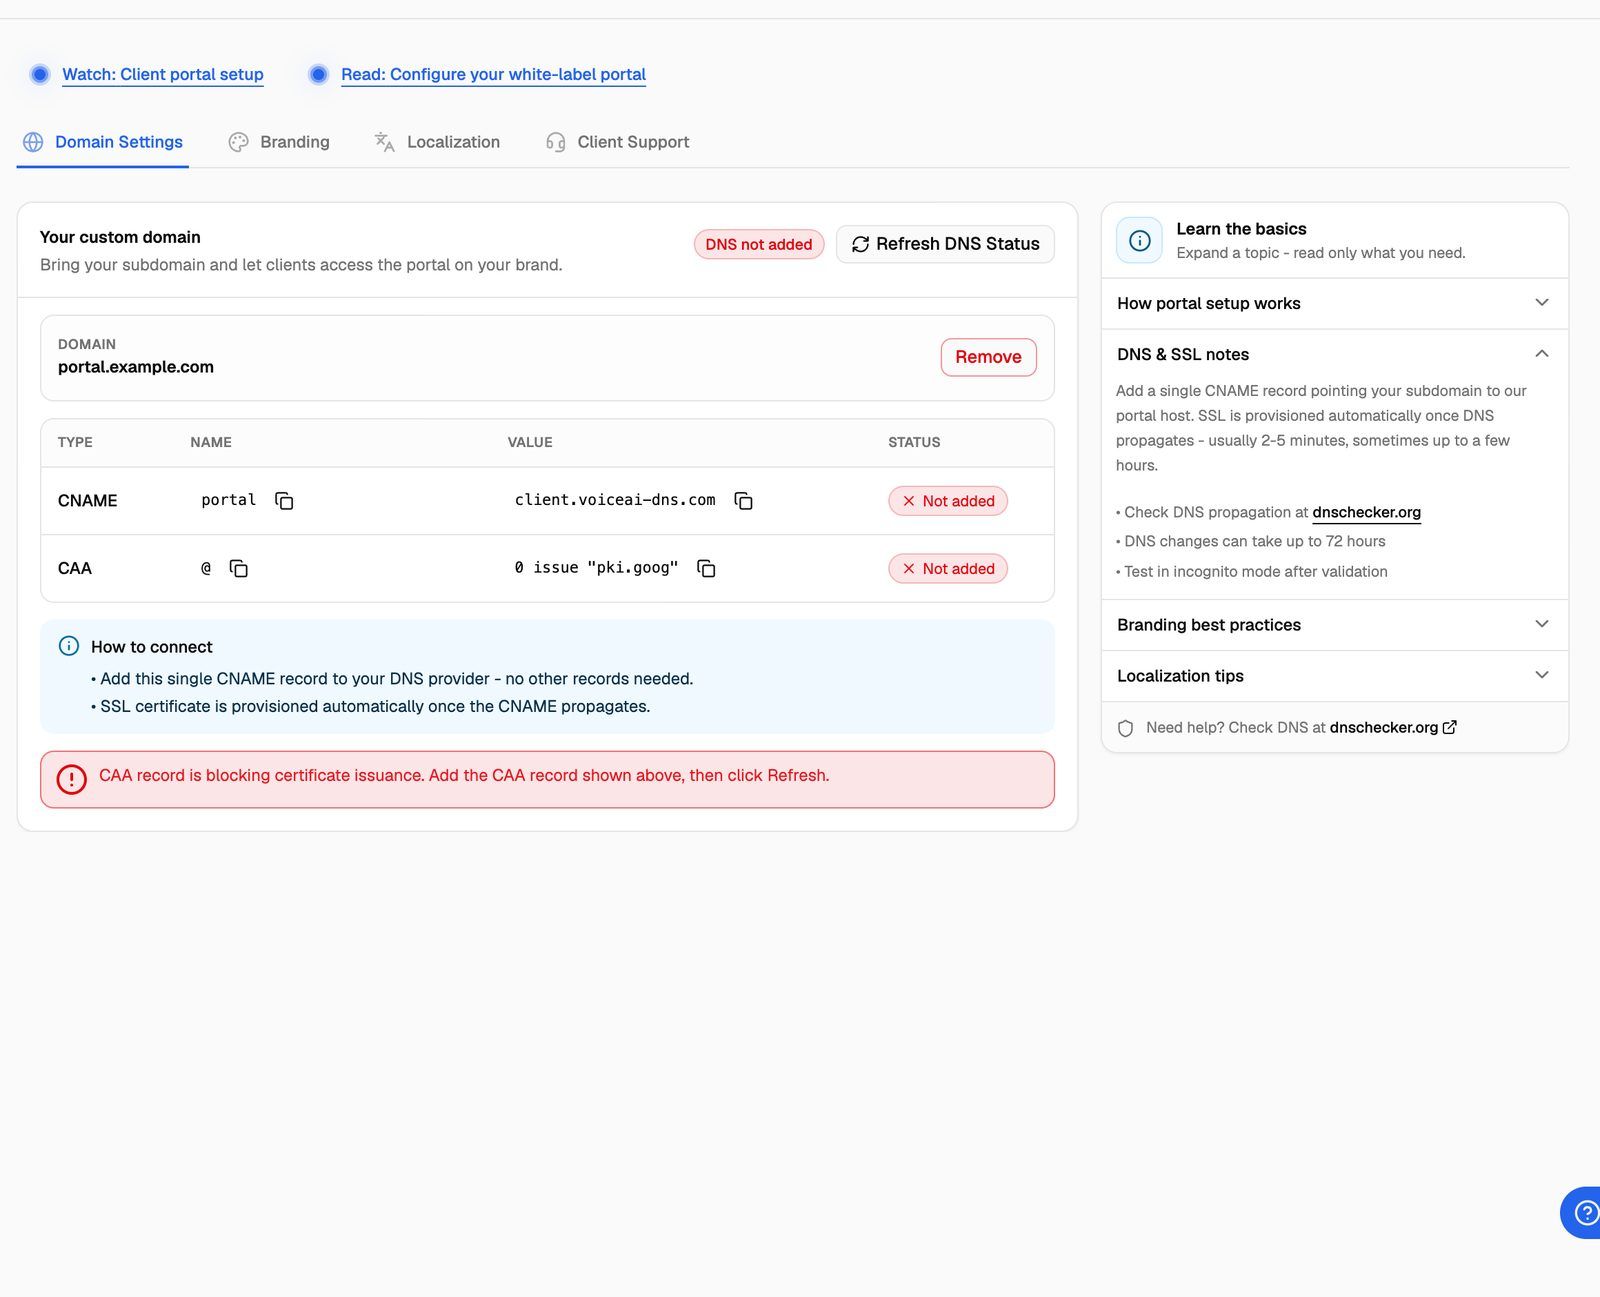
I see "CAA record is blocking certificate issuance".
I see "CAA record is blocking certificate issuance".
Your domain has a CAA record that only allows certain certificate providers. VoiceAIWrapper adds a CAA row to the table with the value you need. Add that CAA record (or update your existing one) with your DNS provider, then click Refresh DNS Status.
It says the certificate timed out or was deactivated.
It says the certificate timed out or was deactivated.
Click Remove next to your domain, then add the same subdomain again. This restarts the setup.
I want to use a different subdomain.
I want to use a different subdomain.
Click Remove next to the current domain, then add the new one. Clients using the old address will need the new link.
My domain was set up a while ago and shows several DNS records.
My domain was set up a while ago and shows several DNS records.
Older setups use a different method: several records, which must be added within 72 hours. If your DNS provider doesn't support CAA records, skip the CAA record and add the other four. When they're added, click Verify DNS records. If more than 72 hours pass, remove the domain and add it again.
Still stuck? Open Need help? → Help Chat and include your subdomain and a screenshot of the Domain Settings tab.
Related articles
Was this helpful?
Still need help? Share an idea