The Self-Serve Client Experience
What a new client sees from your pricing table to their workspace: the signup form, password rules, checkout or trial, and their first login.
Written By voiceaiwrapper
Last updated 26 days ago
With SaaS Creator, a client can go from your pricing table to a working, paid-up workspace without you doing anything. This article walks through each screen they see, in order, so you can test the flow yourself and answer clients' questions about it.
The signup page only exists while your plan includes SaaS Creator. Without it, the signup address sends people to the portal's login page instead.
The journey at a glance
- The client picks a plan on your pricing table, or clicks a signup link you shared.
- They create an account on the signup page of your client portal.
- They're logged in and taken into their new workspace.
- They go through checkout, or start a trial, depending on how the plan is set up.
- They come back to the portal and start using it.
Step 1: Choosing a plan
Each plan button on your pricing table, and each signup link from the pricing table's Signup Links, opens the signup page on your portal's custom domain. The link carries the plan and billing frequency the client picked, so they don't choose again.
Signup links need a custom domain. Without one, the share sheet shows "No signup links available. Please configure white label domain." See Connect Your Custom Domain.
Always send people to the signup page through your pricing table or a signup link. The signup page needs to know which plan to set up, and only those links tell it.
Step 2: The signup form
The page is titled Sign up and has three fields: Email, Password and Confirm Password.
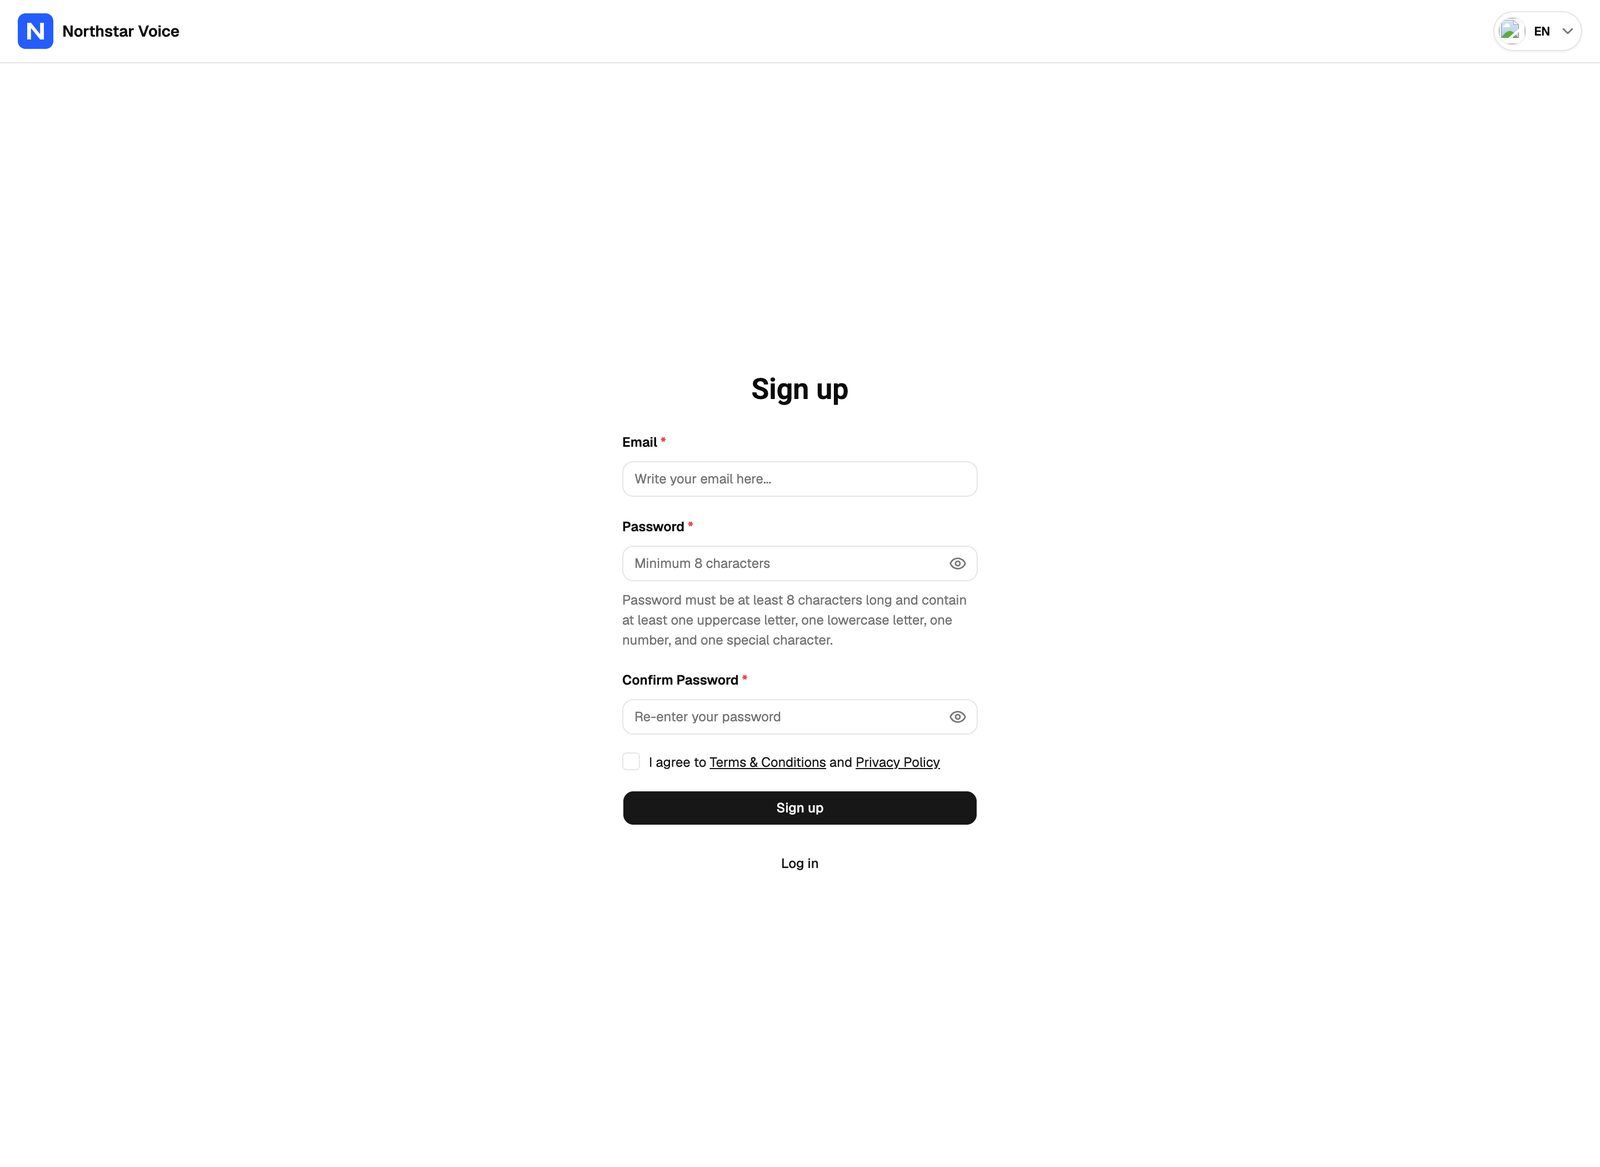
The password must be at least 8 characters long and contain at least one uppercase letter, one lowercase letter, one number and one special character. The form shows these rules under the field and checks them when the client clicks Sign up. A very common password, or one made only of numbers, is also refused.
If you've set up customer acknowledgements, the client must tick a checkbox such as "I agree to Terms & Conditions and Privacy Policy" before they can sign up. If you've set up country restrictions, people outside the allowed countries are refused at this point. See Signup Settings: Country Restrictions and Acknowledgements.
Common messages on this page:
Each email address can sign up only once with your organization. Someone who already has an account should use the Log in link instead.
Step 3: What's created when they sign up
When the client clicks Sign up, the webapp sets everything up at once:
- A client account, named after their email address, with them as its user.
- A customer in your Stripe account.
- A workspace on the Pod (an engine or provider connection) you chose for the plan, with the client access settings from the plan. See Set Up a Plan for Self-Serve Signup.
- The plan they picked, plus access to any usage packs you added to that plan in the pricing table.
- A welcome email, using your SaaS Creator User Signup email template. It's only sent if your client emails are set up and that email is turned on. See Customize Email Templates and Check Delivery Logs.
The client sees "User created successfully" and is logged in and taken into their workspace. They don't need to confirm their email first.
Step 4: Checkout or trial
Before they can use the portal, the client sees a full-page screen that depends on how the plan is set up. They can't get past it until they act.
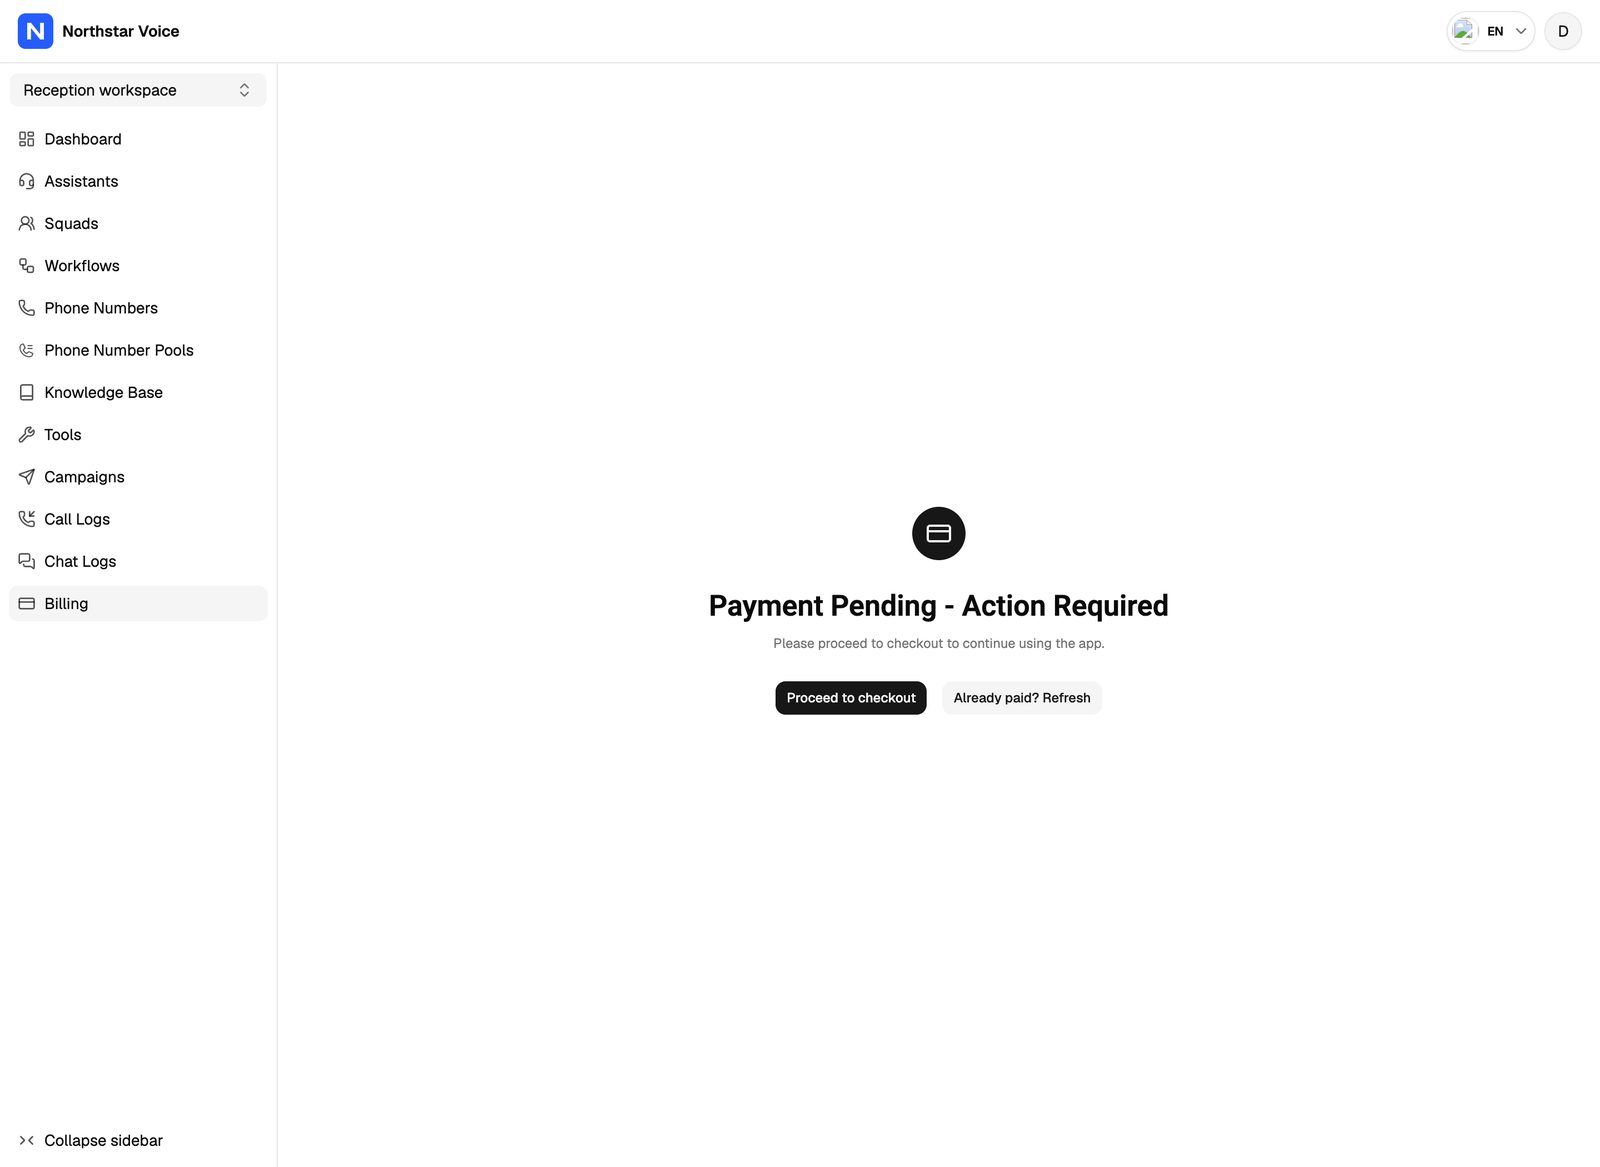
Checkout runs on your Stripe account, so payments go to you. Clients can enter a promotion code from your Stripe account at checkout. For a day-based trial with a minute cap, the screen also says how long the trial lasts and how many minutes it includes. Trial options are explained in Offer Free Trials to Clients.
If a client closes checkout without finishing, they see the same screen the next time they log in. If they've paid but the screen hasn't updated, the Already paid? Refresh link (or Already Started the trial? Refresh for trials) reloads it.
Step 5: Back in the portal
After checkout, the client returns to their workspace's home page. If you've set up redirects, they go to the page you chose instead. See Redirect Clients After Checkout.
During a trial, the portal sidebar shows a You're in trial card with the days or trial minutes left. The client can click Activate Account and confirm to end the trial early and start their paid plan. What they see when the trial or its minutes run out is covered in Offer Free Trials to Clients.
From here, the portal works the same as for any client you added yourself. See What Your Clients See in the Client Portal.
What you see as the agency
New self-serve clients appear under Client Accounts with Saas in the Type column. The account name starts out as the client's email address; you can rename it. To see where someone signed up from, open the client's users and choose Signup location details from the user's actions.
A test signup creates a real client account and a real customer in your Stripe account, and paying at checkout charges the card for real on a live Stripe account. Use a plan with a trial or a promotion code for tests, and delete the test client afterwards. See Enable, Disable or Delete a Client.
Frequently asked questions
The signup link takes people to the login page.
The signup link takes people to the login page.
Your plan doesn't include SaaS Creator, so the signup page is turned off. See A Feature Is Locked or Asks Me to Upgrade.
A client says their email is already taken.
A client says their email is already taken.
They already have an account with your organization, possibly from an earlier signup. Ask them to log in instead. If they've forgotten their password, see My Client Can't Log In or Sees Access Paused.
A client closed the checkout page. Do they need to sign up again?
A client closed the checkout page. Do they need to sign up again?
No. Their account already exists. They log in, see the same checkout or trial screen, and continue from there.
Can a client switch to a different plan after signing up?
Can a client switch to a different plan after signing up?
Clients choose their plan at signup. To change it afterwards, manage their subscription from their client account. See Assign a Plan and Manage a Client's Subscription.
Related articles
Was this helpful?
Still need help? Share an idea