The Setup Checklist: From First Agent to First Paying Client
What each Setup Progress step means, what ticks it off, and the order to work through them to reach your first paying client.
Written By voiceaiwrapper
Last updated 26 days ago
The setup checklist walks you from an empty account to your first paying client: connect an engine, build an agent, launch a campaign, put your brand on the client portal, connect Stripe, and sign up a client on a billing plan. Most steps have a button that takes you straight to the right page, and every step ticks itself off once the webapp sees the work is done.
Where to find the checklist
There are two places:
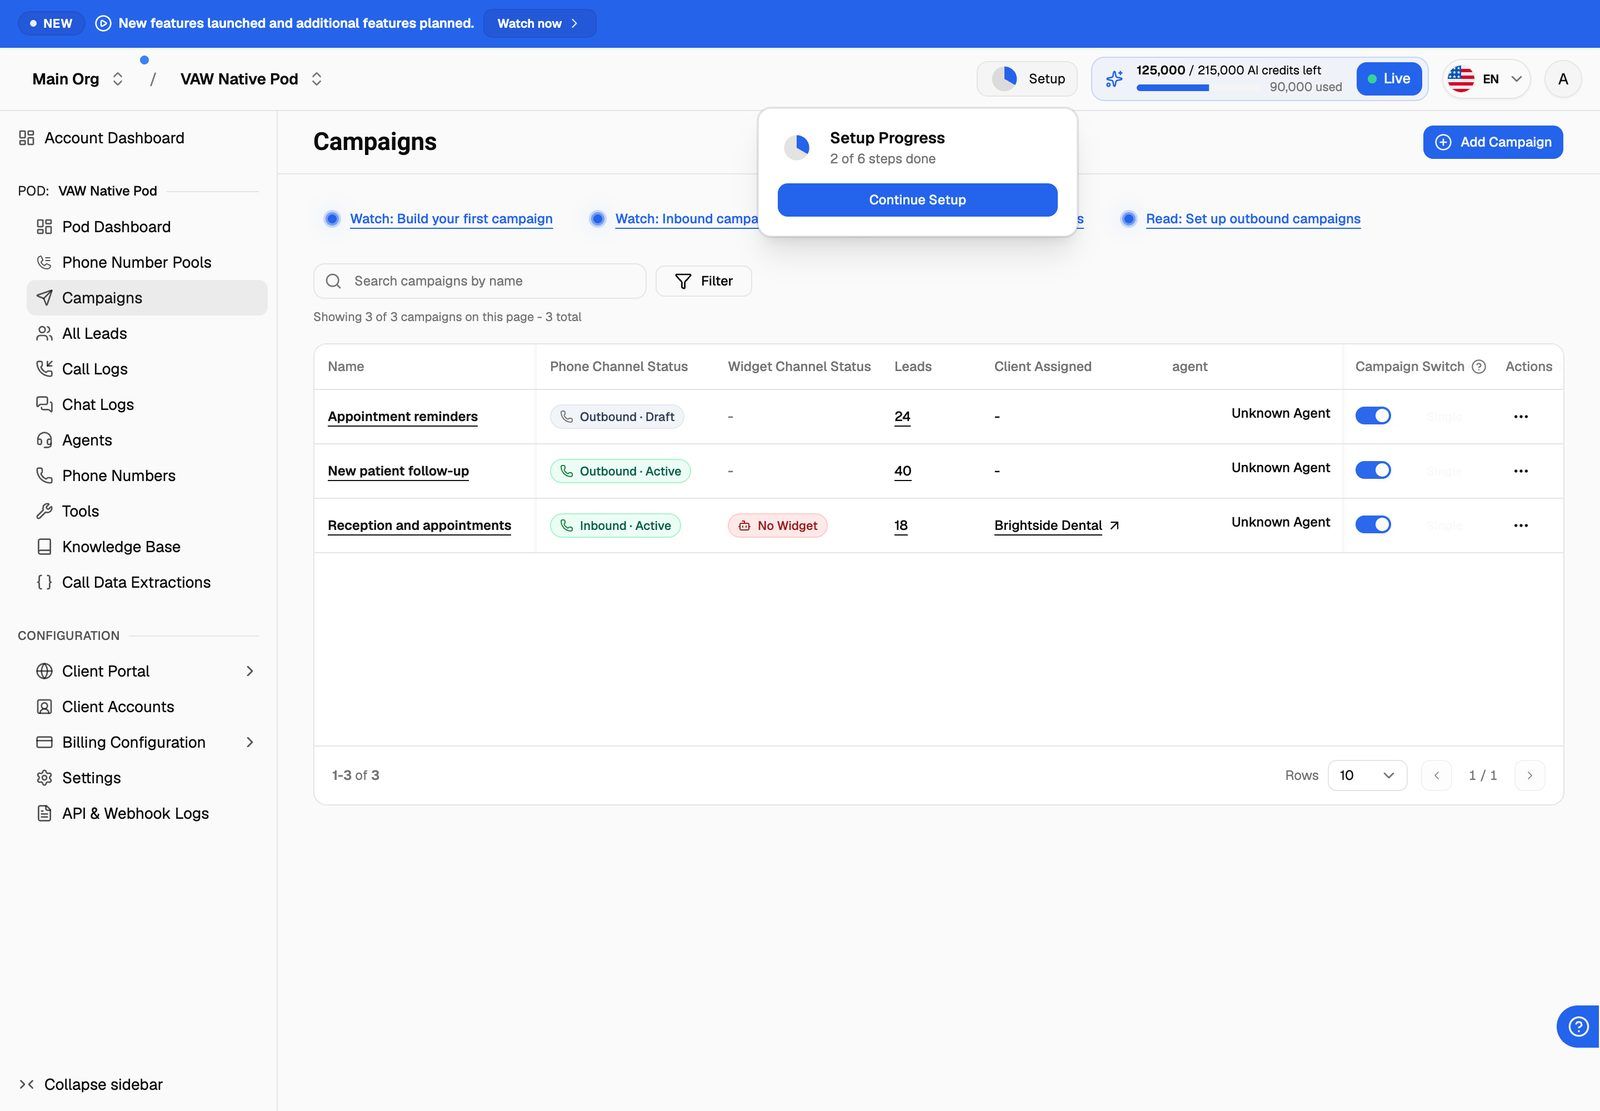
- The Setup button in the header. It shows a progress circle and Setup. Click it to see Setup Progress with X of Y steps done, then click Continue Setup to open your dashboard. The button disappears when every step is done, and it's hidden while you're on the Account Dashboard.
- The Account Dashboard. Under Get started ("Finish setting up your account"), the card Next steps to get the most out of the platform lists every step. Finished steps show Completed; open steps show their button. A badge such as 3 / 8 done · 38% and a progress bar show how far you are.
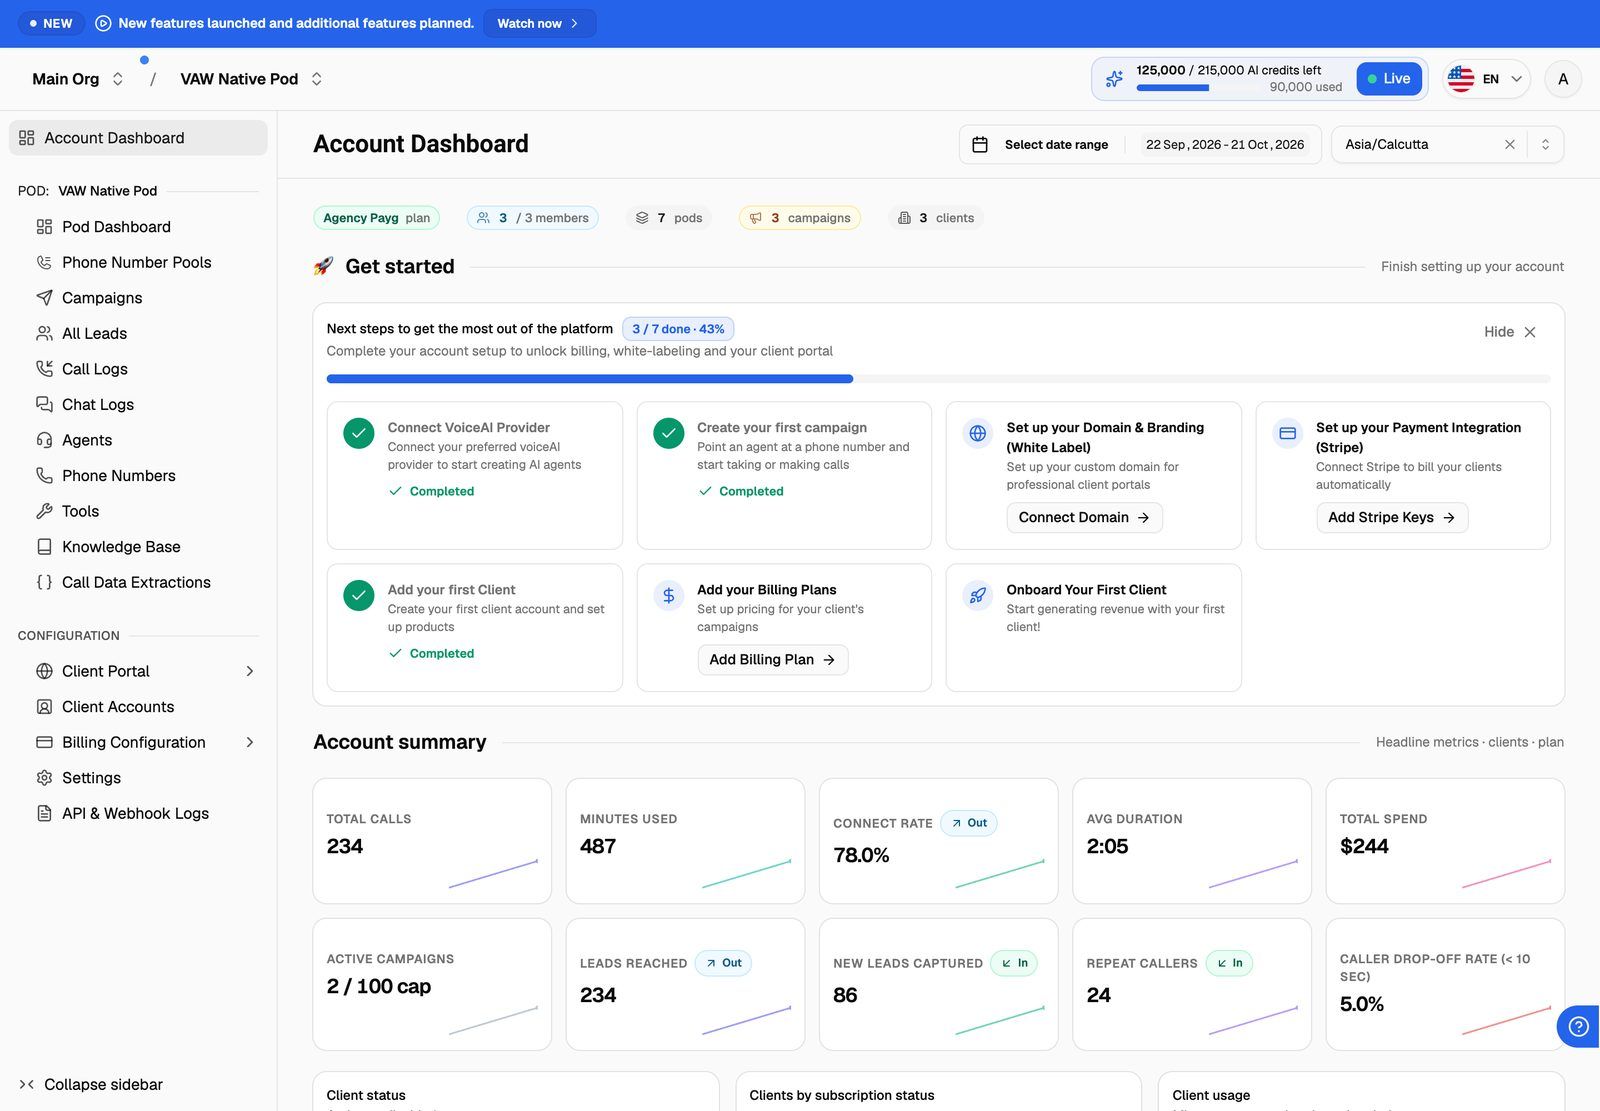
Click Hide to put the card away. It comes back the next time you open the Account Dashboard, or straight away with Show setup checklist. The card disappears for good once every step is done.
If your organization's only Pod (an engine or provider connection) is the built-in VAW Native Pod, the webapp opens that Pod's Dashboard instead of the Account Dashboard, so the checklist card isn't shown. Use the steps below and the pages they link to. The full card appears once you add a second Pod.
The steps
On Vapi Pods, the agent step says assistant instead of agent (Create your first assistant, Create assistant).
Step details
- Connect VoiceAI Provider. The organization you create when you sign up already has a built-in VAW Native Pod, so this step is usually done from day one. Connect Provider opens the Add Pod flow if you also want to bring your own Vapi, Retell AI or ElevenLabs account. See What Is a Voice AI Pod?.
- Create your first agent. This step only appears when the selected Pod is a Vapi, Retell AI or ElevenLabs Pod and your plan includes VAW Assistant. The button opens VAW Assistant, which builds a ready-to-call agent in your provider account. See Build a Provider Agent with VAW Assistant. On a VAW Native Pod, build your agent from the Pod's Agents page instead. See Create an Agent with the AI Agent Builder.
- Create your first campaign. The button opens the selected Pod's Campaigns page with the campaign wizard ready to go. A campaign connects an agent to a phone number or web widget. See Create a Campaign with the Campaign Wizard.
- Set up your Domain & Branding (White Label). The button opens Client Portal → Portal Configuration. The step only counts as done once your subdomain is verified and Live. Adding branding is recommended but doesn't affect the tick. See Connect Your Custom Domain.
- Set up your Payment Integration (Stripe). The button opens Billing Configuration → Stripe. See Connect Your Stripe Account.
- Add your first Client. The button opens Client Accounts with the new client form open. See Add a Client Account.
- Add your Billing Plans. The button opens the Stripe page with a new billing plan form open. See Create a Billing Plan.
- Onboard Your First Client. This ticks itself off when steps 6 and 7 are both done. To actually start charging, assign the plan to the client. See Assign a Plan and Manage a Client's Subscription.
The two Stripe steps (5 and 7) only appear if your plan includes Bill your clients with Stripe.
The order we recommend
Work through the steps in the order shown. A few dependencies make that order matter:
- Agent before campaign. A campaign needs an agent to run.
- Domain before Stripe billing. Billing a client through Stripe needs a verified custom domain, and you can't add brand assets on the Branding tab until you've added a subdomain.
- Stripe before billing plans. Billing plans are created in your connected Stripe account.
- Client and plan before onboarding. Once both exist, assign the plan, preview the client's portal, then invite them. See White-Label Checklist Before You Invite Clients.
Domain setup is where most people need a hand. If you get stuck, open Need help? → Book a Call.
Frequently asked questions
I finished a step but it isn't ticked.
I finished a step but it isn't ticked.
Refresh the page. If it's still open, check what the step actually looks for in the table above. The most common case is the domain step: adding the subdomain isn't enough, it has to reach Live.
Some steps are missing from my checklist.
Some steps are missing from my checklist.
That's expected. The Stripe steps only show if your plan includes Bill your clients with Stripe. The agent step only shows on a Vapi, Retell AI or ElevenLabs Pod with no agents, when your plan includes VAW Assistant.
The header and the dashboard show different step counts.
The header and the dashboard show different step counts.
The Setup button in the header doesn't count the agent and campaign steps, so its "X of Y" can differ from the dashboard card. Go by the dashboard card.
Does finishing the checklist unlock anything?
Does finishing the checklist unlock anything?
No. It's a guide, not a gate. Once every step is done, the checklist and the Setup button disappear.
Related articles
Was this helpful?
Still need help? Share an idea