Run an Outbound Phone Campaign
Take an outbound campaign from setup to results: create it, add leads, check the schedule, start calling, watch live calls and review what happened.
Written By voiceaiwrapper
Last updated 26 days ago
An outbound phone campaign has your agent call a list of leads during the hours you choose, and retry the ones who don't pick up. This article takes you from an empty campaign to reviewing results: create it, add leads, check the schedule, start it, and watch the calls come in.
Starting an outbound campaign places real calls to real people. On VAW Native, calls use your AI credits. On Vapi, Retell AI, ElevenLabs, Bolna and Ultravox, your provider bills you for the calls. Test your agent before you start a campaign on a full list.
Before you start
You'll need:
- A Pod with an agent and a phone number (or a phone number pool). See Campaign Types: Outbound Phone, Inbound Phone and Inbound Widget for which engines support what.
- Your leads: at least a phone number for each person. Names, emails and custom fields are optional, but your agent can use them in the conversation.
- A tested agent. On VAW Native, see Test Your Agent: Web Calls, Phone Calls and Chat.
Step 1: Create the campaign
- Open your Pod and select Campaigns → Add Campaign.
- Choose Outbound Phone and work through the wizard: name, agent, number, schedule, dialing rules, webhooks and success metric.
- On the Review step, click Create Campaign.
The new campaign is a draft, and it opens on the Leads tab. For each step of the wizard, see Create a Campaign with the Campaign Wizard.
Step 2: Add leads
On the Leads tab, click Add leads and pick how:
You can keep adding leads after the campaign has started. New leads join the queue and are called during the next open calling window. You can't add leads to a campaign that has ended.
Add yourself as the first lead. When the campaign starts, you'll hear exactly what your leads hear.
Step 3: Check the schedule
Open the Settings tab and select Schedule. Check:
- Start Date and End Date (Optional)
- Daily Calling Window: calls only start between From and To
- Time Zone: the window is read in this time zone, not yours
- Days of the Week
Click Save Settings after any change. Settings are locked while the campaign is scheduled or active. For how each field works, see Set the Schedule and Calling Window.
Want calls to start right away? Set Start Date to a past date. When you start the campaign, it becomes active immediately instead of waiting for the start date. Calls still only go out inside the calling window, on the days you picked.
Step 4: Start the campaign
The button that starts the campaign is in the Phone Channel card at the top right of the campaign page. While the campaign is a draft, it shows one of two labels:
- Activate Campaign when the start date is in the past.
- Schedule Campaign when the start date is today or later.
Click it. You'll see a confirmation that the campaign status was updated.
What happens next depends on the start moment, which is the Start Date at the From time, in the campaign's time zone:
- If that moment has passed, the campaign goes straight to Active and starts calling during the current calling window.
- If it's still ahead, the campaign is Scheduled and becomes Active by itself at that moment. To change something before then, click Move to Draft.
If the button is greyed out, hover over it to see why:
- Please fill in all required fields (Assistant, Time Settings, Days of Week, Phone Number, and Start Date): finish the Settings tab, then try again.
- Campaign is disabled: the Campaign Switch for this campaign is off on the Campaigns list. Turn it on first.
Once the campaign is active, the Calling Status pill next to its name tells you what the dialer is doing, for example Calling window active (Call(s) in progress), Starts in 2h 15m or Ended for today. See the full list in Set the Schedule and Calling Window.
Step 5: Watch live calls
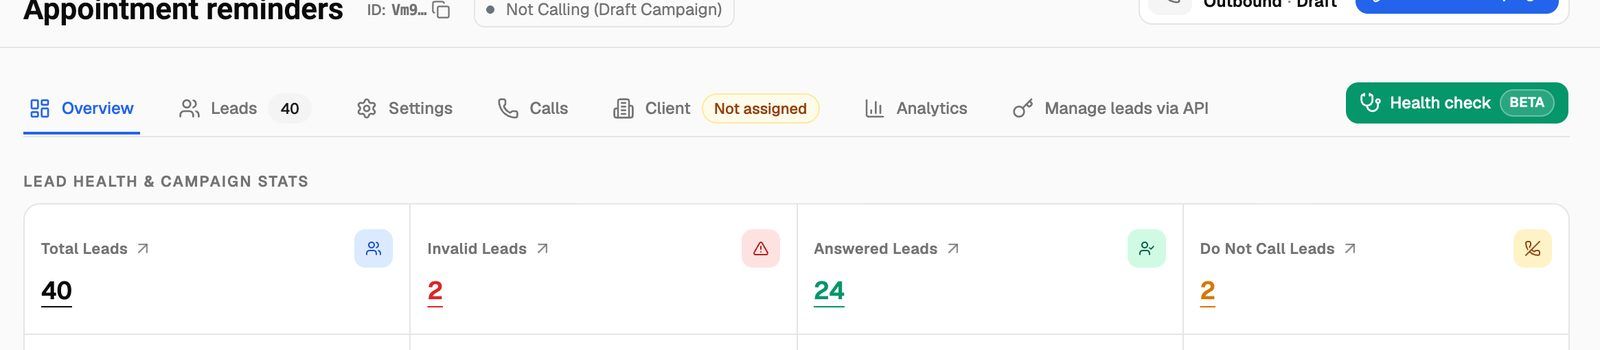
The Overview tab shows the campaign as it runs:
- Lead health & campaign stats: Total Leads, Eligible Leads (leads "with one or more attempts left"), Queued Leads, Answered Leads, Invalid Leads, Do Not Call Leads, Ongoing Calls and Recent Calls (in the last 30 minutes). Click a number to open the matching leads or calls.
- Next call info & success outcome: Next call after (the earliest time the next eligible lead can be called), plus Call Success % and Lead Success % if you've turned on a success metric.
- Live calls: calls happening right now.
- Next in line (Eligible Leads): the leads that will be called next, sorted by next attempt. The real calling order can differ slightly.
- Calls running unusually long (not on VAW Native): calls that may be stuck on the provider's side. They're cleared automatically after a while, or you can click Sync status to check one now.
For a guided tour of this tab, see Campaign Overview: Lead Health, Live Calls and Next in Line.
Step 6: Review the results
To share results with a client, assign the campaign on the Client tab. See Assign a Campaign to a Client.
Pause, change or end the campaign
- Pause: click Pause Campaign. No new calls start until you click Resume Campaign.
- Change settings: settings are locked while the campaign is active. Pause it, edit the Settings tab, click Save Settings, then resume.
- End: if you set an end date, the campaign ends by itself after that day's calling window and shows Not Calling (Campaign Ended). To use it again, click Reactivate Campaign. This moves it to paused and removes the end date, so you can resume it.
Two red badges can appear next to the campaign name:
- Paused due to billing: the client this campaign is assigned to has a billing problem, so the campaign was paused. You can override this by resuming it.
- Paused, out of credits. Add credits to continue. (VAW Native): your organization has run out of AI credits. Calling restarts by itself after you add credits. See What Happens When You Run Out of Credits.
For every status and button, see Campaign Statuses and the Campaign Switch.
Troubleshooting
The campaign is active but no calls are going out.
The campaign is active but no calls are going out.
Check the Calling Status pill first:
- Not Calling (Today not in schedule): today isn't one of the campaign's days.
- Starts in… or Ended for today: you're outside the calling window in the campaign's time zone.
- Not Calling (max attempts reached or answered): every lead has been answered or has used all its attempts. Add more leads.
- Calling window active (Waiting for next available lead): no lead is due right now, usually because of the wait between redials.
If none of these explain it, see My Outbound Campaign Isn't Calling.
I clicked Schedule Campaign, but I wanted it to start now.
I clicked Schedule Campaign, but I wanted it to start now.
Click Move to Draft, set Start Date to a past date on the Settings tab, click Save Settings, then click Activate Campaign.
I can't edit the settings.
I can't edit the settings.
You'll see "Settings are locked in the current campaign status." Pause an active campaign, or move a scheduled campaign back to draft, then edit.
Related articles
Was this helpful?
Still need help? Share an idea