Send Branded Emails to Clients with SendGrid
Connect your own SendGrid account so client emails, including invites and password resets, come from your brand's name and address.
Written By voiceaiwrapper
Last updated 26 days ago
Every email your clients get from the portal, such as their invite to set a password, password resets, billing notices and call summaries, is sent through your own SendGrid account. That way each email comes from your brand's name and address.
You connect SendGrid once, on the Client Emails page. Have your SendGrid API key and a verified sender address ready before you start.
Available on: plans that include White-labeled emails. Without it, clicking Save shows an upgrade message instead of connecting SendGrid.
Why you need this
Until SendGrid is connected, VoiceAIWrapper can't send any email to your clients. In practice that means:
- No invite emails. When you add a client user, the Send set-password email option stays locked. You have to set a password for the user yourself and share it.
- No password resets. The Forgot password? link only appears on your portal's login page when SendGrid is connected and active, and the Client User Password Reset email template is switched on.
- No billing or usage emails. Payment receipts, failed-payment notices, trial and minutes alerts aren't sent.
- No call summary emails from your inbound campaigns.
Before you start
You'll need:
- A SendGrid account. You can create one at signup.sendgrid.com.
- A verified sender in SendGrid. Verify either the single email address you'll send from, or the whole domain it belongs to. Do this under Settings → Sender Authentication in SendGrid.
- A SendGrid API key with full access. Create it under Settings → API Keys in SendGrid. It starts with
SG.. SendGrid shows the key only once, so copy it straight away.
Send from an address on your own domain, such as hello@yourbrand.com. Verifying the whole domain in SendGrid (domain authentication) also helps your emails land in the inbox rather than spam.
Step 1: Connect SendGrid
- In the sidebar, open Client Portal → Client Emails.
- Stay on the Email Configuration tab. You'll see No sender configured yet.
- Fill in the form:
- Click Save.
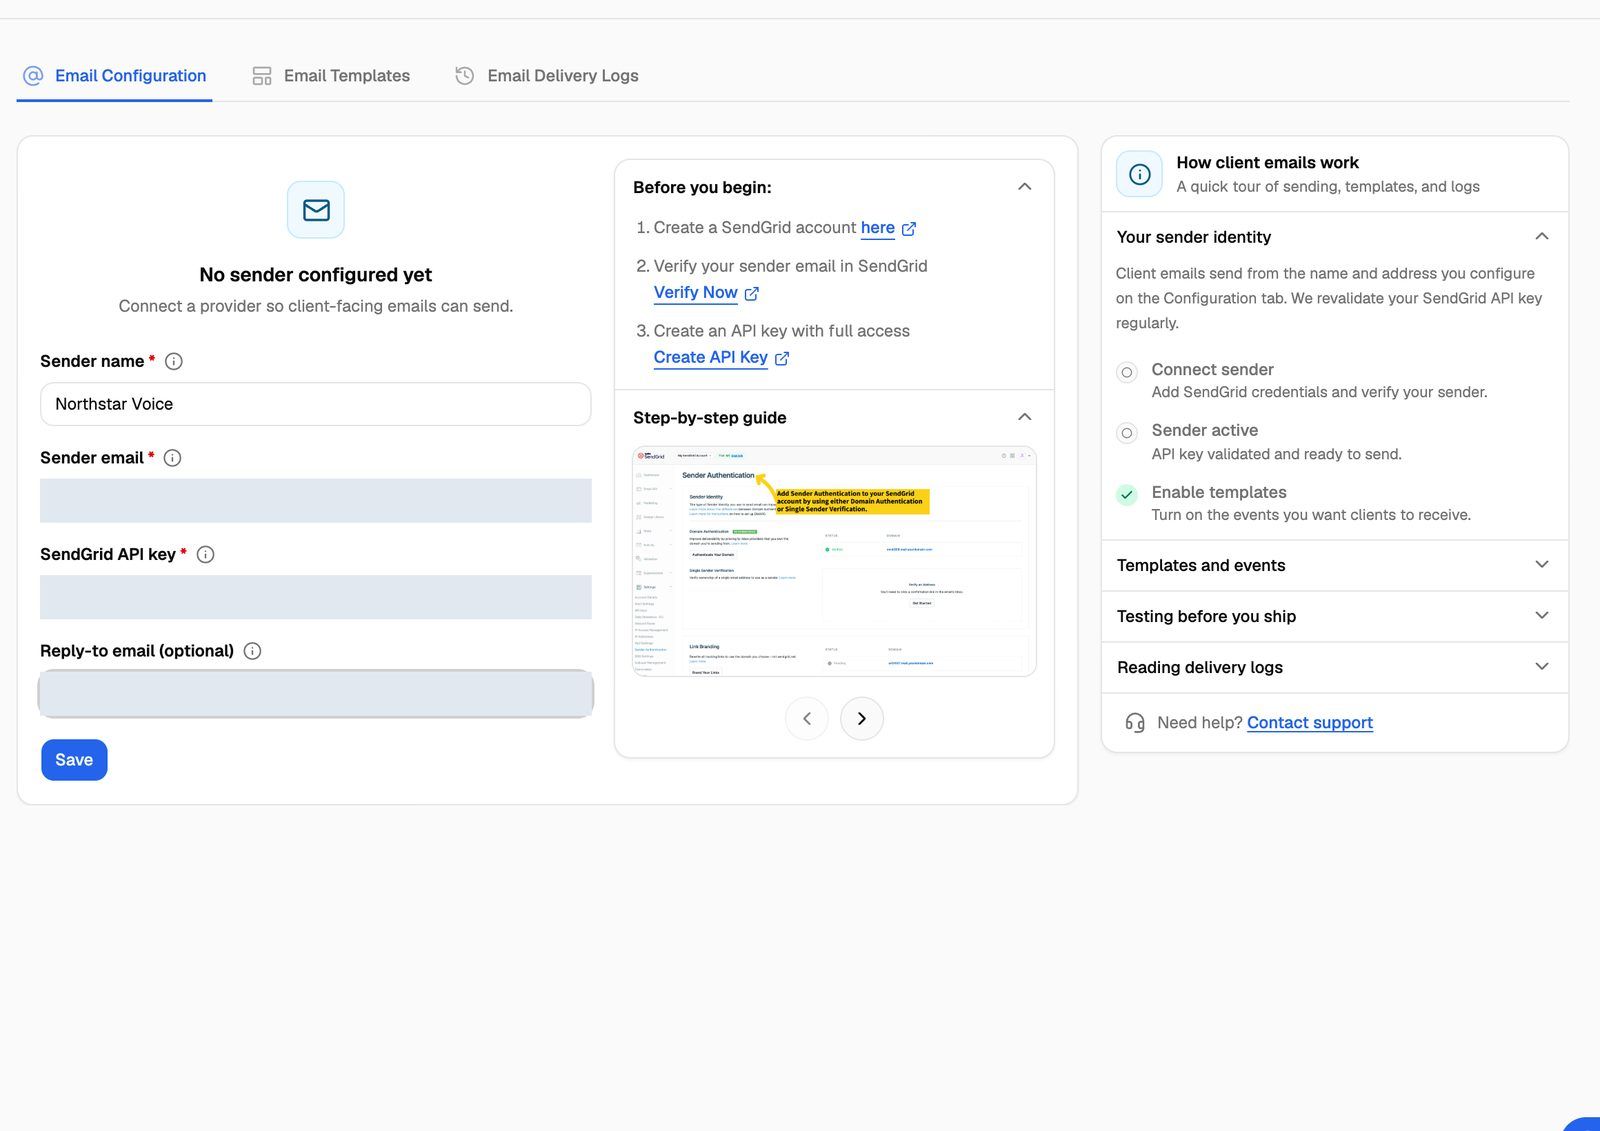
When you click Save, VoiceAIWrapper checks two things with SendGrid before it saves anything:
- The API key works and has the permissions it needs.
- The sender email (or its domain) is verified in your SendGrid account.
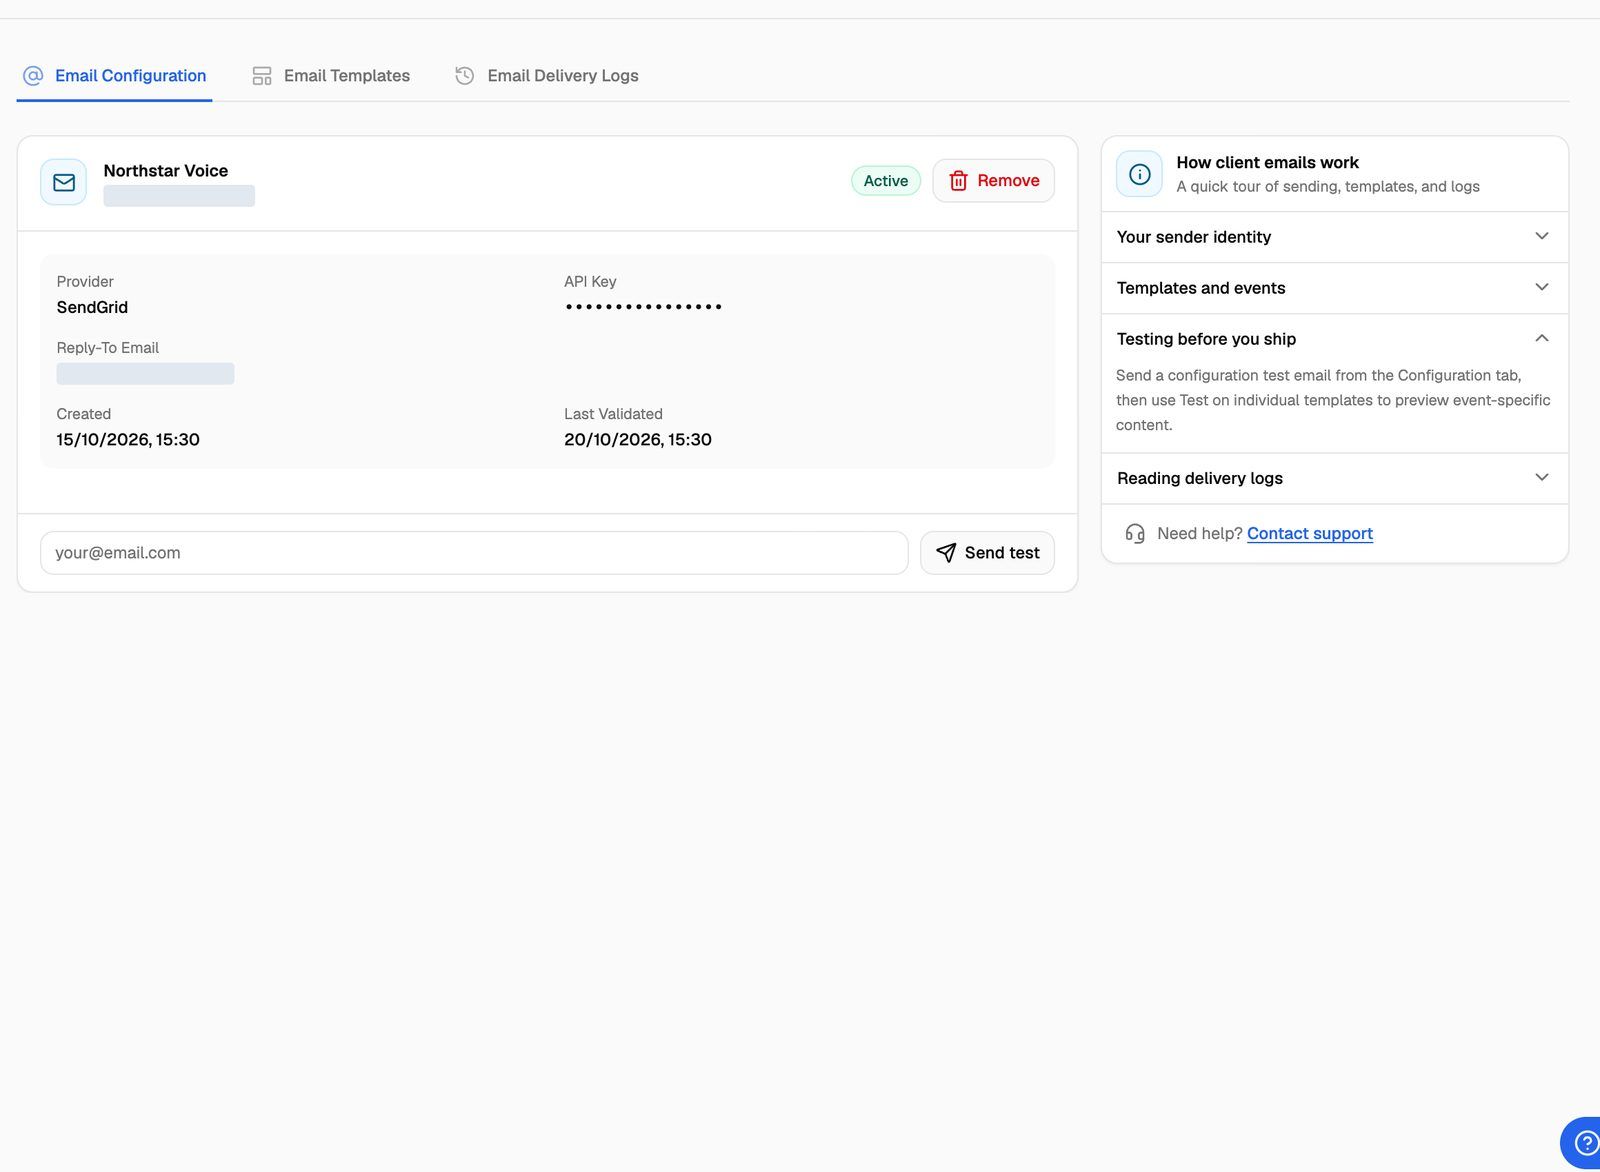
If both pass, you'll see a confirmation and the tab shows your sender with an Active badge. If not, nothing is saved and the error tells you what to fix. The most common errors are covered under Troubleshooting below.
The Before you begin: and Step-by-step guide panels on the right of the form walk through the SendGrid side with links and screenshots.
Step 2: Send a test email
- On the Email Configuration tab, type your own email address in the field at the bottom.
- Click Send test. The button only works while the connection shows Active.
You should receive an email titled "Test Email - Configuration Successful!" from your sender name and address. If it doesn't arrive within a few minutes, check your spam folder, then the Email Delivery Logs tab.
Step 3: Choose which emails to send
Connecting SendGrid doesn't decide which emails go out. Each type of email (an "event") has its own template that you can switch on or off and reword. Open the Email Templates tab to review them. See Customize Email Templates and Check Delivery Logs.
The How client emails work panel on the right tracks your progress: Connect sender, Sender active and Enable templates.
Connection statuses
VoiceAIWrapper checks your key and sender with SendGrid again before sending if the last check is more than 24 hours old. If SendGrid rejects them, the connection changes to Needs attention.
Change or remove the connection
There's no edit form for a saved connection. To change the API key, sender or reply-to address, click Remove, then Remove again in the Remove Email Configuration? dialog, and connect again with the new details.
While no connection is saved, no emails reach your clients: no invites, password resets, billing notices or call summaries. Have your new details ready before you click Remove. Your template changes are kept, but the Email Templates tab is hidden until you connect again.
Troubleshooting
It says "SendGrid API key must start with "SG.""
It says "SendGrid API key must start with "SG.""
You've pasted something other than the API key, for example the key's name or ID. Create a new key in SendGrid under Settings → API Keys and copy the value SendGrid shows right after you create it.
It says the API key is missing required permissions.
It says the API key is missing required permissions.
The key was created with restricted access. Create a new key with Full Access in SendGrid and save again. If you prefer a restricted key, it needs at least the Mail Send and Sender Verification Eligible permissions, plus read access to sender authentication.
It says my email "is not verified in your SendGrid account".
It says my email "is not verified in your SendGrid account".
SendGrid doesn't recognise the Sender email as verified. In SendGrid, open Settings → Sender Authentication and either verify that exact address as a single sender or authenticate its domain. Make sure the address you type matches the verified one exactly, then click Save again.
It says "Invalid or expired API key".
It says "Invalid or expired API key".
The key was deleted or mistyped. Create a new key in SendGrid and save again.
I can't tick "Send set-password email" when adding a client user.
I can't tick "Send set-password email" when adding a client user.
Either SendGrid isn't connected and active, or the Client User Password Setup template is switched off. Check the badge on Email Configuration, then make sure that template is active on Email Templates.
The test email didn't arrive.
The test email didn't arrive.
Check your spam folder first. Then open Email Delivery Logs and look for the test email. A Failed status shows the error SendGrid returned. If it shows Sent, SendGrid accepted it; check your SendGrid Activity feed for what happened next.
Related articles
Was this helpful?
Still need help? Share an idea