Customize Email Templates and Check Delivery Logs
Choose which emails your clients receive, reword them with your own subject and body, send test emails, and check what was sent.
Written By voiceaiwrapper
Last updated 26 days ago
Each email your clients receive is triggered by an event, such as a new client user being invited, a payment failing or an inbound call ending. Every event has its own template. You decide which events send an email, and you can rewrite the subject and body so they sound like your brand. The delivery logs then show every email that went out and why any failed.
Available on: plans that include White-labeled emails. Payment, trial, usage and billing-pause emails also need Bill your clients with Stripe, and the signup email needs SaaS Creator. Templates your plan doesn't cover show an Upgrade badge.
Before you start
- Connect SendGrid first. Until you do, the Email Templates tab only shows Email Configuration Required. See Send Branded Emails to Clients with SendGrid.
- Set your brand name. Templates use your Brand Name from Portal Configuration → Branding. Without one, your organization name is used. See Brand Your Portal: Name, Logo, Meta and Theme.
The email templates
Open Client Portal → Client Emails → Email Templates. Each row is one event:
- Event Type: the event's name and a short description of when it's sent. A Customized badge means you've changed its subject or body.
- Active: the switch that turns this email on or off for all your clients.
- Actions: View, Test, and Customize (or Edit once customized).
Use Search templates to find an event by name, or filter by Active (Active / Inactive) and Customized (Customized / Default).
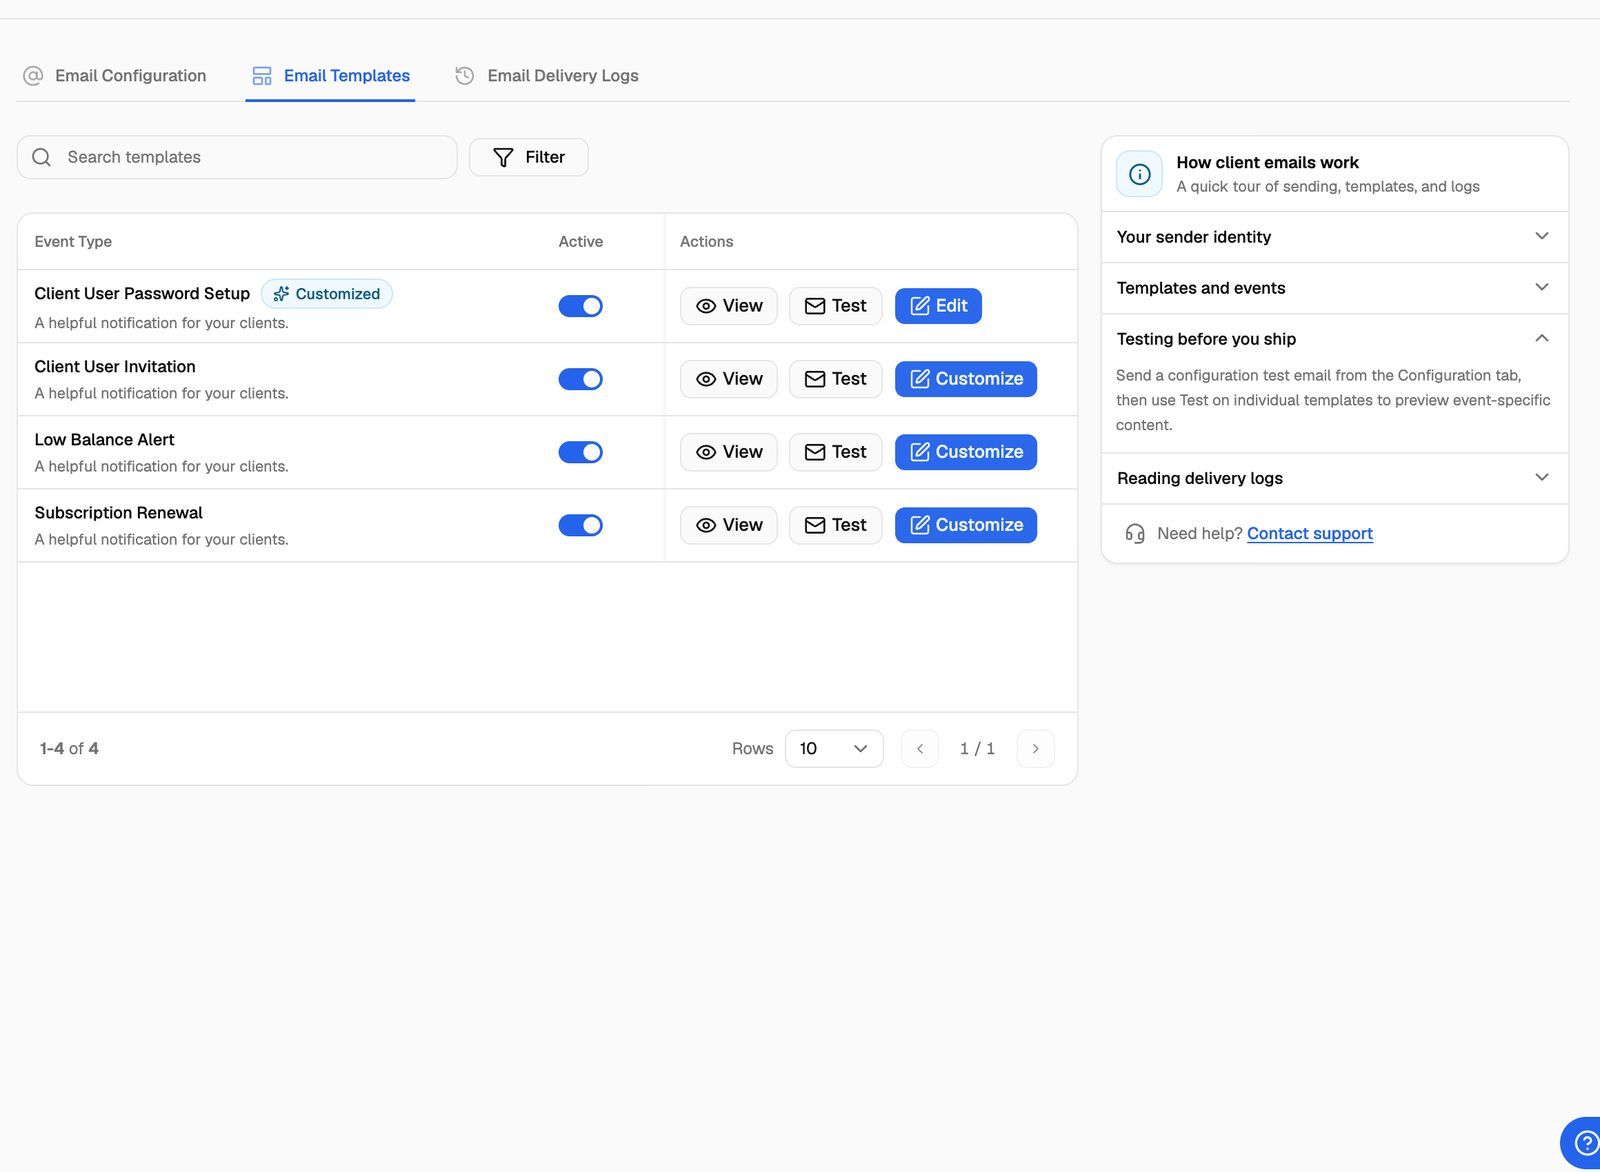
The events fall into these groups:
Most templates start switched on. A few start switched off, for example Minutes Exhausted 70%, Minutes Exhausted 80% and SaaS Creator User Signup. Check the Active column before you invite clients.
Turn an email on or off
Click the switch in the Active column. You'll see Email template activated or Email template deactivated.
When an email is off, it isn't sent and doesn't appear in the delivery logs. Two switches affect what clients can do:
- Client User Password Setup off: you can't send set-password emails when you add client users.
- Client User Password Reset off: the Forgot password? link disappears from your portal's login page.
Customize an email
- Click Customize on the row (or Edit if it's already customized). The Customize Email Template sheet opens (Edit Email Template for a customized template).
- Check the Active switch at the top. You can turn the email on or off here too.
- Change the Subject.
- Change the Body in the editor. You can format text and add links.
- Add variables where you want personal details. Click a variable under Available Variables to copy it, then paste it into the subject or body. You can also type
{{in the body to get suggestions. - Click Preview above the body to see the email with sample values. Click Edit to go back.
- Click Save Changes.
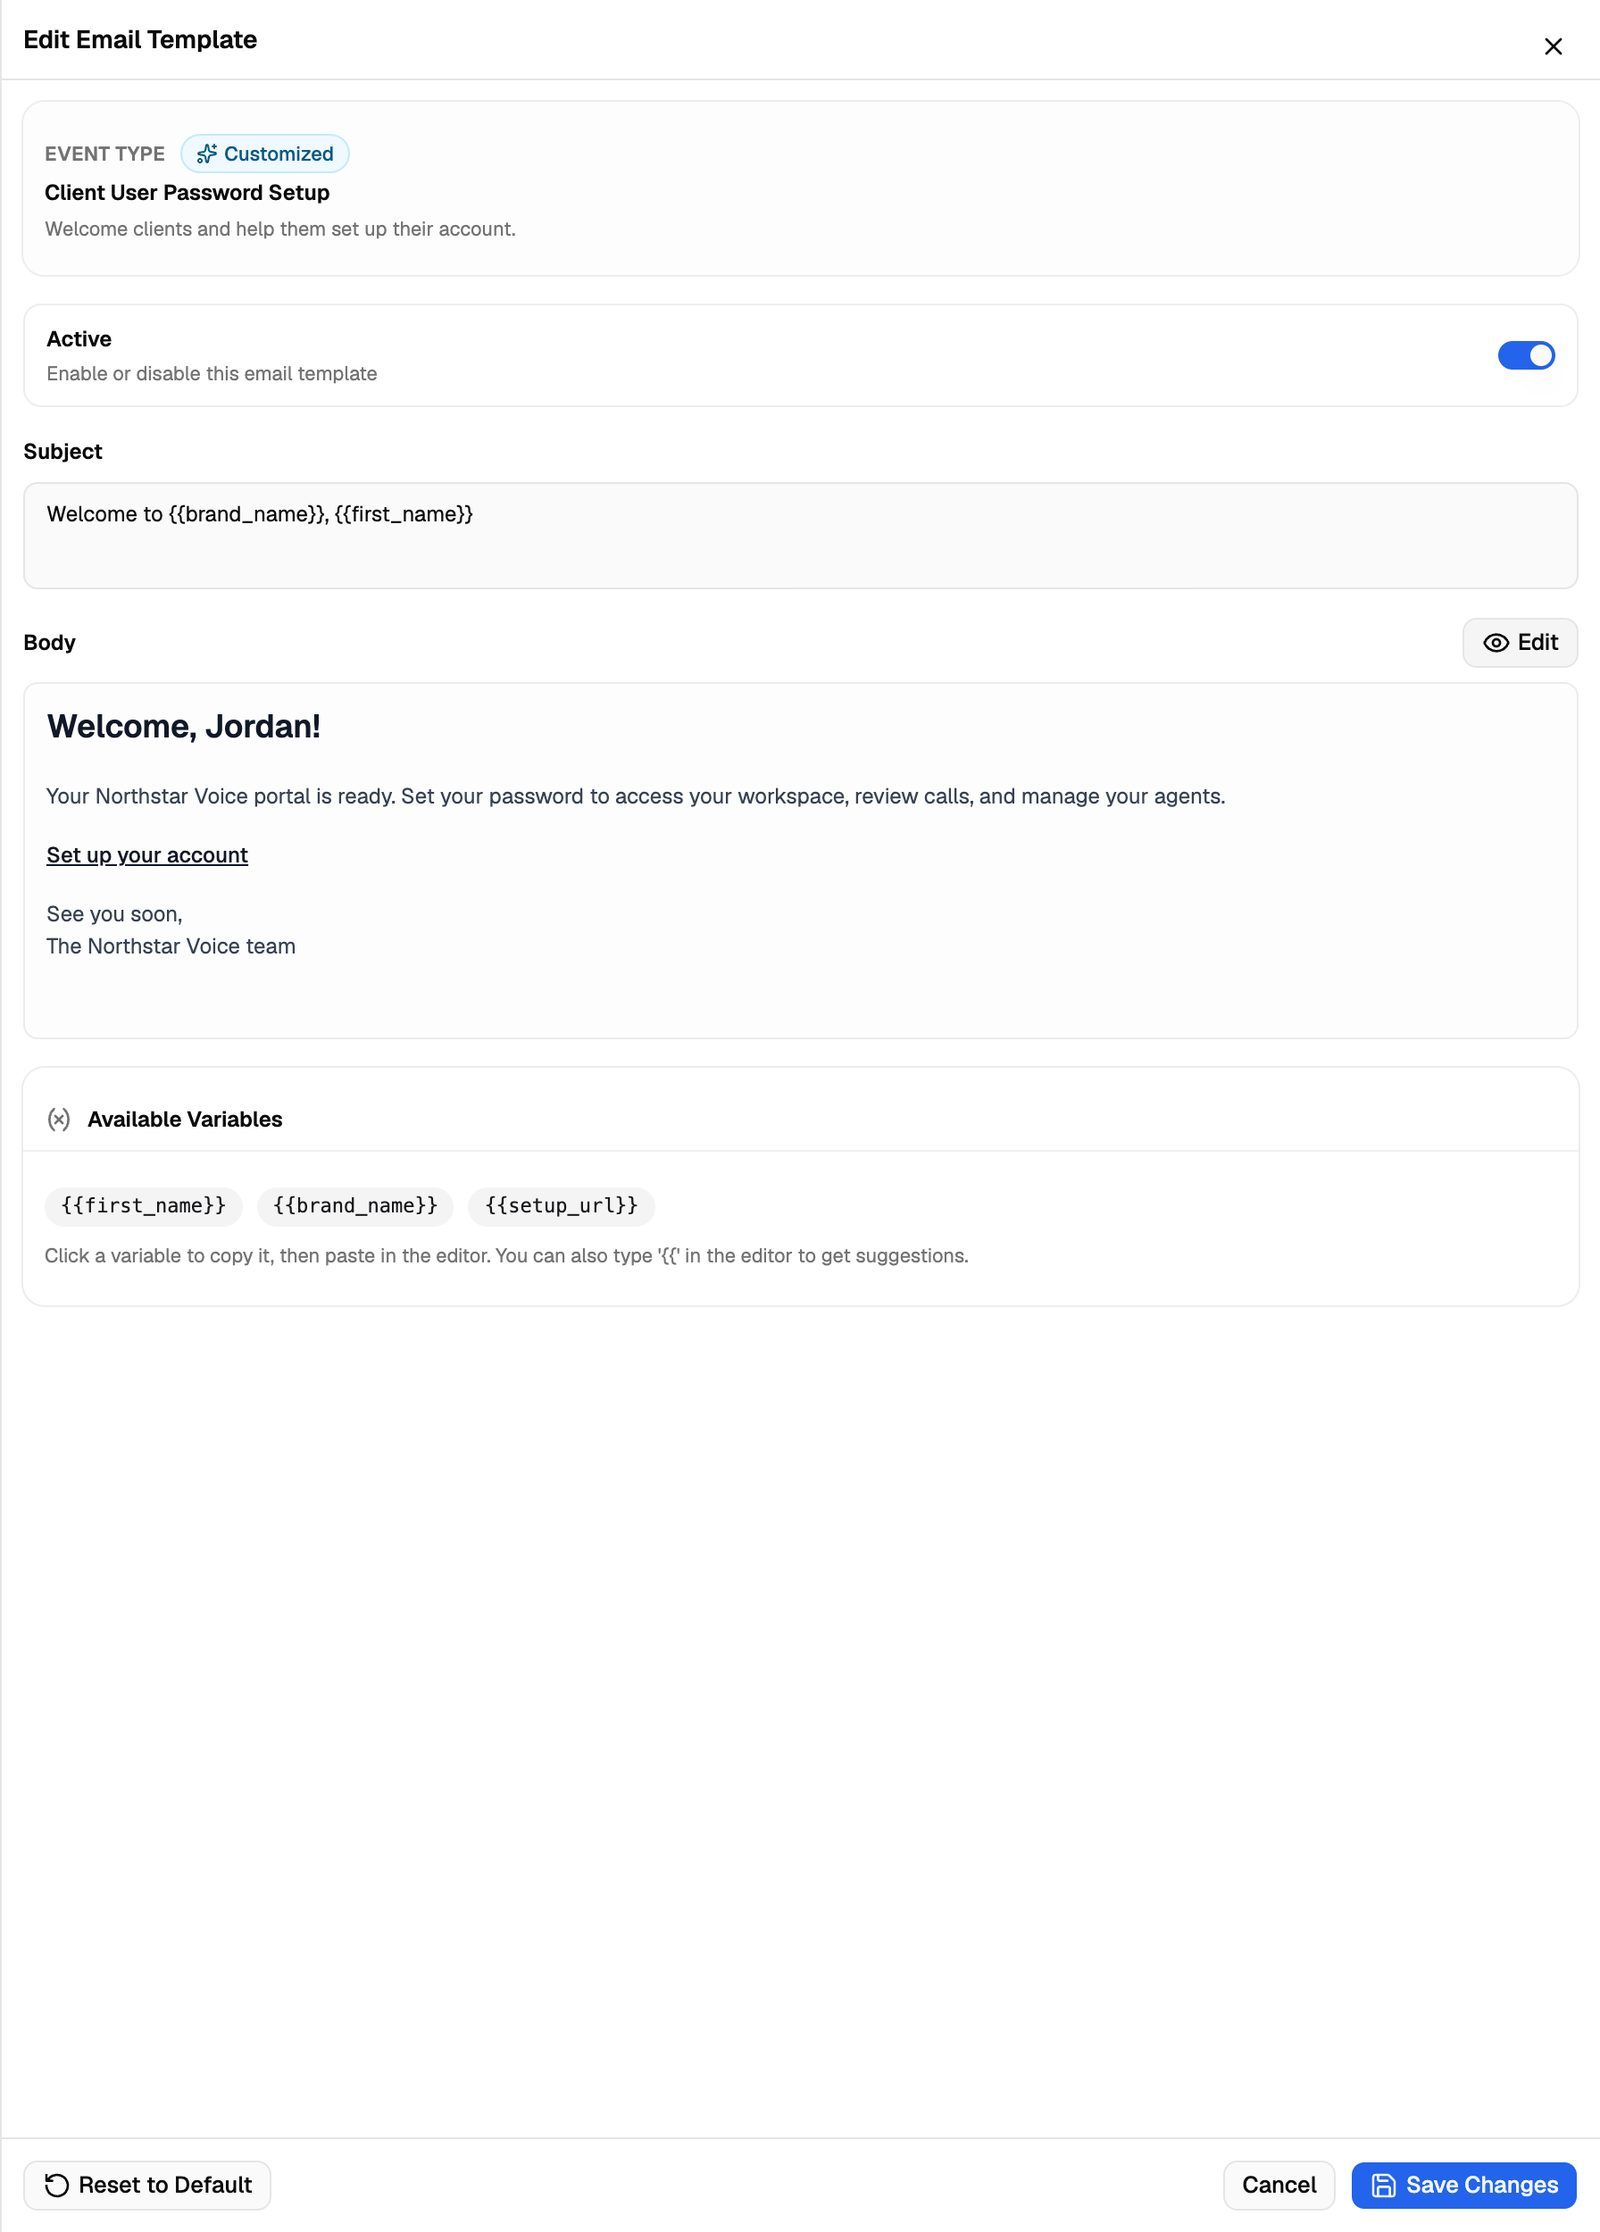
Both Subject and Body are required. A Customized badge appears once your subject or body differs from the original. Turning a template on or off doesn't count as customizing it.
Variables
Variables look like {{client_name}} and are replaced with real values when the email is sent. Each event has its own set, listed under Available Variables. Some common ones:
Keep the link variable in Client User Password Setup ({{invite_url}}) and Client User Password Reset ({{reset_url}}). Without it, your clients get an email with no way to set or reset their password.
Don't put any spaces inside the braces. Write {{client_name}}, not {{ client_name }} or {{client name}}. A variable with a space anywhere inside the braces is removed from the email when it's sent.
Reset to the default
Click Reset to Default at the bottom of the sheet, then Reset to confirm. The button appears only on customized templates.
Resetting replaces your subject and body with the original text and puts the Active switch back to its default setting. Your changes can't be recovered. Check the Active column afterwards.
Send a test email
- Click Test on the template's row.
- In Send Test Email, enter the Email Address to send to.
- Click Send.
The test uses sample values for the variables, and the subject starts with [TEST]. Only active templates can be tested, so switch the template on first.
Test email sent successfully means the email was handed over for sending, not that it arrived. If it doesn't show up, find it in Email Delivery Logs.
To check an email without sending it, click View. The View Email Template sheet shows the subject, the body and the template's variables with a short description of each. Click Preview to fill in the variables with sample values, and Show Raw to go back to the variable names.
Check the email delivery logs
Open the Email Delivery Logs tab to see every email sent from your SendGrid connection, including tests.
- Search by recipient or event with Search recipient or event.
- Filter by Status, Type (Client or Test) and Sent at.
- The table shows To Email, Event Type, Status, Email Type, SendGrid Message ID, Error Message and Sent At.
- Click a row to open Email Details: the sender and recipient, subject, client, the full Email Body, the Context Variables used to fill it in, and any error.
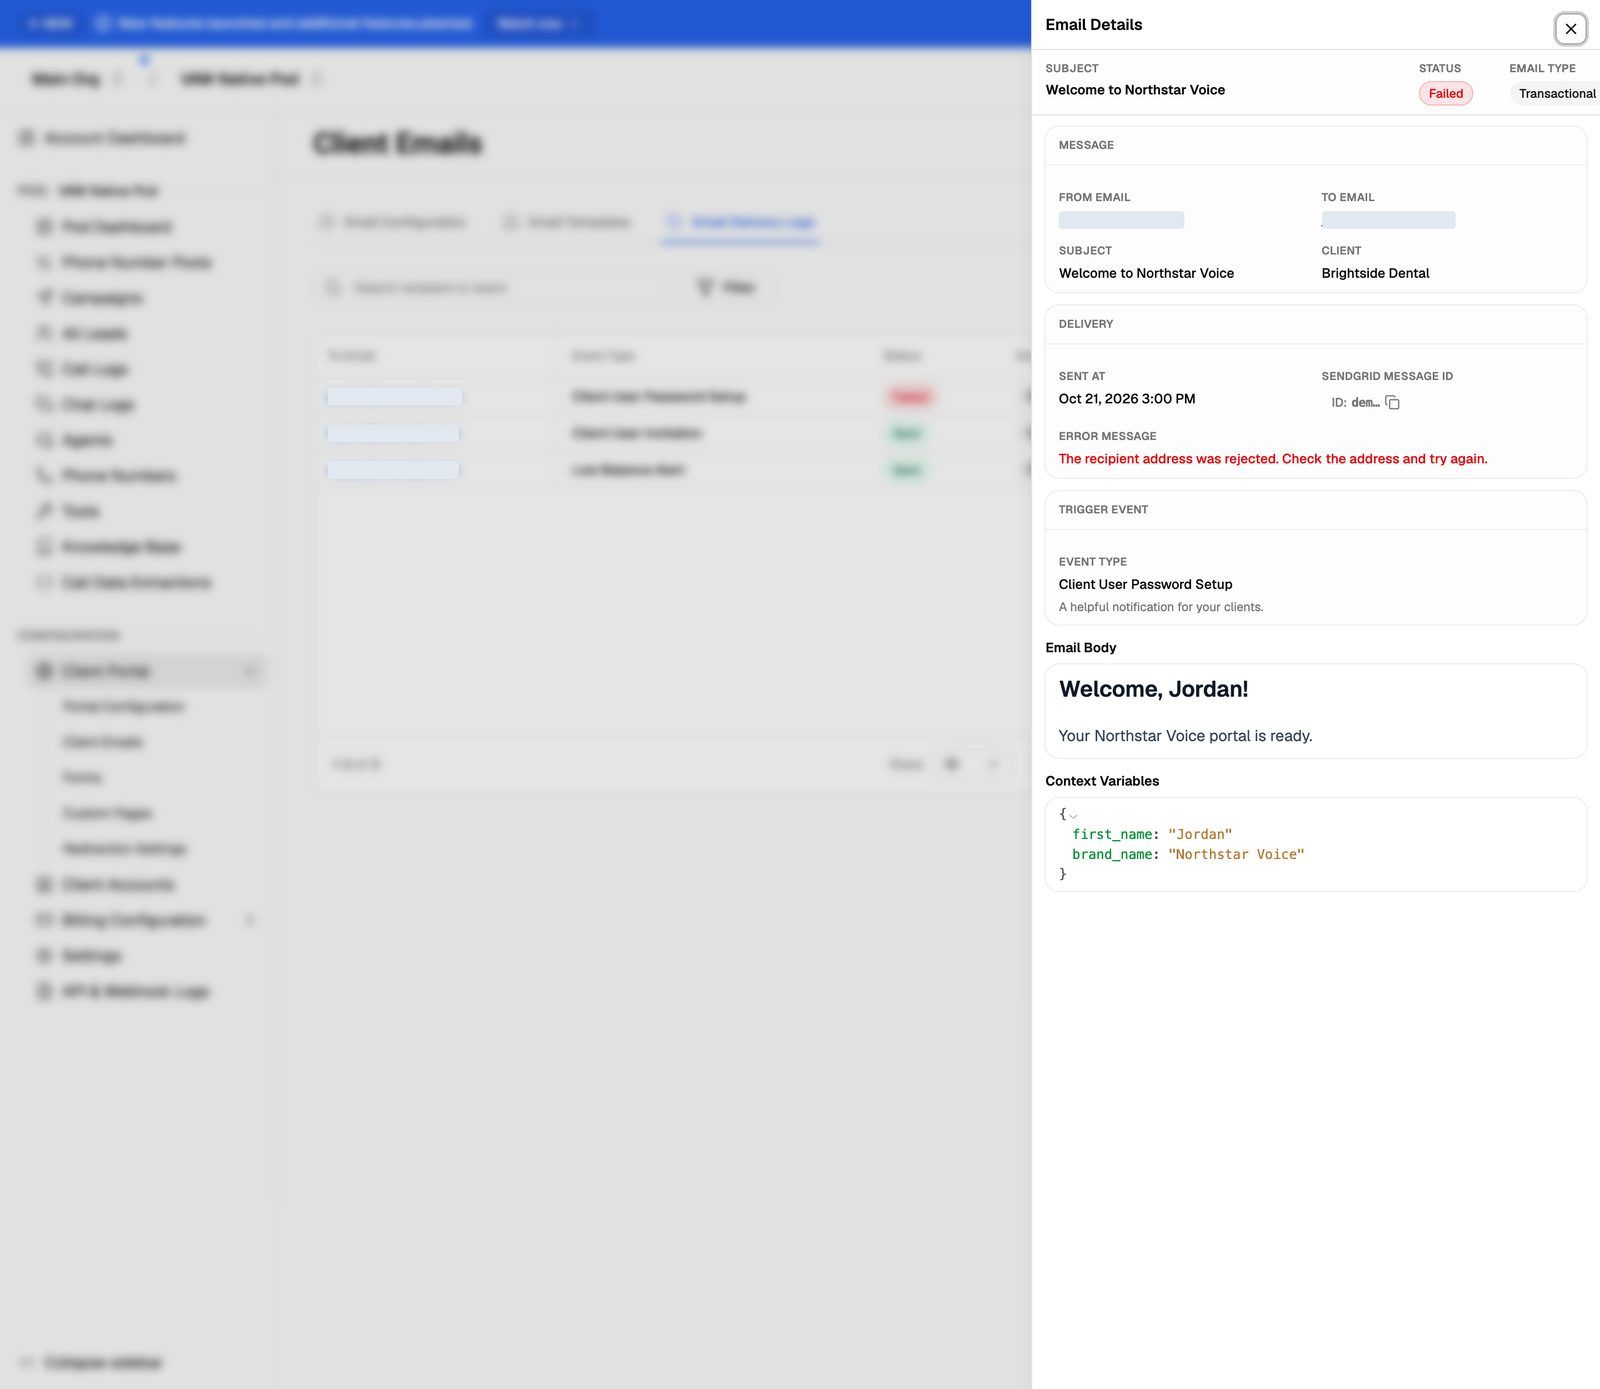
For anything after Sent, such as bounces or spam blocks, look up the SendGrid Message ID in your SendGrid account's Activity feed.
Troubleshooting
The Email Templates tab says "Email Configuration Required".
The Email Templates tab says "Email Configuration Required".
SendGrid isn't connected yet. Connect it on the Email Configuration tab first. See Send Branded Emails to Clients with SendGrid.
A template shows "Upgrade" and I can't switch it on.
A template shows "Upgrade" and I can't switch it on.
Payment, subscription, trial, usage and Campaign Paused Due to Billing Failed emails need the Bill your clients with Stripe plan feature. SaaS Creator User Signup needs SaaS Creator. Click Upgrade on the row to see which plan includes it.
A client says they didn't get an email, and there's nothing in the logs.
A client says they didn't get an email, and there's nothing in the logs.
The email wasn't attempted. Check that its template is switched on in Email Templates, and that the connection on Email Configuration shows Active. Emails that are switched off, or skipped because SendGrid needs attention, don't create a log entry.
The log says "Failed".
The log says "Failed".
Open the row and read Error Message. Errors starting with "Email configuration validation failed" mean SendGrid rejected your API key or sender. Fix it in SendGrid, then reconnect on Email Configuration.
A variable shows up blank in the email.
A variable shows up blank in the email.
Check the spelling against Available Variables for that template. Each template only fills in its own variables, so a variable copied from another template stays empty.
Related articles
Was this helpful?
Still need help? Share an idea