Add a Client Account
Create a client account, read the Client Accounts list, use the Overview tab's readiness check and copy the client portal link.
Written By voiceaiwrapper
Last updated 26 days ago
A client account is the home for one of your clients: their workspaces, their portal logins, their billing and their security settings. Creating one takes under a minute. You only need the client's name and a business email address.
Included client accounts: Pay-as-you-go includes 1, Growth includes 3 and Scale includes 20. Additional accounts are available as paid add-ons. When you use all included and purchased capacity, Add Client Account shows an upgrade prompt.
Before you start
You'll need:
The client's business name. Your client sees it in their portal.
A primary email address for the client. It must be different from every other client account's primary email. If you bill the client through Stripe, this is the email on their Stripe customer.
A Pod with the agents and campaigns you plan to give this client. You'll need it for the client's first workspace in the next article.
Step 1: Create the client account
In the sidebar, open Client Accounts.
Click Add Client Account. The Create Client Account sheet opens.
In Name, type the client's business name.
In Client Account's Primary Email, type the client's email address.
Click Create Client Account.
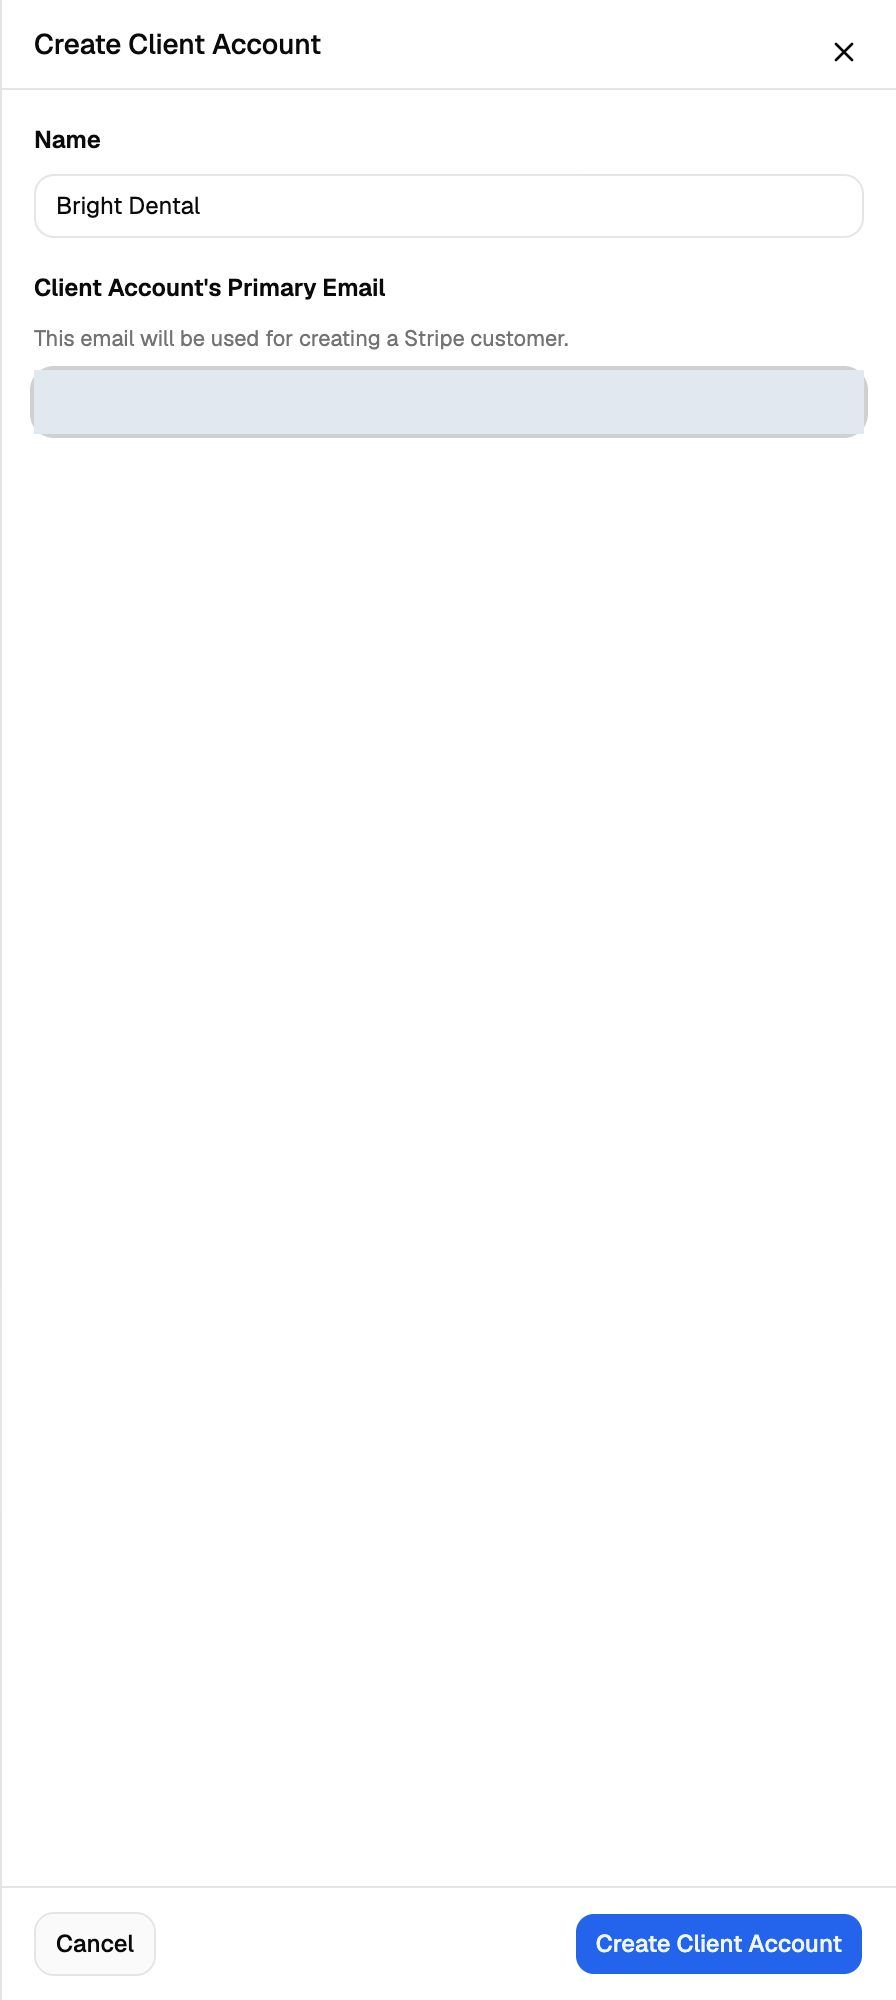
You'll see "Client created successfully", and the webapp opens the new client's Overview tab.
The primary email doesn't create a portal login. Your client can't sign in until you add a user on the Users tab. See Add and Manage Client Users.
Step 2: Check what to set up next
The Overview tab shows a Client readiness card. For a new client it says Not ready - create your first workspace, with a Create workspace button.
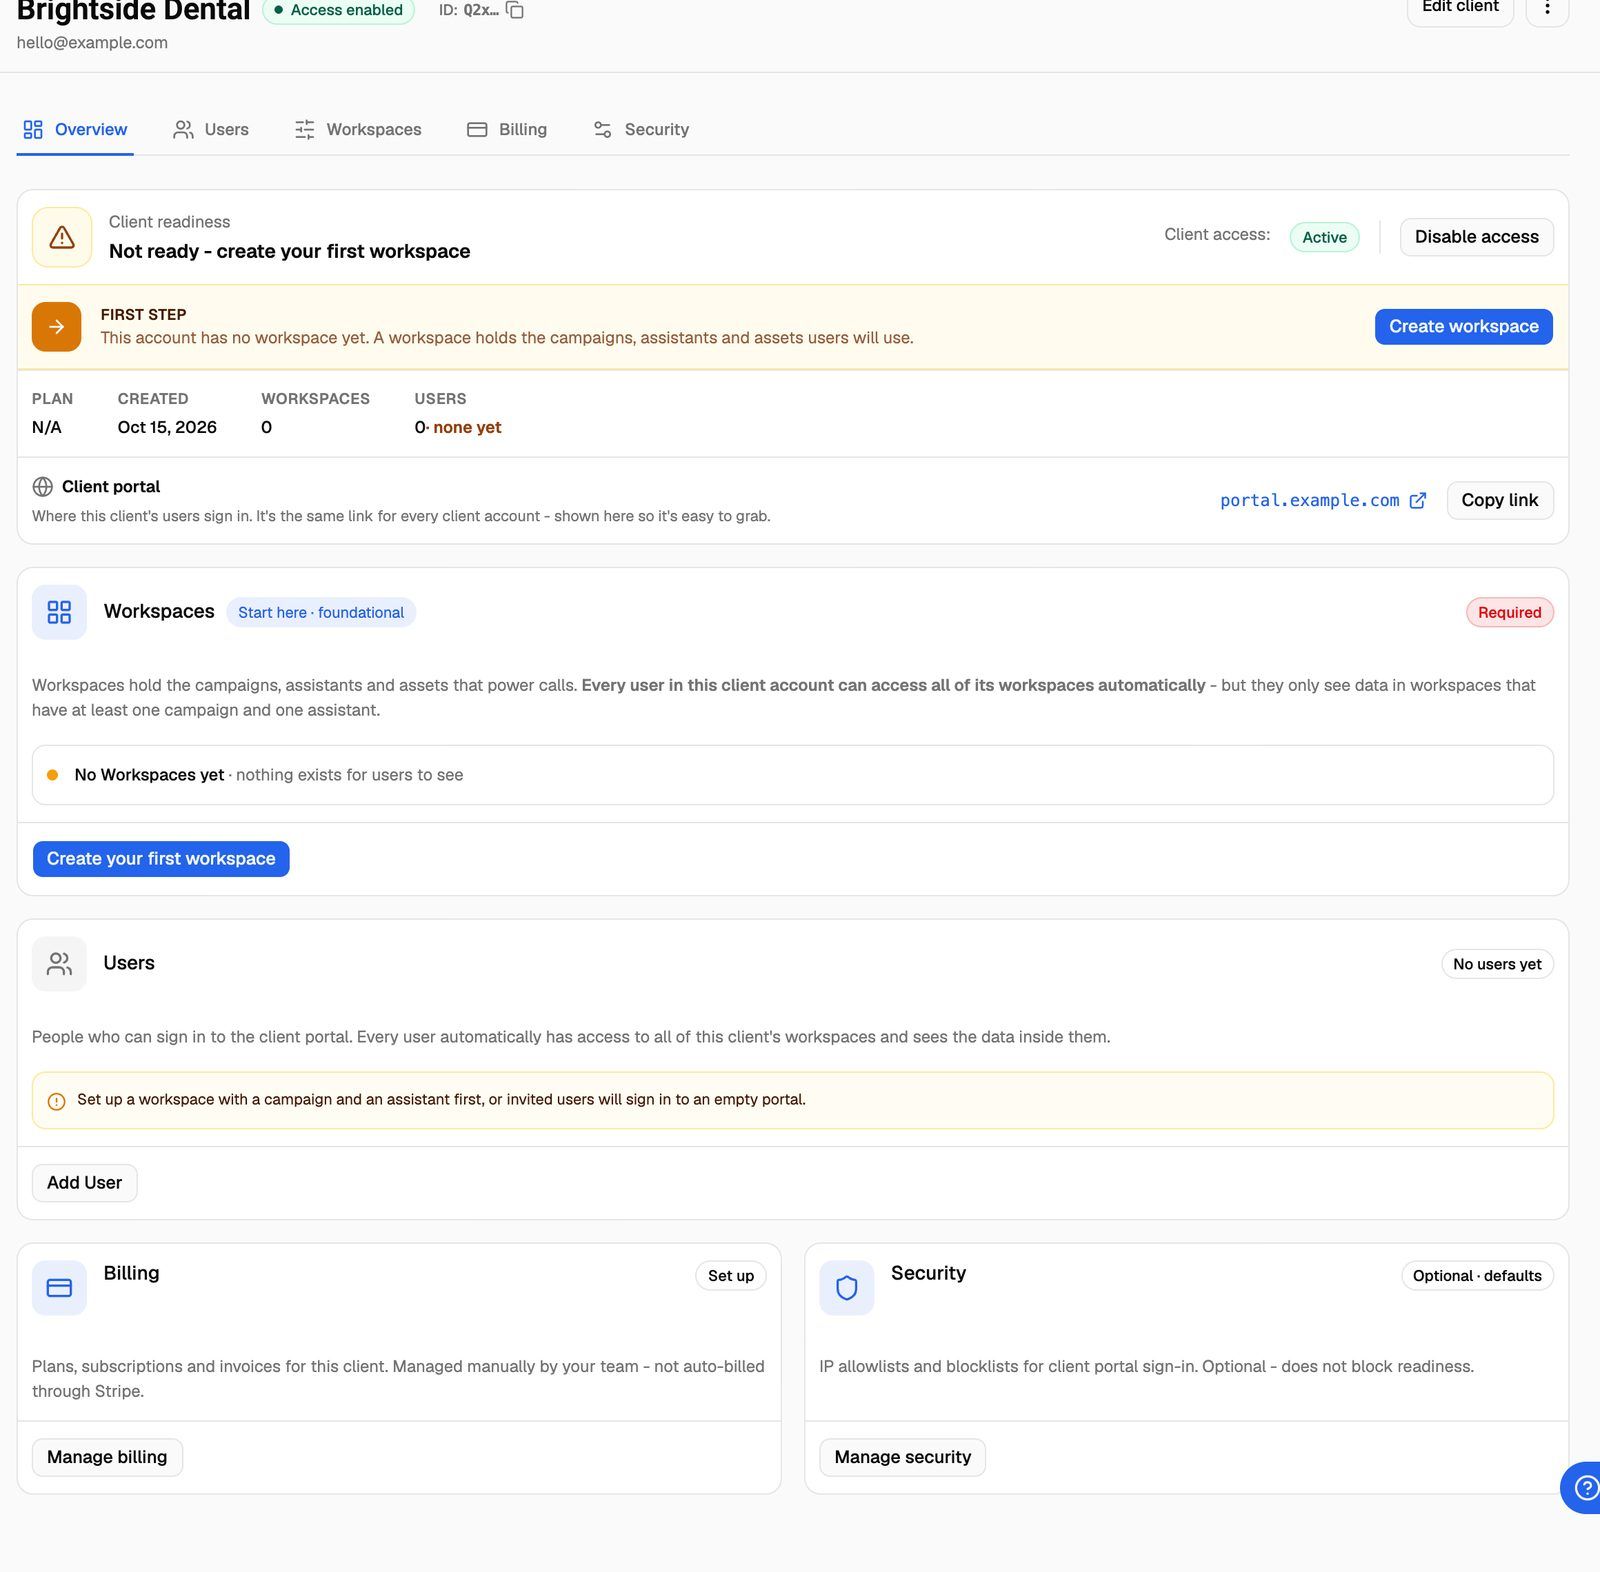
What's on the Overview:
Client readiness: a headline, the next step and a button that takes you there. The headline changes as you add workspaces and users. How Client Accounts and Workspaces Work lists every message.
Client access: Active or Disabled, with a button to switch it.
Plan, Created, Workspaces and Users: quick facts about the account.
Workspaces card: each workspace with Ready or Empty. A workspace is ready when it has at least one campaign and one agent.
Users card: how many people can sign in.
Billing card: whether billing is set up for this client.
Security card: IP allowlists and blocklists. This card only appears if your plan includes Client IP access control.
Your next step is a workspace. See Create a Workspace and Assign Assets.
Step 3: Copy the client portal link
The portal link is where your client's users sign in. Copy it from either place:
The Client portal card on the Overview tab: click Copy link.
The top of any client page: open the ⋮ menu next to Edit client and choose Copy portal link.
It's the same link for every client account. Each user's login decides which client they see. Until you connect a custom domain, the link uses a VoiceAIWrapper address. To put the portal on your own subdomain, see Connect Your Custom Domain.
The Client Accounts list
Client Accounts lists every client with these columns:
Use Search client accounts to find a client by name or email, and the filter button to narrow the list by Type, Workspaces, Users, Billing, Status or Primary login.
The Actions menu on each row has Edit client, Disable access (or Enable access) and Delete client. Disabling and deleting are covered in Enable, Disable or Delete a Client.
Inside a client account
Open a client to see its tabs:
At the top of the page, next to the client's name, a badge shows Access enabled or Access disabled. On the right are Edit client and a ⋮ menu with Copy portal link, Disable access (or Enable access) and Delete client.
Change a client's name or email
Click Edit client (at the top of the client page, or in the row's actions menu on Client Accounts).
Change Name or Client Account's Primary Email in the Edit Client Account sheet.
Click Save Client Account.
If the client already has a Stripe customer, the new name and email are updated on that customer too.
Troubleshooting
I see "Client with this email already exists".
I see "Client with this email already exists".
Another client account in your organization already uses that primary email. Use a different email, or open the existing client from Client Accounts (search by email).
Clicking Add Client Account opens an upgrade prompt.
Clicking Add Client Account opens an upgrade prompt.
You've used every client account your plan includes. Disabled clients still count until you delete them. Delete a client you no longer need, or add more client accounts in Settings → Billing. On some older plans you upgrade to the latest plan instead. See Add-Ons: BYOK Connections, Client Accounts and Team Members.
A client shows "Billing paused".
A client shows "Billing paused".
The client hasn't paid or topped up. While billing is paused, all of the client's campaigns are paused and their VAW Native agents can't take new calls or chats. Agents on other providers keep running outside campaigns. It clears when the client pays. See What Clients See When Payment Is Due.
Login as Primary User is greyed out.
Login as Primary User is greyed out.
The primary user hasn't set their password from the set-password email yet. Once they do, the button works. See Log In as a Client to Preview Their Portal.
Related articles
Was this helpful?
Still need help? Share an idea