Build and Embed a Pricing Table
Build a pricing table of your self-serve plans, preview it, and put it on your own site with an embed code or per-plan signup links.
Written By voiceaiwrapper
Last updated 26 days ago
A pricing table shows your self-serve plans side by side, with a switch for billing frequency (for example Monthly and Yearly). Clients click a plan's button and go straight to signup on your client portal. You can embed the whole table on your own site with one piece of code, or use the per-plan signup links with buttons you design yourself.
You can have several tables, for example one per market or offer.
Available on: plans that include SaaS Creator. Without it, Add Pricing Table opens an upgrade prompt.
Before you start
You'll need:
- Stripe connected. Until it is, the SaaS Creator tab only shows Connect Your Stripe Account. See Connect Your Stripe Account.
- At least one plan set up for self-serve signup. Only active plans with SaaS Creator turned on can go on a table. See Set Up a Plan for Self-Serve Signup.
- Prices for each billing frequency you want to show. A plan only appears on a frequency's tab if it has a price for that frequency.
- A live custom domain. Signup happens on your client portal domain. Without one, the table's buttons don't go anywhere and no signup links are created. See Connect Your Custom Domain.
Step 1: Start a new table
- Open Billing Configuration → Stripe, then the SaaS Creator tab.
- Stay on Pricing Tables and click Add Pricing Table.
The Add Pricing Table sheet opens. It has two steps.
If you came from a plan's Add to a pricing table → Create a new pricing table, the plan is already selected and the billing frequencies match the prices it has.
Step 2: Basic configuration
Fill in the first step, Basic Configuration:
Click Next.
Step 3: Choose and customize plans
In the second step, Product Selection:
- Click Add Product and pick a plan. Repeat for each plan you want on the table.
- Drag a plan by its handle to change the order. Plans appear on the table in this order, left to right.
- Check the frequency badges on each plan card. A green badge with a tick means the plan has a price for that frequency. An amber badge with Add price means it doesn't, so the plan won't show on that tab. Click the amber badge to go to your billing plans and add the price.
- Click a plan card to customize how it looks. The settings are in four tabs:
- Click Create Pricing Table.
You'll see Pricing table created successfully, and the new table's preview opens.
Each card shows the plan's name and description, its price for the selected frequency, the minutes included, and the button.
Step 4: Preview the table
The Pricing table sheet opens on the Preview tab. Switch between Desktop, Tablet and Mobile to see how the table fits on each screen, and click the frequency tabs to check every price.
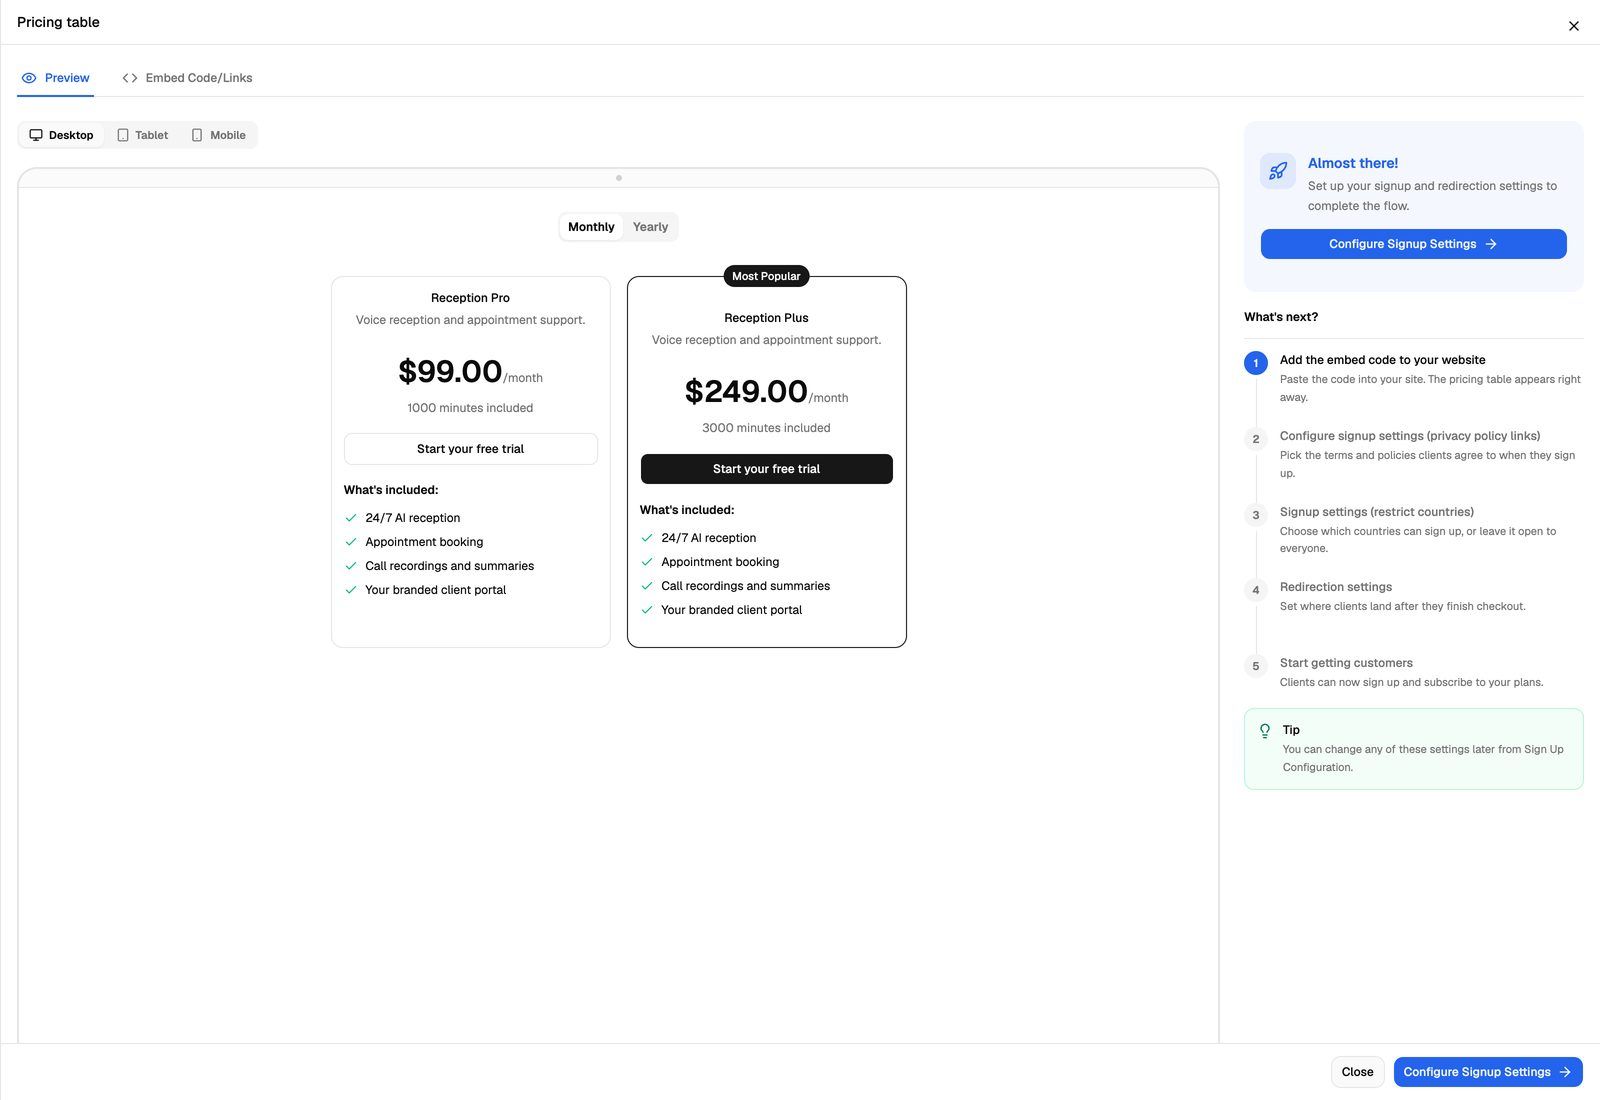
On wide screens, a panel on the right lists what's left to do next. To open the preview again later, click Preview in the table's row on the Pricing Tables list.
Step 5: Put the table on your site
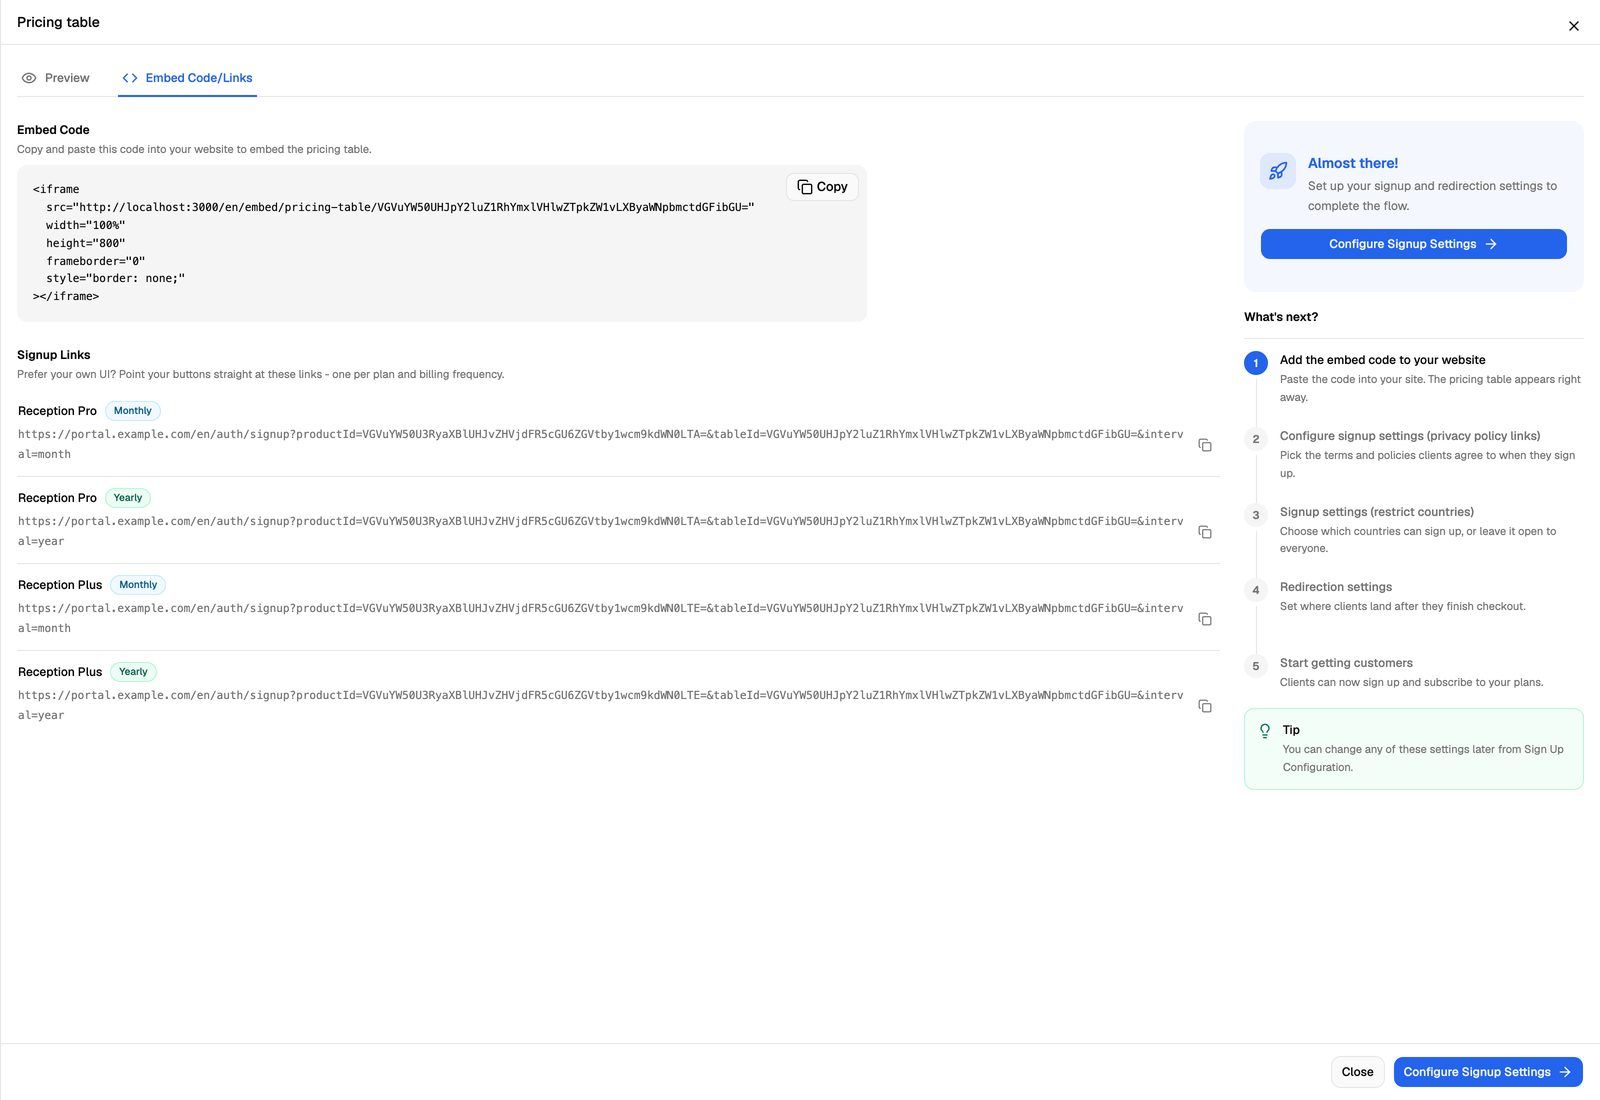
Open the Embed Code/Links tab. Clicking Copy Link in the table's row on the list opens this tab too.
You have two options:
- Embed the whole table. Under Embed Code, click Copy and paste the code into your page where the table should appear. Most site builders have an "HTML" or "Embed" block for this. The code is an iframe that fills the width of its container and is 800 pixels tall. Change the
heightvalue if your table needs more or less room. - Use your own buttons. Under Signup Links, there's one link for each plan and billing frequency the plan has a price for. Point each of your buttons at the matching link. Each link opens the signup page on your client portal domain with that plan and frequency already chosen.
When a client clicks a plan's button on the embedded table, the signup page opens in a new tab.
Step 6: Finish your signup settings
Click Configure Signup Settings at the bottom of the sheet to go through three short steps:
- Customer Acknowledgements: the terms and policies clients agree to when they sign up.
- Country Restrictions: allow all countries, or only allow or block the countries you pick.
- Redirection Settings: where clients land after signup and checkout.
Click Save & Next on each step (or Skip), and Save & Finish on the last. You'll see You're all set to onboard customers.
These settings apply to every pricing table, and you can change them later under Sign Up Configuration. See Signup Settings: Country Restrictions and Acknowledgements and Redirect Clients After Checkout.
Manage your pricing tables
The Pricing Tables list shows each table's Name, Frequencies, Products, Theme (Dark or Light) and Created date. Use the search box to find a table by name.
- Edit a table: click its row, or the pencil icon (Edit) in the Action column. Make your changes and click Update Pricing Table. Embedded tables show the change the next time the page loads, so you don't need to paste the code again.
- Delete a table: click the trash icon (Delete) in the Action column, then Delete in the confirmation.
Deleting a pricing table can't be undone. Wherever its embed code is used, clients see "Pricing table not found", and its signup links stop working. Replace the code and links on your site before you delete a table.
Troubleshooting
Add Product is greyed out, or it says "No plan has been created."
Add Product is greyed out, or it says "No plan has been created."
No active plan has SaaS Creator turned on yet, or every eligible plan is already on this table. Set up a Subscription + Usage Packs plan for self-serve signup first. See Set Up a Plan for Self-Serve Signup.
A plan is missing when I switch to another frequency.
A plan is missing when I switch to another frequency.
The plan has no active price for that frequency. Add the price to the plan on the Billing Plans tab, or remove that frequency from the table.
The buttons don't do anything, or Signup Links says "No signup links available. Please configure white label domain."
The buttons don't do anything, or Signup Links says "No signup links available. Please configure white label domain."
Your custom domain isn't connected yet. Signup happens on your client portal domain, so the buttons and links only work once it's live. See Connect Your Custom Domain.
A plan no longer shows on my table.
A plan no longer shows on my table.
The plan was probably archived. Archived plans don't appear on pricing tables or in the table editor. On the Billing Plans tab, switch the list to Archived, open the plan's actions and choose Unarchive Product to bring it back.
The table won't save.
The table won't save.
Check the plans you customized. Each switch you turned on needs its field filled in:
- Highlight this plan needs Badge Text.
- Customize button needs a Button Label.
- Customize features needs text in every item under Feature Items. Remove empty items, or turn the switch off.
Also check that at least one plan is on the table and Table Name isn't empty.
Related articles
Was this helpful?
Still need help? Share an idea