Signup Settings: Country Restrictions and Acknowledgements
Choose which countries can sign up through your pricing table, which terms new clients must accept, and where they land after checkout.
Written By voiceaiwrapper
Last updated 26 days ago
Before you share your pricing table, decide who is allowed to sign up and what they agree to. Signup settings let you limit self-serve signups to certain countries, make new clients accept your terms and privacy policy, and send them to a page of your choice after checkout. The settings apply to every signup through your pricing table and signup links.
Setup takes about five minutes.
Available on: plans that include SaaS Creator. Without it, you can open the settings, but clicking Save shows an upgrade prompt.
Before you start
- Stripe connected. The SaaS Creator tab shows Connect Your Stripe Account until it is. See Connect Your Stripe Account.
- Links to your terms and policies, if you want clients to accept them. They must be public web addresses, for example
https://yourbrand.com/terms. - Custom pages to redirect to (optional). Redirects after checkout send clients to a custom page in their portal, so create those pages first. See Redirect Clients After Checkout.
Where to find the settings
- In the sidebar, open Billing Configuration → Stripe.
- Open the SaaS Creator tab, then Sign Up Configuration.
You'll see three sections: Customer Acknowledgements, Country Restrictions and Redirection Settings. Each one saves on its own.
The same three settings appear as a short setup wizard after you create a pricing table. In the pricing table's share sheet, click Configure Signup Settings and work through the steps with Save & Next, Skip and Save & Finish. Changes there and on this tab are the same settings.
Restrict signups by country
Country restrictions decide who can create an account through your pricing table, based on where they are when they sign up.
- Open the Country Restrictions section.
- Under Restriction mode, choose one of these:
- If you chose to allow or block specific countries, add them under Allow signups from or Block signups from. Type to search the list.
- Click Save. You'll see "Country restrictions saved successfully".
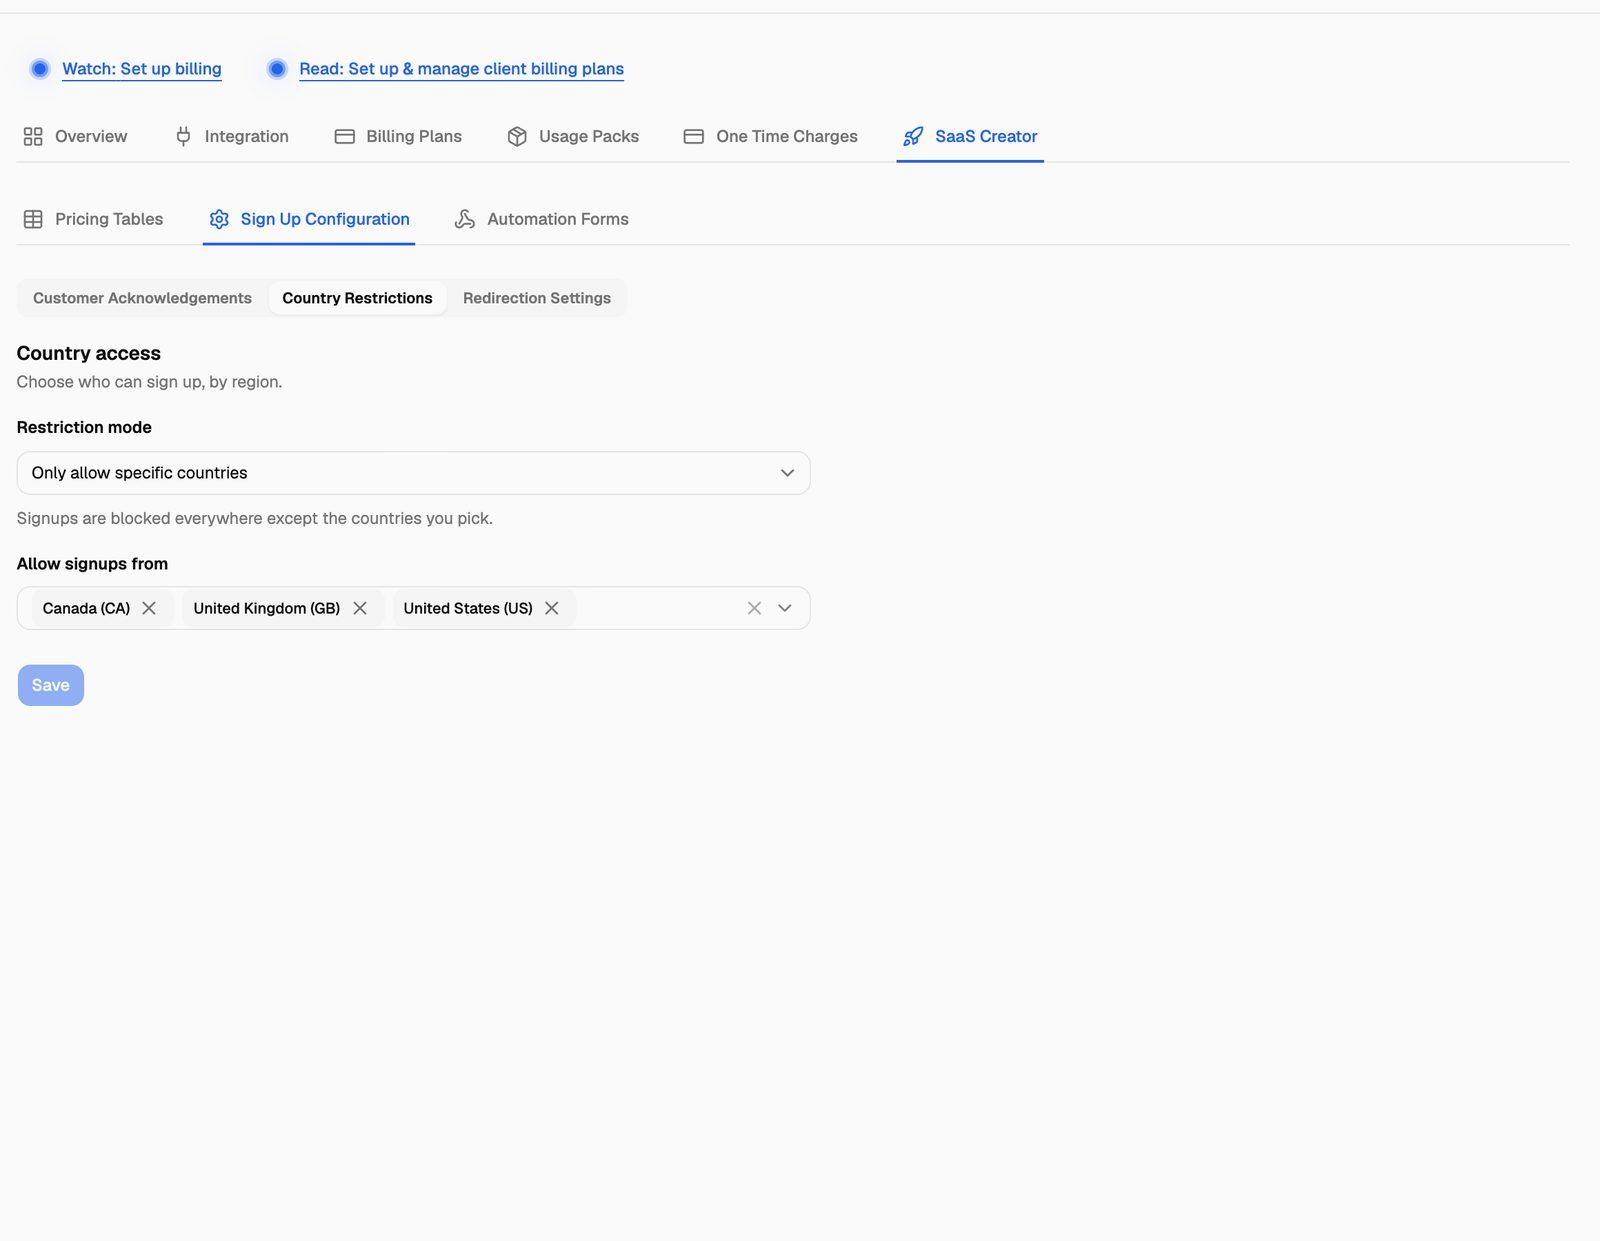
How the check works:
- The country comes from the location of the person's internet connection (their IP address) at the moment they click Sign up. Someone using a VPN is checked against the VPN's location.
- The check only applies to self-serve signups. Clients you add yourself, and people who already have an account and are logging in, aren't affected.
- If a restriction is on and the location can't be worked out, the signup is refused to be safe.
What a refused visitor sees:
No account is created when a signup is refused.
Ask clients to accept your terms
Customer acknowledgements add a required checkbox to the signup form. Clients can't sign up until they tick it.
- Open the Customer Acknowledgements section.
- For each document, enter a Label (the link text, for example
Terms & Conditions) and a URL. The first time you open this section, two suggested rows, Terms & Conditions and Privacy Policy, are already there with empty links. - Click Add More for another row, or the bin icon to remove one. The link icon opens the URL so you can check it.
- Check the Preview on the right. It shows the signup form as clients will see it.
- Click Save Configuration. You'll see "Acknowledgements saved successfully".
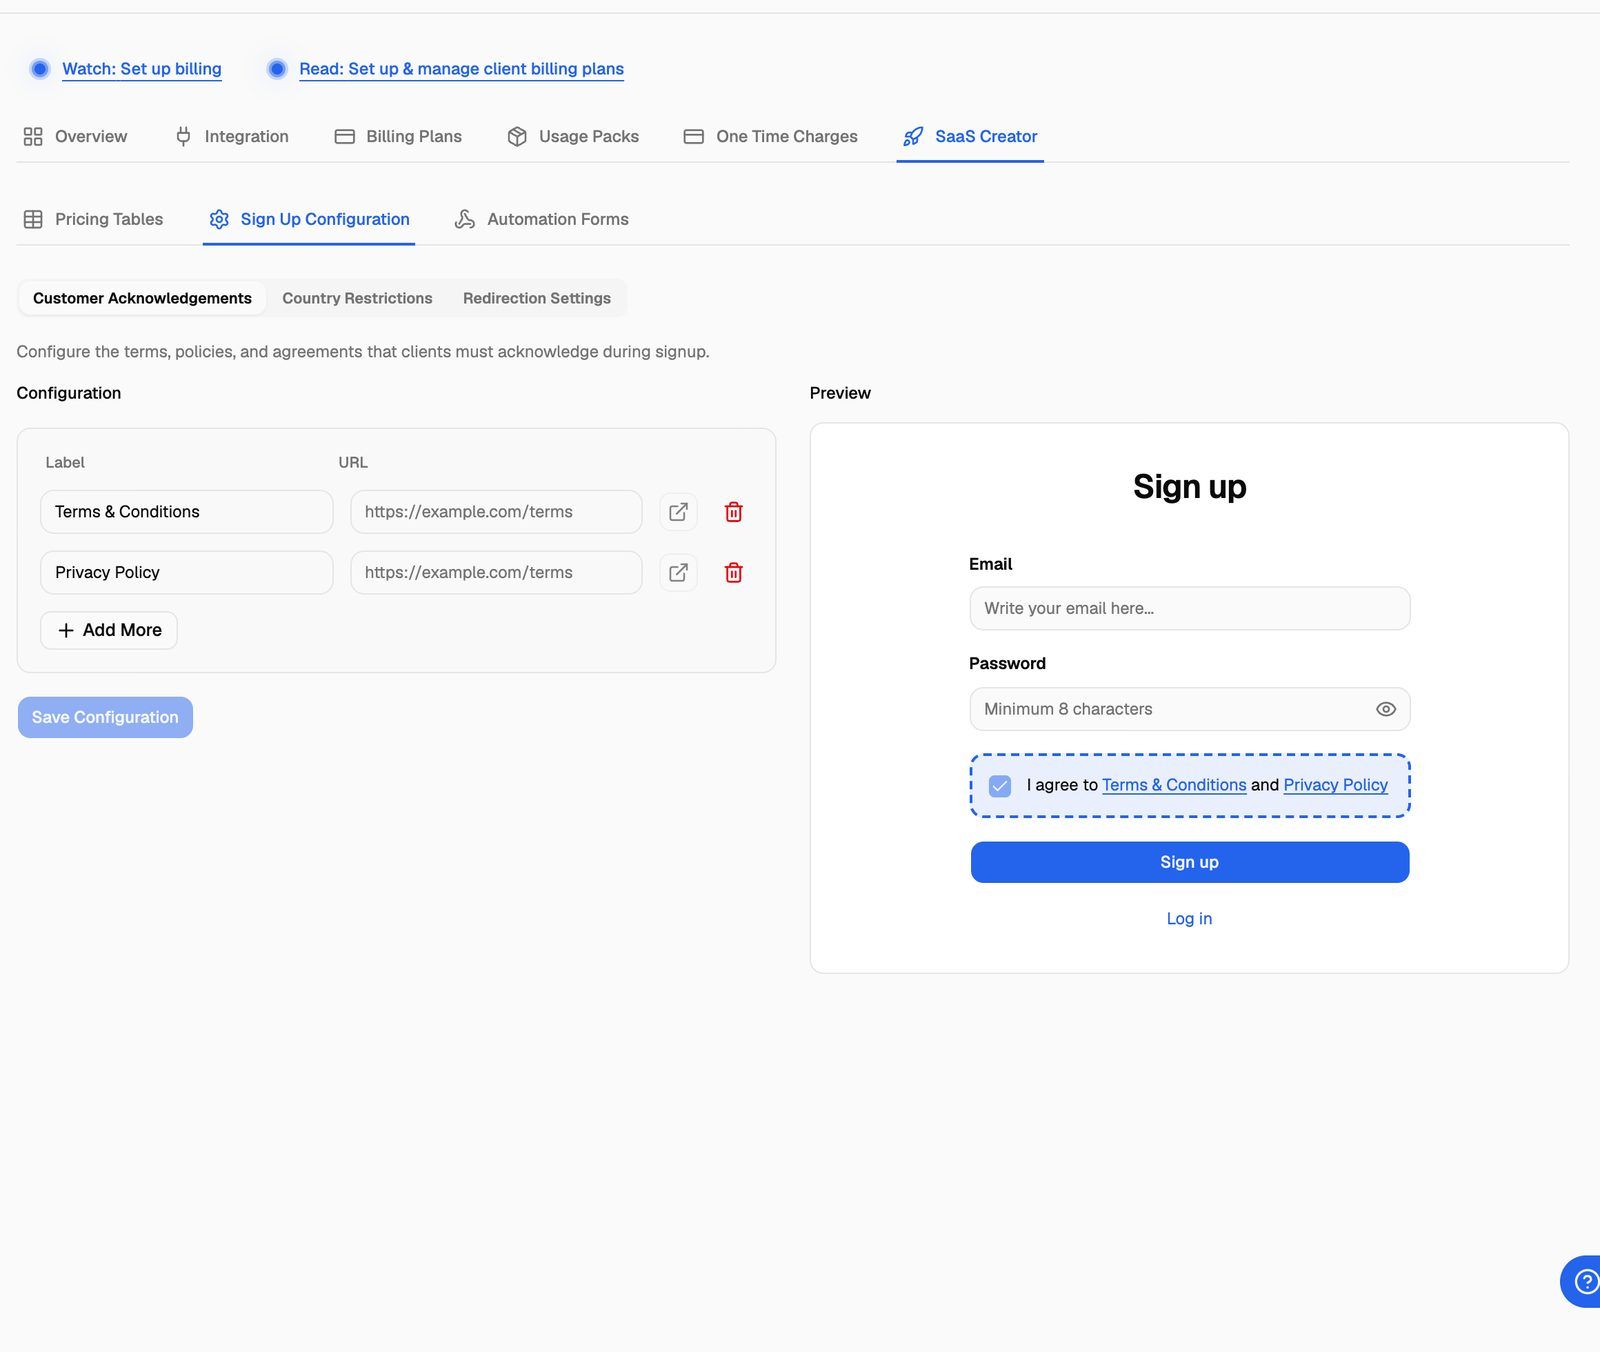
All your rows become one checkbox, for example: "I agree to Terms & Conditions, Acceptable Use Policy and Privacy Policy". Each label links to its URL and opens in a new tab. If a client tries to sign up without ticking it, they see "You need to accept the required policies".
A few rules when saving:
- Every row needs both a label and a URL. Otherwise you'll see "Please fill in all fields or remove empty items".
- If you leave out
https://, it's added for you. An address that still isn't a valid link shows "Invalid URL format" followed by the address. - To remove the checkbox entirely, delete every row and save. When you come back later, the two suggested empty rows show again. That's expected: clients see no checkbox until you save rows with links.
Choose where clients land after checkout
After signing up, a client is logged in and taken straight into their new workspace. When they then complete checkout or start a trial, they come back to the portal home page by default.
The Redirection Settings section lets you send them to a custom page instead, such as a welcome or onboarding page. You pick a page for each checkout flow, then click Save Redirection Settings:
Leave a choice on No redirect to keep the home page. These are the same settings as Client Portal → Redirection Settings, and they apply to all your clients, not only self-serve ones. There's no separate setting for a page shown straight after signup.
Redirection Settings needs a plan that includes Custom client-portal menu items; otherwise this section shows Upgrade to Access. Redirects also only work while your custom domain shows Live. For the full setup, see Redirect Clients After Checkout.
Frequently asked questions
Clicking Save shows an upgrade prompt.
Clicking Save shows an upgrade prompt.
Your plan doesn't include SaaS Creator. Signup settings can only be saved on plans that include it. See A Feature Is Locked or Asks Me to Upgrade.
I chose "Only allow specific countries" but Save shows an error.
I chose "Only allow specific countries" but Save shows an error.
You need at least one country in the list. The message reads "Add at least one country to allow, or choose “Allow all countries”." With Block specific countries, it reads "Add at least one country to block, or choose “Allow all countries”."
A client in an allowed country says they can't sign up.
A client in an allowed country says they can't sign up.
They are probably on a VPN, a work network or a mobile connection that appears to be in another country. Ask them to turn off the VPN or try another connection. If that isn't possible, add the account for them yourself; see Add a Client Account.
Is the client's acceptance of my terms recorded?
Is the client's acceptance of my terms recorded?
The signup form won't submit until the checkbox is ticked, but the webapp doesn't store a separate record of which documents were accepted or when. If you need proof for compliance, keep each version of your documents at its own dated URL, so you know which version was linked at any time.
Is the checkbox text translated?
Is the checkbox text translated?
Your labels appear exactly as you type them. The words around them ("I agree to" and "and") are always in English, even when the portal is shown in another language.
Related articles
Was this helpful?
Still need help? Share an idea