Clone, Edit and Delete Campaigns
Copy a campaign to reuse its setup, change a campaign's settings safely, and delete a campaign along with its leads, calls and widget.
Written By voiceaiwrapper
Last updated 26 days ago
Once a campaign works well, you'll often want another one just like it, for a new client, a new list or a different calling window. Cloning copies the setup in seconds. This article also covers how to change a campaign's settings and what happens when you delete one.
All three actions live in the Actions menu (the three dots) at the end of each row on the Campaigns list. In your Pod, open Campaigns to find it.
Clone a campaign
A clone copies the campaign's settings into a new campaign. Leads, calls and client assignments stay with the original.
- On the Campaigns list, open the Actions menu on the campaign you want to copy.
- Click Clone.
- In Clone Voice Campaign, edit the Campaign Name. It starts as the original name followed by "(Clone)".
- Click Clone.
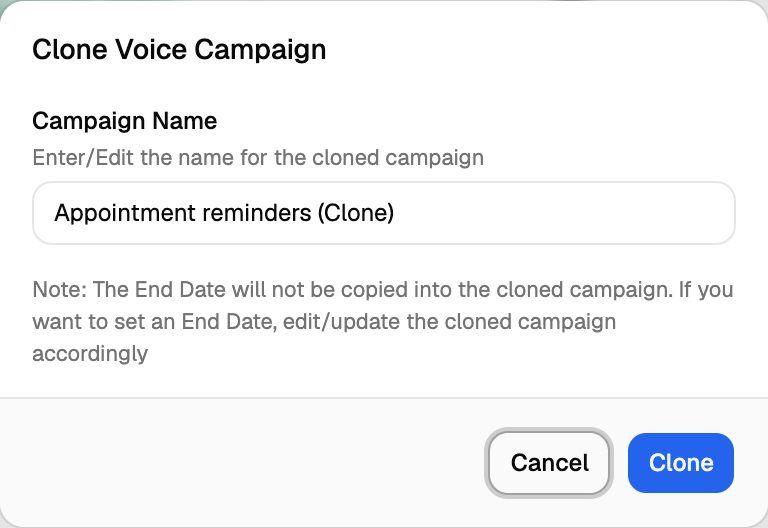
You'll see Campaign duplicated successfully!, and the new campaign appears in the list.
What the clone keeps and what it doesn't
The clone starts in Draft, so it won't call anyone until you add leads and schedule it.
Before you schedule the clone, open its Settings tab and check the agent, phone number and schedule. If you set an end date on the original, add one to the clone too. If the original had a web widget, the clone has its own widget: copy the embed code from the clone's Web Widget tab. See Embed the Widget on a Website.
When you can't clone
- Clone is greyed out: the campaign's Campaign Switch is off. Only enabled campaigns can be cloned. Turn the switch on first.
- You see an upgrade prompt: the clone is created switched on, so it counts toward your plan's campaign limit. If you're at the limit, an upgrade prompt for Voice campaigns opens instead of the clone dialog. Switch off a campaign you no longer use, or upgrade. See A Feature Is Locked or Asks Me to Upgrade.
Edit a campaign's settings
- On the Campaigns list, open the Actions menu and click Edit. This opens the campaign on its Settings tab. You can also open the campaign and click Settings.
- Change what you need in General Settings, Schedule, Outbound behavior, Webhooks and Emails, Success metric or Advanced Controls. Some sections only appear for some campaign types and Pods (for example, Outbound behavior is for outbound campaigns only).
- Click Save Settings.
Settings can only be changed while the campaign is Draft or Paused. This stops you from changing a campaign while it's calling. In any other status, the fields are read-only:
When a campaign is Active or Scheduled, the tab shows Settings are locked in the current campaign status. with the action you need.
To learn what each setting does, see Create a Campaign with the Campaign Wizard. For statuses, see Campaign Statuses and the Campaign Switch.
Delete a campaign
- On the Campaigns list, open the Actions menu on the campaign.
- Click Delete.
- Read the list of what will be deleted, then click Delete to confirm.
Deleting a campaign can't be undone. It permanently deletes:
- All associated leads
- All calls triggered under this campaign
- The campaign's web widget, if it has one. The widget stops working on any site where you embedded it.
- Its links to client workspaces in the client portal
- The call minutes clients used on it, if the campaign was assigned to a client
Export the leads and call logs first if you might need them. See Export Leads and Export Call and Chat Logs.
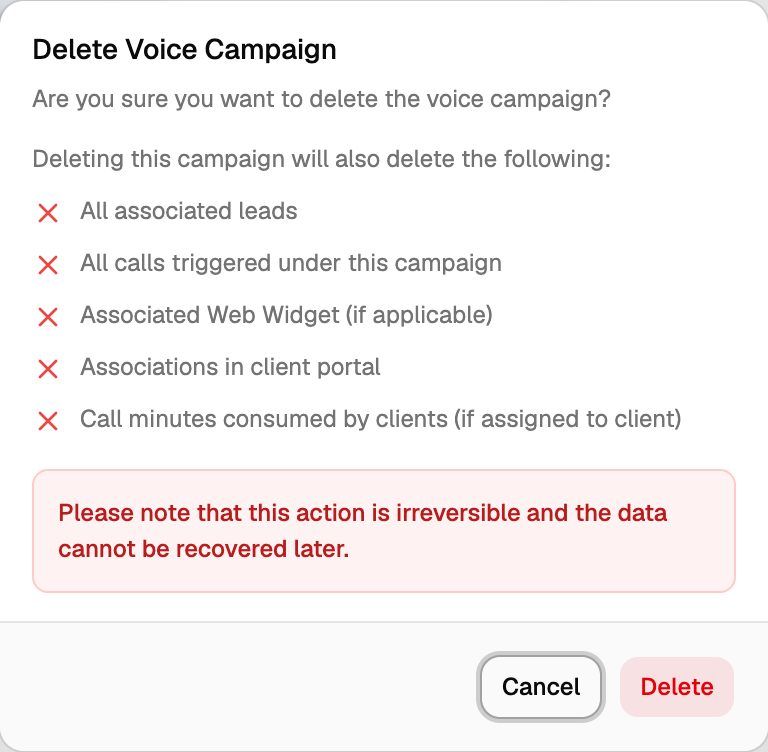
You'll see Campaign deleted successfully! and the campaign disappears from the list.
On VAW Native Pods, the records of the campaign's calls stay in the Pod's Call logs, no longer linked to a campaign.
If you only want a campaign to stop, you don't need to delete it. Pause it, or turn off its Campaign Switch. Both keep all its leads and history.
Frequently asked questions
Can I clone a campaign into a different Pod?
Can I clone a campaign into a different Pod?
No. The clone is created in the same Pod as the original, with the same agent and phone number. To run the same campaign on another Pod, create a new campaign there. See Create a Campaign with the Campaign Wizard.
How do I give the clone the same leads?
How do I give the clone the same leads?
Leads aren't copied. Export them from the original campaign, then import the file into the clone. See Export Leads and Import Leads from a CSV File.
The original campaign was assigned to a client. Is the clone?
The original campaign was assigned to a client. Is the clone?
No. Client assignments aren't copied, so calls on the clone aren't billed to anyone until you assign it. See Assign a Campaign to a Client.
Save Settings is greyed out.
Save Settings is greyed out.
Either the campaign isn't Draft or Paused (see the table above), or you haven't changed anything yet. The button becomes available once you edit a field.
Related articles
Was this helpful?
Still need help? Share an idea