Set Up a Plan for Self-Serve Signup
Turn on SaaS Creator for a billing plan, pick the Pod new clients connect to, set their default access, and add the plan to a pricing table.
Written By voiceaiwrapper
Last updated 26 days ago
Before clients can sign up for a plan on their own, you tell VoiceAIWrapper two things about that plan: which Pod (an engine or provider connection) each new client's workspace is connected to, and what clients can see and do in it. Then you add the plan to a pricing table so clients can choose it.
It takes a few minutes per plan. Each self-serve plan is set up separately, so different plans can use different Pods and different access.
Available on: plans that include SaaS Creator. Without it, turning on Enable SaaS Creator opens an upgrade prompt.
Before you start
You'll need:
- Stripe connected. See Connect Your Stripe Account.
- A billing plan that uses the Subscription + Usage Packs model. It's the only model that unlocks SaaS Creator, and the model can't be changed after a plan is created. See Choose a Pricing Model and Create a Billing Plan.
- At least one Pod for new clients' workspaces. See What Is a Voice AI Pod?
Step 1: Open the self-serve setup for the plan
Open Billing Configuration → Stripe → Billing Plans, then use any of these:
- From the plans table: in the plan's SaaS Creator column, click Set up. Plans on other pricing models show "-" here.
- From the plan's details: click the plan's row. In the SaaS Creator (self-serve signup) section, click Set up.
- Right after creating a plan: a new Subscription + Usage Packs plan's success screen offers Enable self signup.
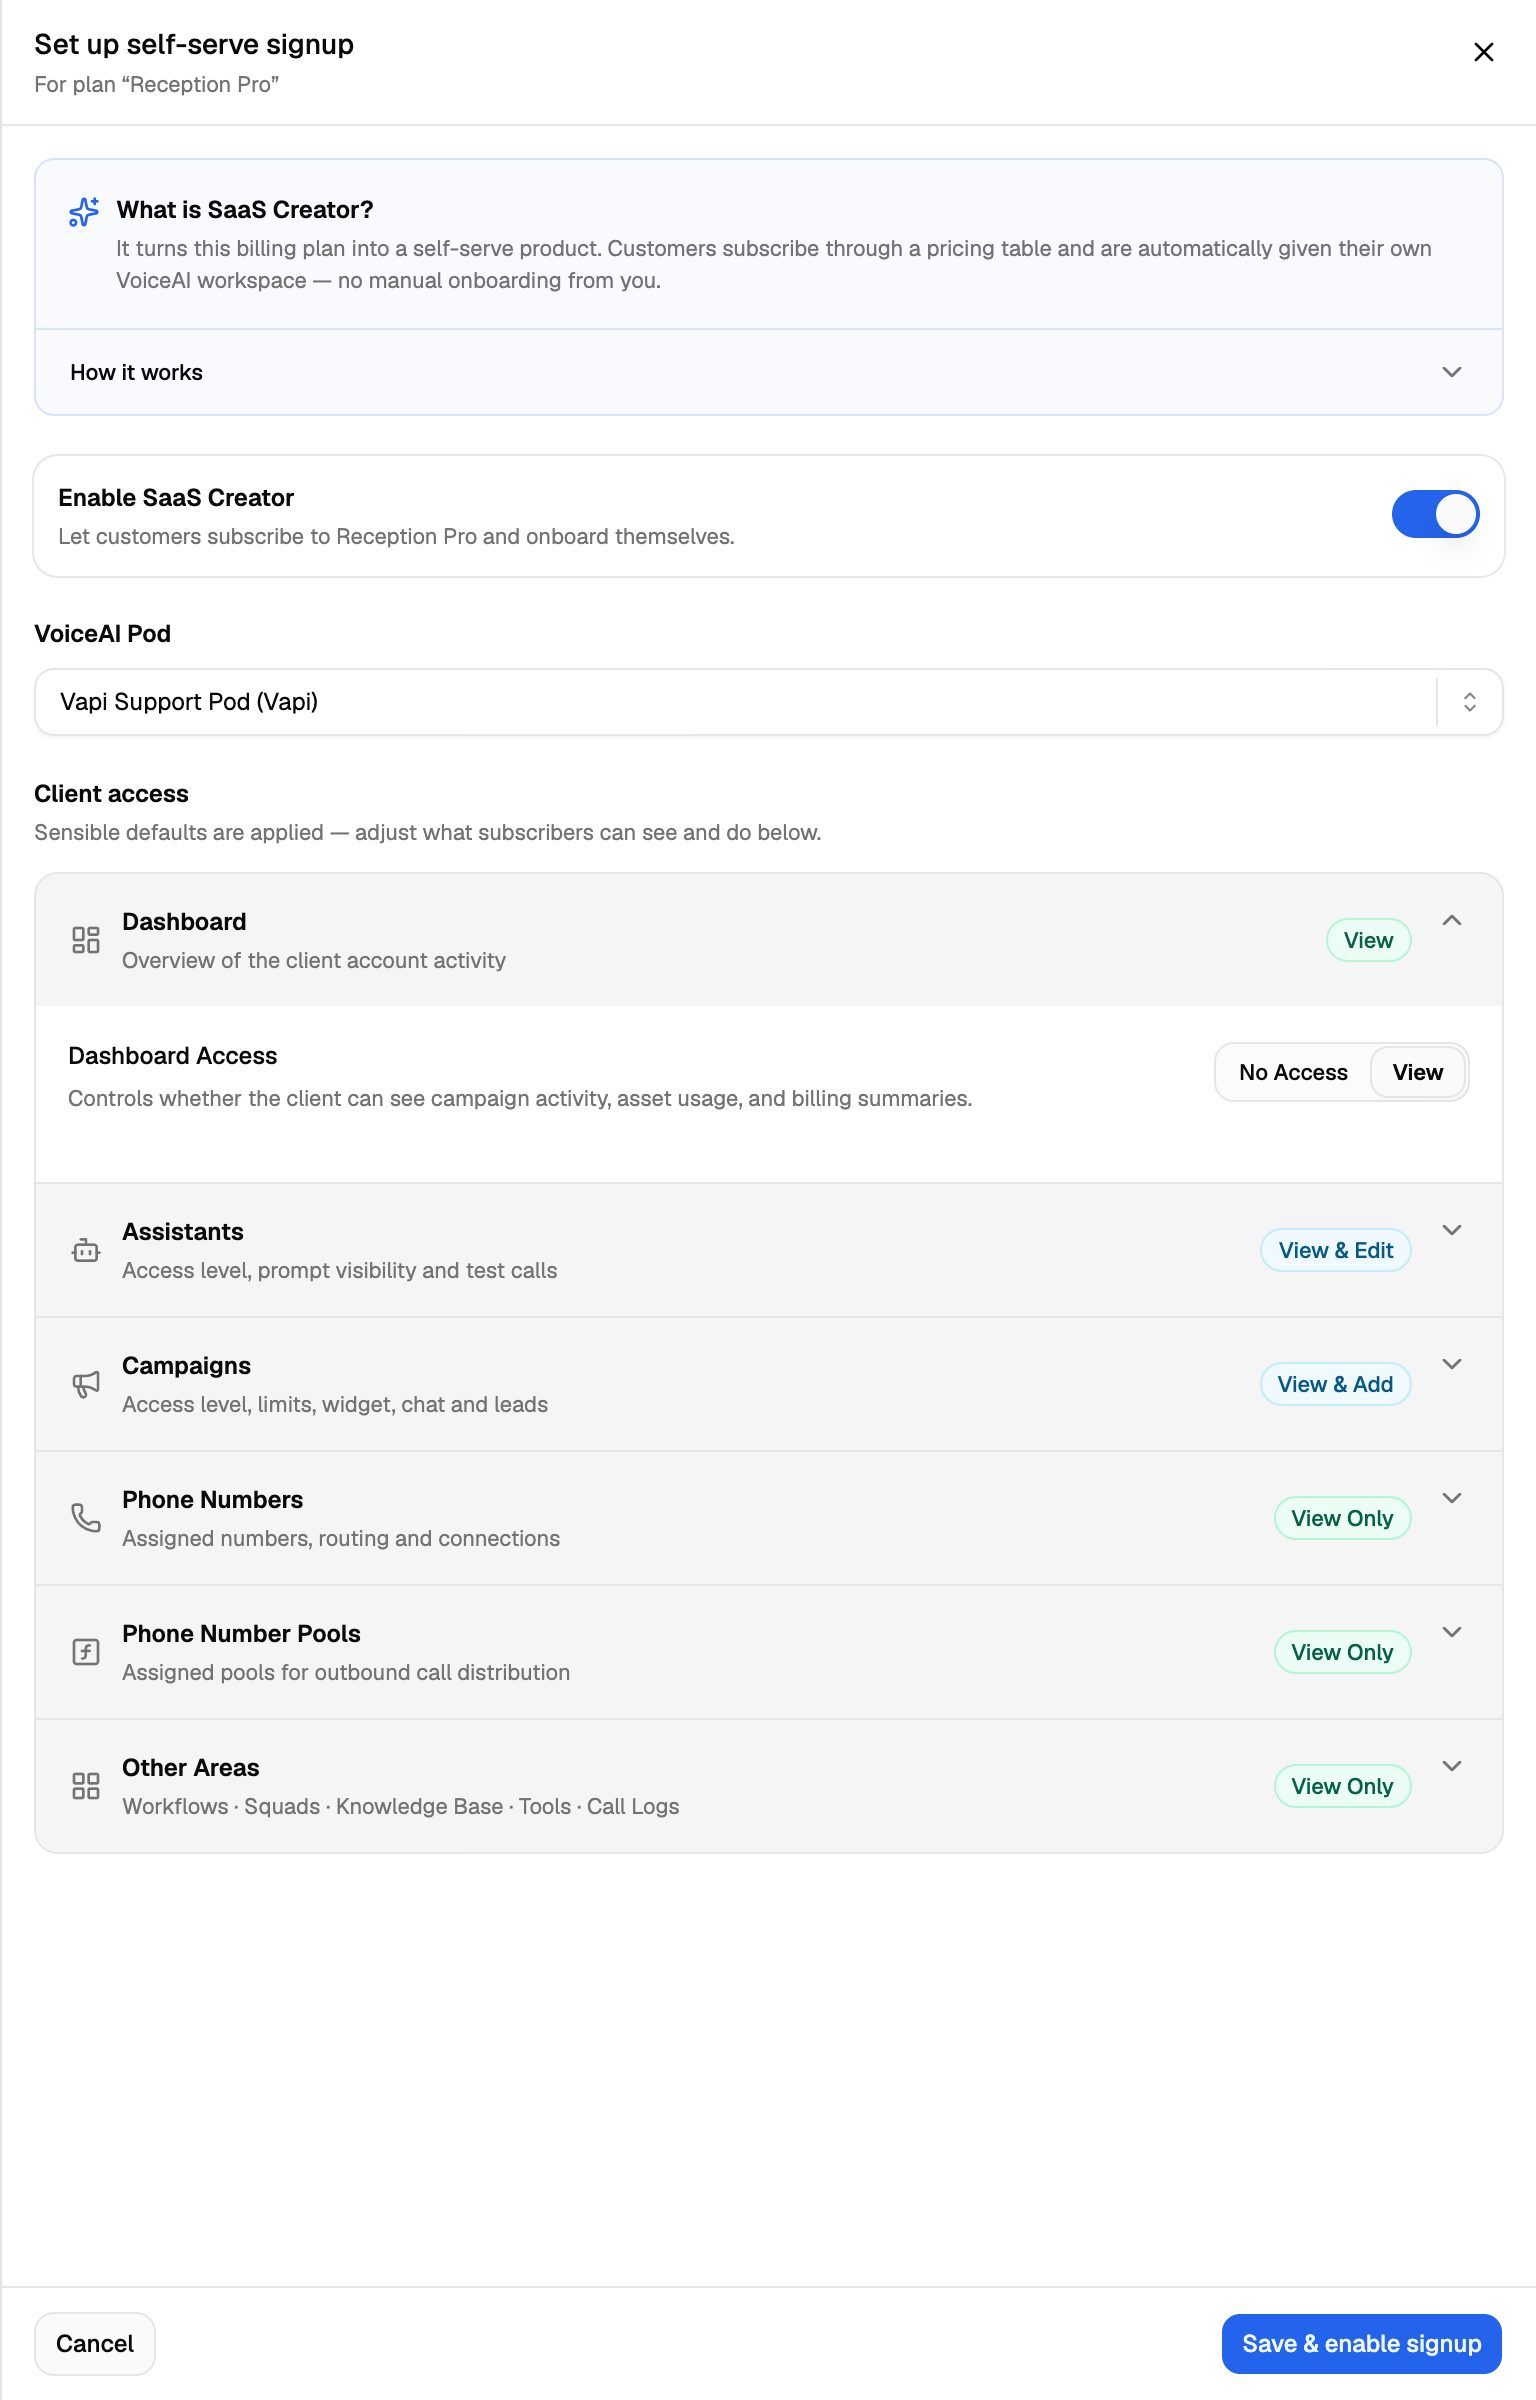
The Set up self-serve signup sheet opens, with the plan's name underneath. The What is SaaS Creator? box at the top has a short How it works summary if you want a reminder.
Step 2: Turn on SaaS Creator
Turn on Enable SaaS Creator. The Pod and access settings below it become editable.
Step 3: Choose the Pod
In VoiceAI Pod, pick the Pod new clients on this plan are connected to. Each option shows the organization name and the engine, for example Main account (Vapi).
Every client who signs up on this plan gets their own workspace on this Pod. The workspace starts with no agents, phone numbers or campaigns. Assign those afterwards, or let clients create their own with Automation Forms for Self-Serve Clients.
Step 4: Set client access
Under Client access, choose what clients on this plan can see and do in their workspace. Sensible defaults are already filled in, so you only change what you want to be different.
The options depend on the Pod's engine. They're the same controls you use to set permissions on any workspace:
- Vapi, Retell AI and ElevenLabs Pods: see Set Client Permissions on Vapi, Retell and ElevenLabs Workspaces.
- VAW Native Pods: see Set Client Permissions on VAW Native Workspaces.
Some options need an extra feature on your own plan. Choosing one of those opens an upgrade prompt, and some show an Upgrade button in place of the setting.
Step 5: Save
Click Save & enable signup. You'll see Product updated successfully, then SaaS Creator is enabled. Saving doesn't change the plan's prices or trial settings.
Back on Billing Plans, the plan's SaaS Creator column now shows Configured with the Pod's name under it.
Step 6: Add the plan to a pricing table
Clients can only choose the plan once it's on a pricing table. Signup links for your own buttons come from pricing tables too. On the success screen, click Add it to a pricing table. You can also skip this with Done and add the plan later from the Pricing Tables tab.
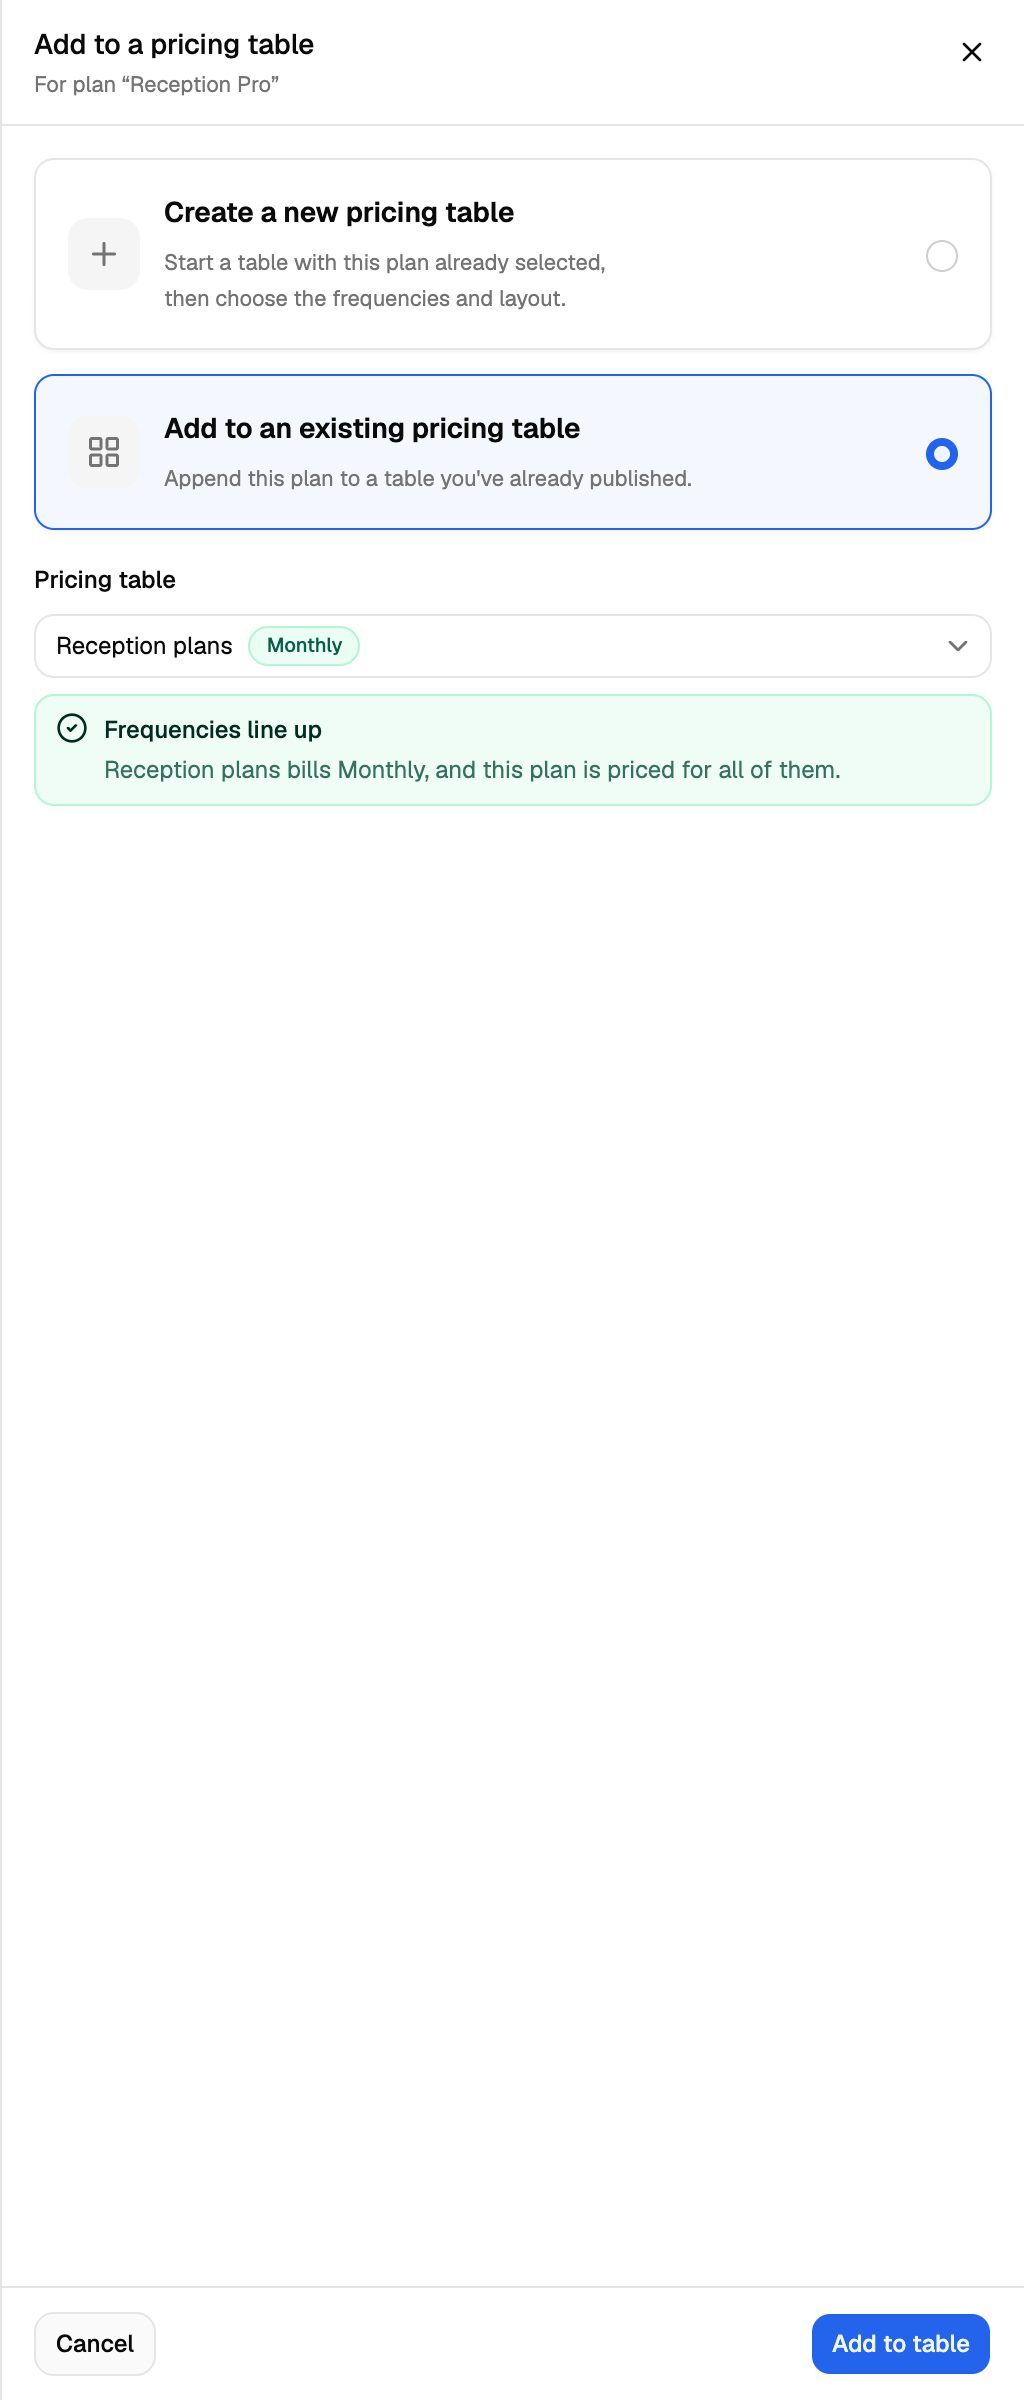
In the Add to a pricing table sheet, choose one:
- Create a new pricing table: click Continue. The pricing table editor opens with this plan already selected, and with billing frequencies that match the prices the plan has. See Build and Embed a Pricing Table.
- Add to an existing pricing table: pick a table under Pricing table, then click Add to table. Tables that already include the plan are marked Already added and can't be picked.
Each table in the list shows the billing frequencies it displays. Green badges are frequencies this plan has a price for. Amber badges are frequencies it doesn't. Once you pick a table, a message tells you how well they match:
When you add the plan to an existing table, you'll see Plan added to the pricing table and the table's preview opens so you can check it.
Change or turn off self-serve signup
To change the Pod or the access, click Edit next to Configured in the plan's SaaS Creator column (or View access config in the plan's details), make your changes and save.
Changes apply to clients who sign up after you save. Clients who already signed up keep the Pod and access their workspace started with. To change an existing client, edit their workspace instead.
To stop self-serve signup for a plan, turn off Enable SaaS Creator and save. You'll see SaaS Creator turned off. The plan's prices and trial settings stay as they are, and existing clients on the plan aren't affected.
Remove the plan from your pricing tables first. Turning off SaaS Creator doesn't take the plan off tables it's already on, and afterwards it no longer appears in the pricing table editor, so you can't remove it there. Edit each table that shows the plan, click the X (Remove plan) on the plan's card, save the table, then turn SaaS Creator off.
Troubleshooting
The SaaS Creator column shows "-" and there's no Set up button.
The SaaS Creator column shows "-" and there's no Set up button.
The plan doesn't use the Subscription + Usage Packs model. A plan's model can't be changed after it's created, so create a new plan with that model. See Create a Billing Plan.
Turning on Enable SaaS Creator opens an upgrade prompt.
Turning on Enable SaaS Creator opens an upgrade prompt.
Your VoiceAIWrapper plan doesn't include SaaS Creator. Upgrade to a plan that includes it. See A Feature Is Locked or Asks Me to Upgrade.
Saving shows "VoiceAI pod is required".
Saving shows "VoiceAI pod is required".
Enable SaaS Creator is on but no Pod is chosen. Pick one in VoiceAI Pod, then save again.
The Client access section says "Pick a VoiceAI pod above to configure client access."
The Client access section says "Pick a VoiceAI pod above to configure client access."
The access options depend on the Pod's engine, so they only appear once you've chosen a Pod.
After creating a plan, Enable self signup says "Couldn't open SaaS Creator for this plan."
After creating a plan, Enable self signup says "Couldn't open SaaS Creator for this plan."
Close the sheet and open the setup from the plan's SaaS Creator column on the Billing Plans tab instead.
Related articles
Was this helpful?
Still need help? Share an idea