Add a Widget to a VAW Native Agent
Give a VAW Native agent its own voice and chat widget from the agent's Deploy tab, customise it, test it and remove it when you no longer need it.
Written By voiceaiwrapper
Last updated 26 days ago
The fastest way to put a VAW Native agent on a site is to give it its own widget. You add it from the agent's page with one click, and it always answers with that agent, for both voice and chat. You don't need a campaign.
Adding the widget takes one click. You then customise it, test it and paste its embed code into your site.
Applies to: agents in a VAW Native Pod (an engine or provider connection). For Vapi, Retell AI and ElevenLabs, see Create an Inbound Widget Campaign.
Available on: plans that include Web widget. Without it, the Widget sub-tab shows Feature Locked with an Upgrade button.
Before you start
- A VAW Native agent you've tested. See Test Your Agent: Web Calls, Phone Calls and Chat.
- AI credits. Every widget call and chat, including your own tests, uses AI credits.
Step 1: Add the widget
- In the sidebar, open Agents and click your agent.
- Open the Deploy tab. The Widget sub-tab is selected by default.
- If the agent has no widget yet, you'll see Add {agent} to your website with the agent's name. Click Add now.
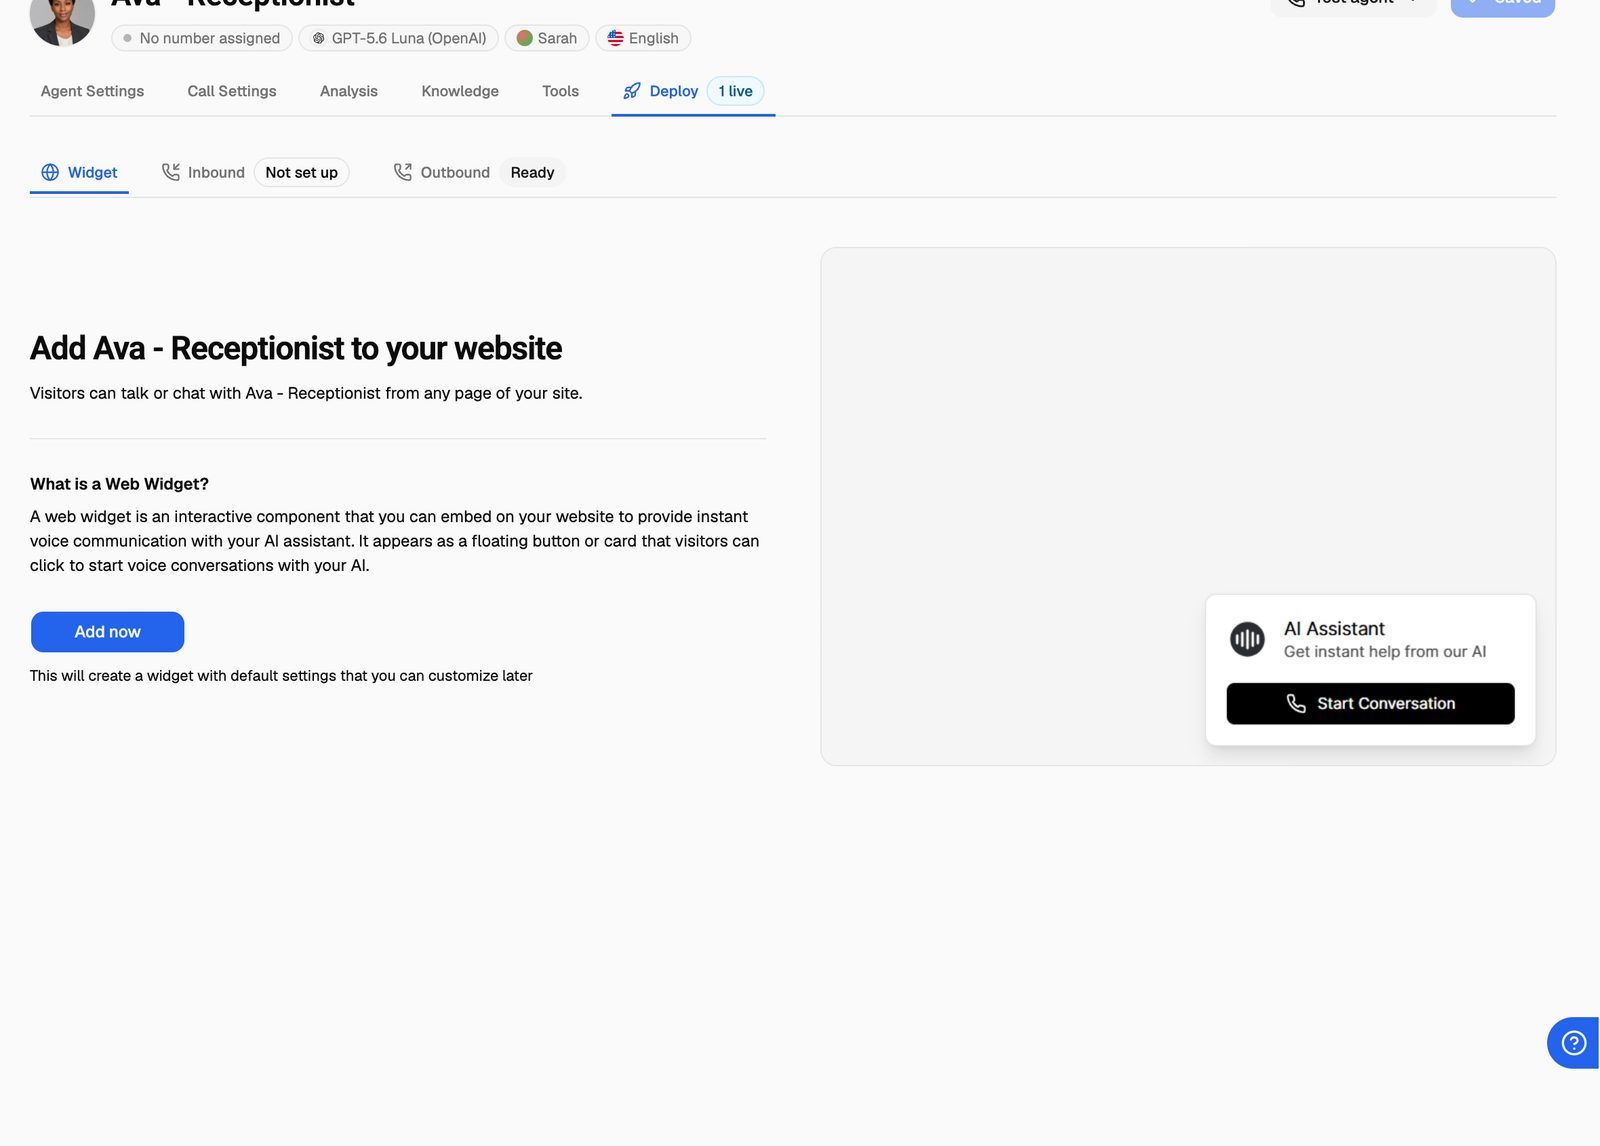
The builder opens with the new widget. It starts with these settings:
If you built the agent in the onboarding wizard as an agent that answers calls, it may already have a widget. In that case the builder opens straight away and Add now doesn't appear.
Step 2: Customise the widget
The builder is the same one campaigns use, with one difference: there's no Agents section. The widget always uses this agent for voice and for chat.
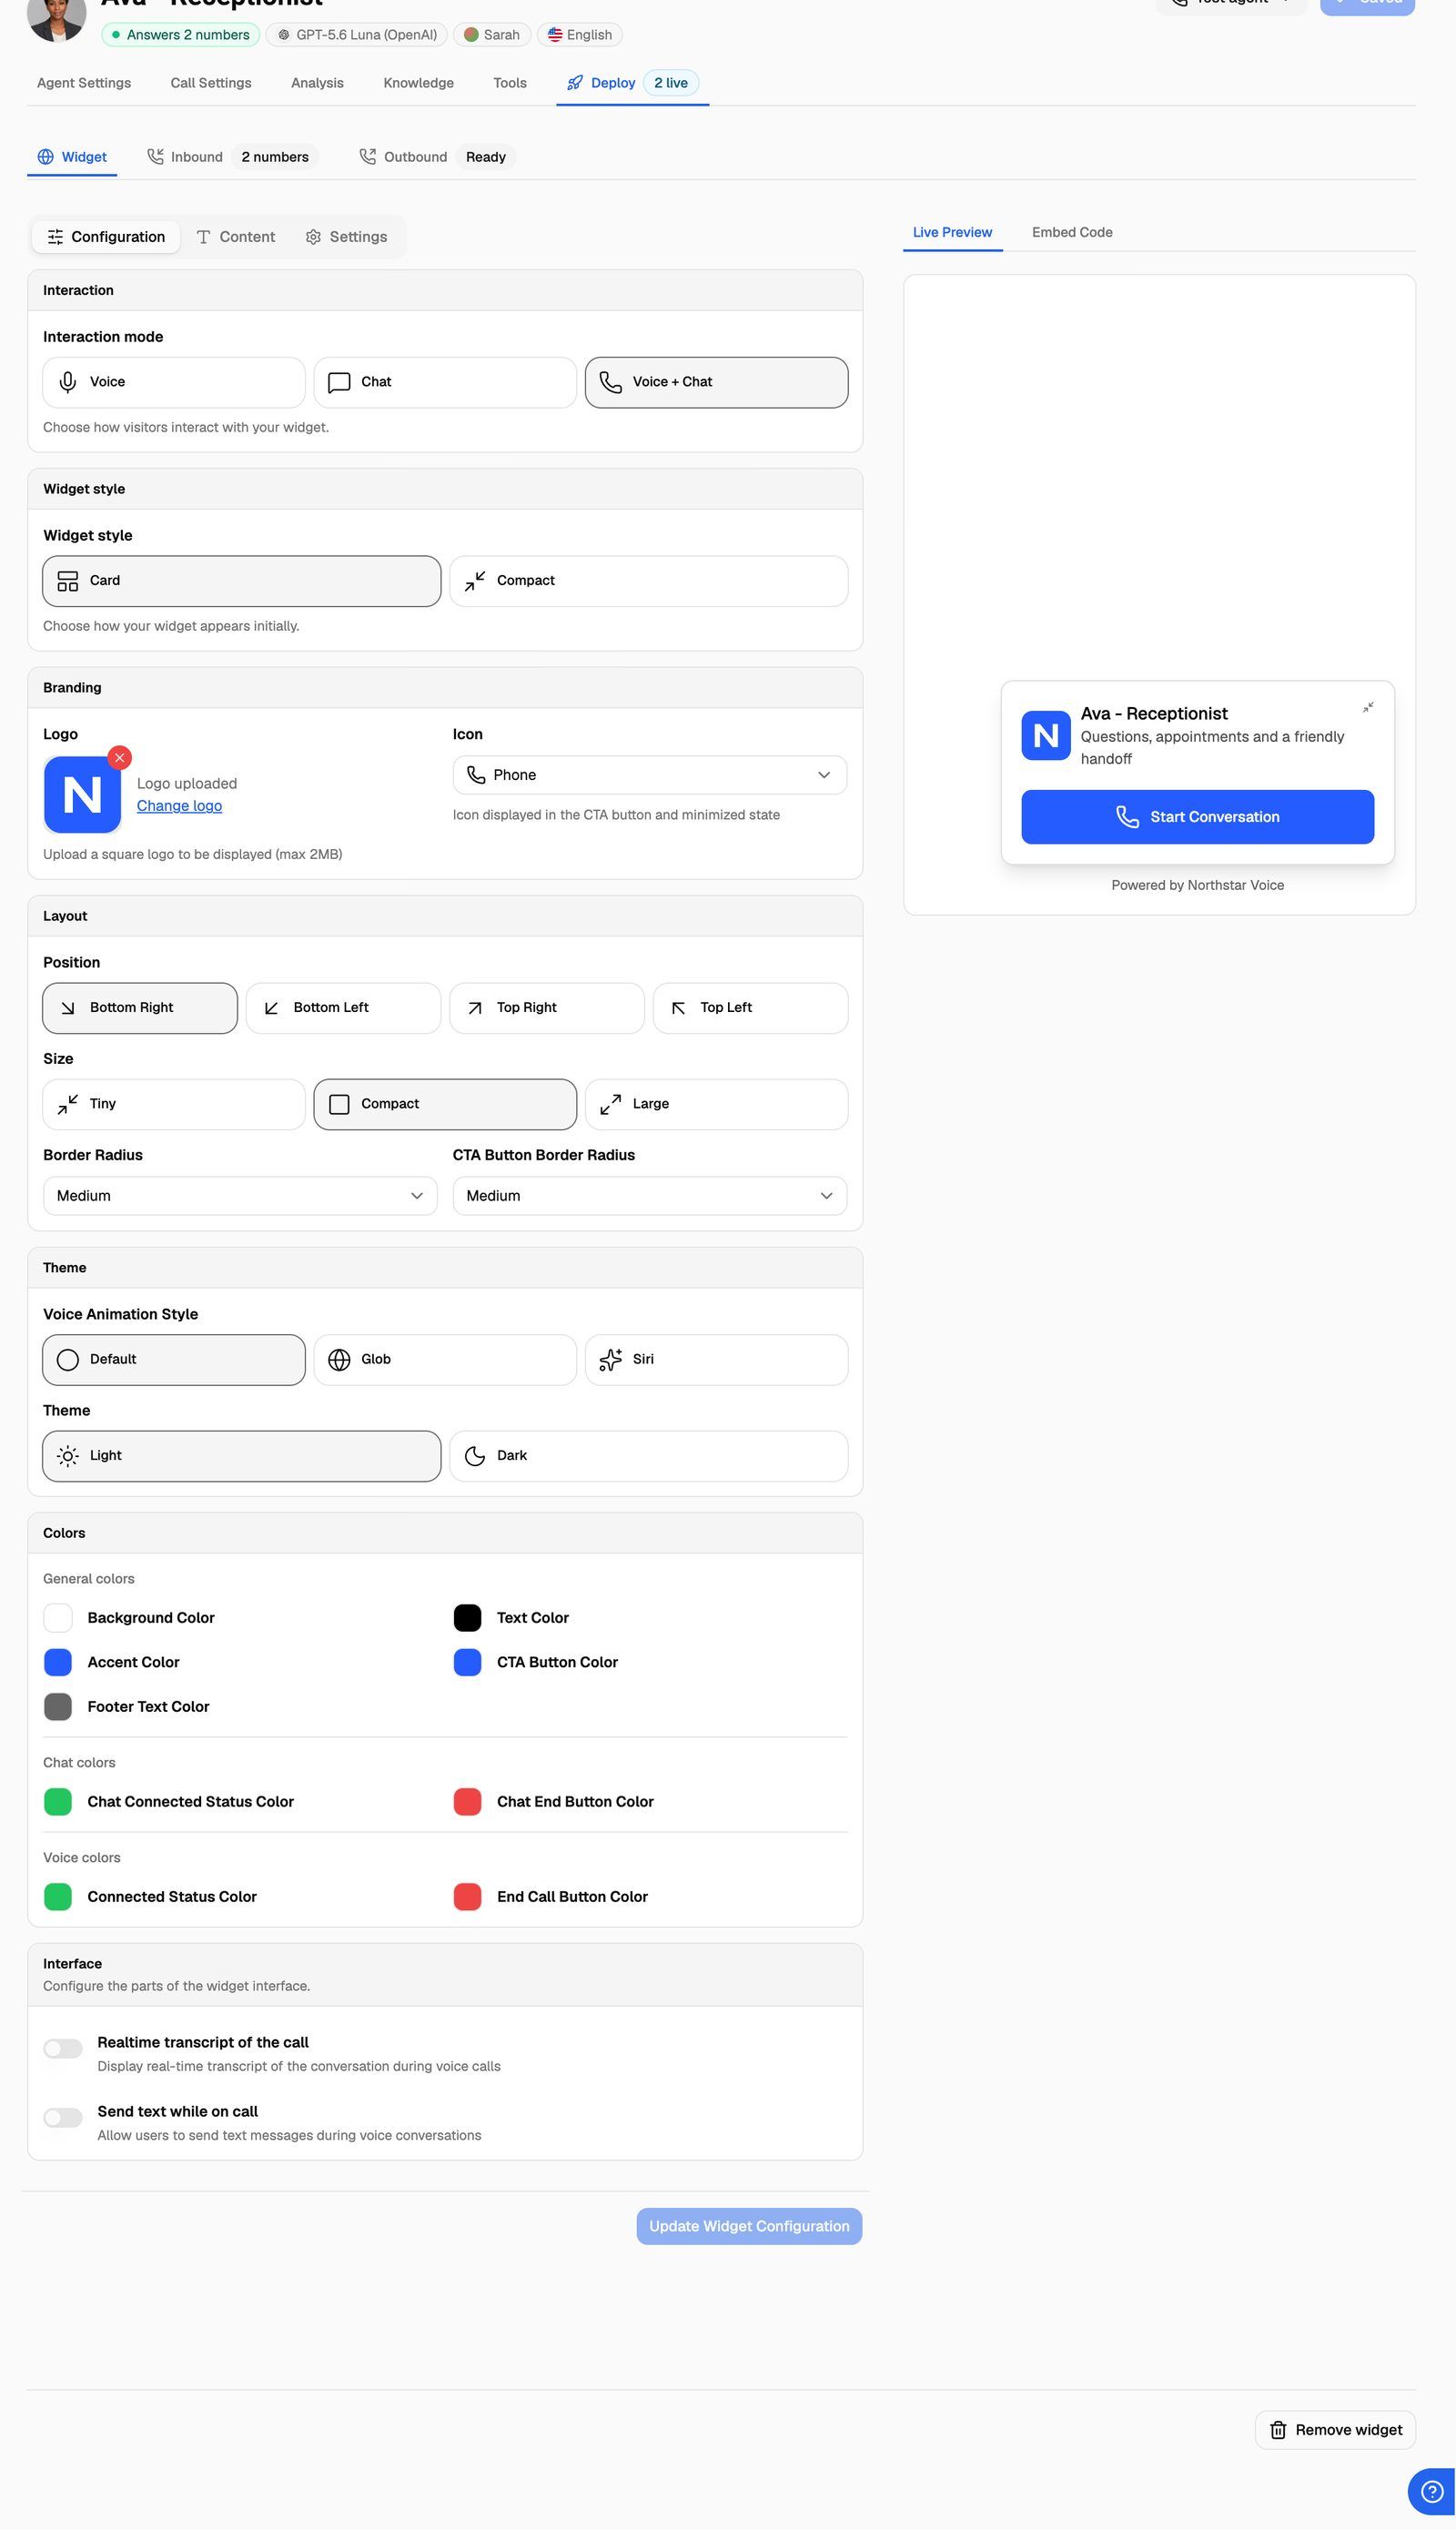
The builder has three tabs:
- Configuration: interaction mode, style, logo, position, size, theme and colours. See Customize Layout, Branding and Colors.
- Content: every text the widget shows, from the title to the button labels. See Voice and Chat Settings.
- Settings: visitor limits, page variables, chat timeout, microphone messages and consent. See Visitor Limits and Page Variables and Add Consent and Legal Notices.
When you're done, click Update Widget Configuration. The button stays greyed out until you change something. You'll see Widget updated successfully once it's saved.
Step 3: Test it in Live Preview
The Live Preview panel next to the builder shows the widget as visitors will see it. You can start a real call or chat with your agent from it.
A preview conversation is a real conversation. It uses AI credits and shows Preview in the Source column of Call Logs and Chat Logs, so you can tell it apart from visitors' conversations, which show Widget.
Step 4: Add it to your site
Open the Embed Code tab next to Live Preview, click Copy, and paste the code into your site. See Embed the Widget on a Website.
Remove the widget
Click Remove widget at the bottom of the builder. In the Remove {agent}'s widget? dialog, click Remove to confirm.
Removing the widget deletes it and all its settings. This can't be undone. Any site using its embed code stops showing it. Its past conversations stay in the logs. If you add a widget again later, it's a new widget with new embed code, so you'll need to paste the code into your site again.
Frequently asked questions
Can one agent have more than one widget?
Can one agent have more than one widget?
No. An agent has one widget at most. If you need a second widget for the same agent, for example with different branding for another site, create an Inbound Widget campaign and pick the agent there. See Create an Inbound Widget Campaign.
Clicking Add now shows "Couldn't add the widget." or "Website widgets aren't available."
Clicking Add now shows "Couldn't add the widget." or "Website widgets aren't available."
"Website widgets aren't available." means your plan doesn't include Web widget. See Plan Limits and Upgrade Prompts. For "Couldn't add the widget.", reload the page and try again. If the message says the agent already has a widget, reload the page to see it.
The agent is assigned to a client. Who pays for its widget conversations?
The agent is assigned to a client. Who pays for its widget conversations?
Widget calls, including calls you start from Live Preview, are billed to the client the agent is assigned to, the same way as the agent's other calls outside a campaign. If that client is paused for billing, the widget stops taking new conversations, and visitors see that the assistant isn't available. See Ways to Bill Your Clients: Stripe or External Billing.
Related articles
Was this helpful?
Still need help? Share an idea