Create a Campaign with the Campaign Wizard
Every step of the Campaign Creation Wizard: type, agent and number, schedule, dialing rules, webhooks and email, success metric, and review.
Written By voiceaiwrapper
Last updated 26 days ago
The Campaign Creation Wizard sets up a campaign in one pass: the type, the agent and number, when it runs, how it dials, where results go, and what counts as success. It checks each step before you move on, so you finish with a campaign that's ready to start.
Creating a campaign doesn't place or answer any calls. Every new campaign starts as a draft, and nothing happens until you start it from the campaign page.
Before you start
You'll need:
- A Pod (an engine or provider connection) with at least one agent. On Vapi, Retell AI, ElevenLabs, Bolna and Ultravox, agents come from your provider account. On VAW Native, create one on the Pod's Agents page first.
- A phone number in the same Pod for phone campaigns, or a phone number pool if you want to rotate numbers. Inbound Widget campaigns don't need a number.
- Room in your plan's campaign limit. See Campaign Types: Outbound Phone, Inbound Phone and Inbound Widget.
Which steps you'll see
The wizard only shows the steps that apply to your campaign type and engine. The counter at the top ("Step 2 of 7") tells you how many there are.
Use Next to move forward and Back to return to an earlier step. Your entries are kept while the wizard is open. Closing the wizard discards them.
Step 1: Choose the campaign type
- Open your Pod and select Campaigns in the sidebar.
- Click Add Campaign. The Campaign Creation Wizard opens.
- Pick Outbound Phone, Inbound Phone or Inbound Widget, then click Next.
A greyed-out card isn't available on this engine or plan, and its badge says why. For what each type does, see Campaign Types: Outbound Phone, Inbound Phone and Inbound Widget.
For an Inbound Widget campaign, the next step only asks for a Campaign Name, then goes straight to Review. You build the widget on the campaign's Web Widget tab after creating it. See Create an Inbound Widget Campaign.
Step 2: General settings
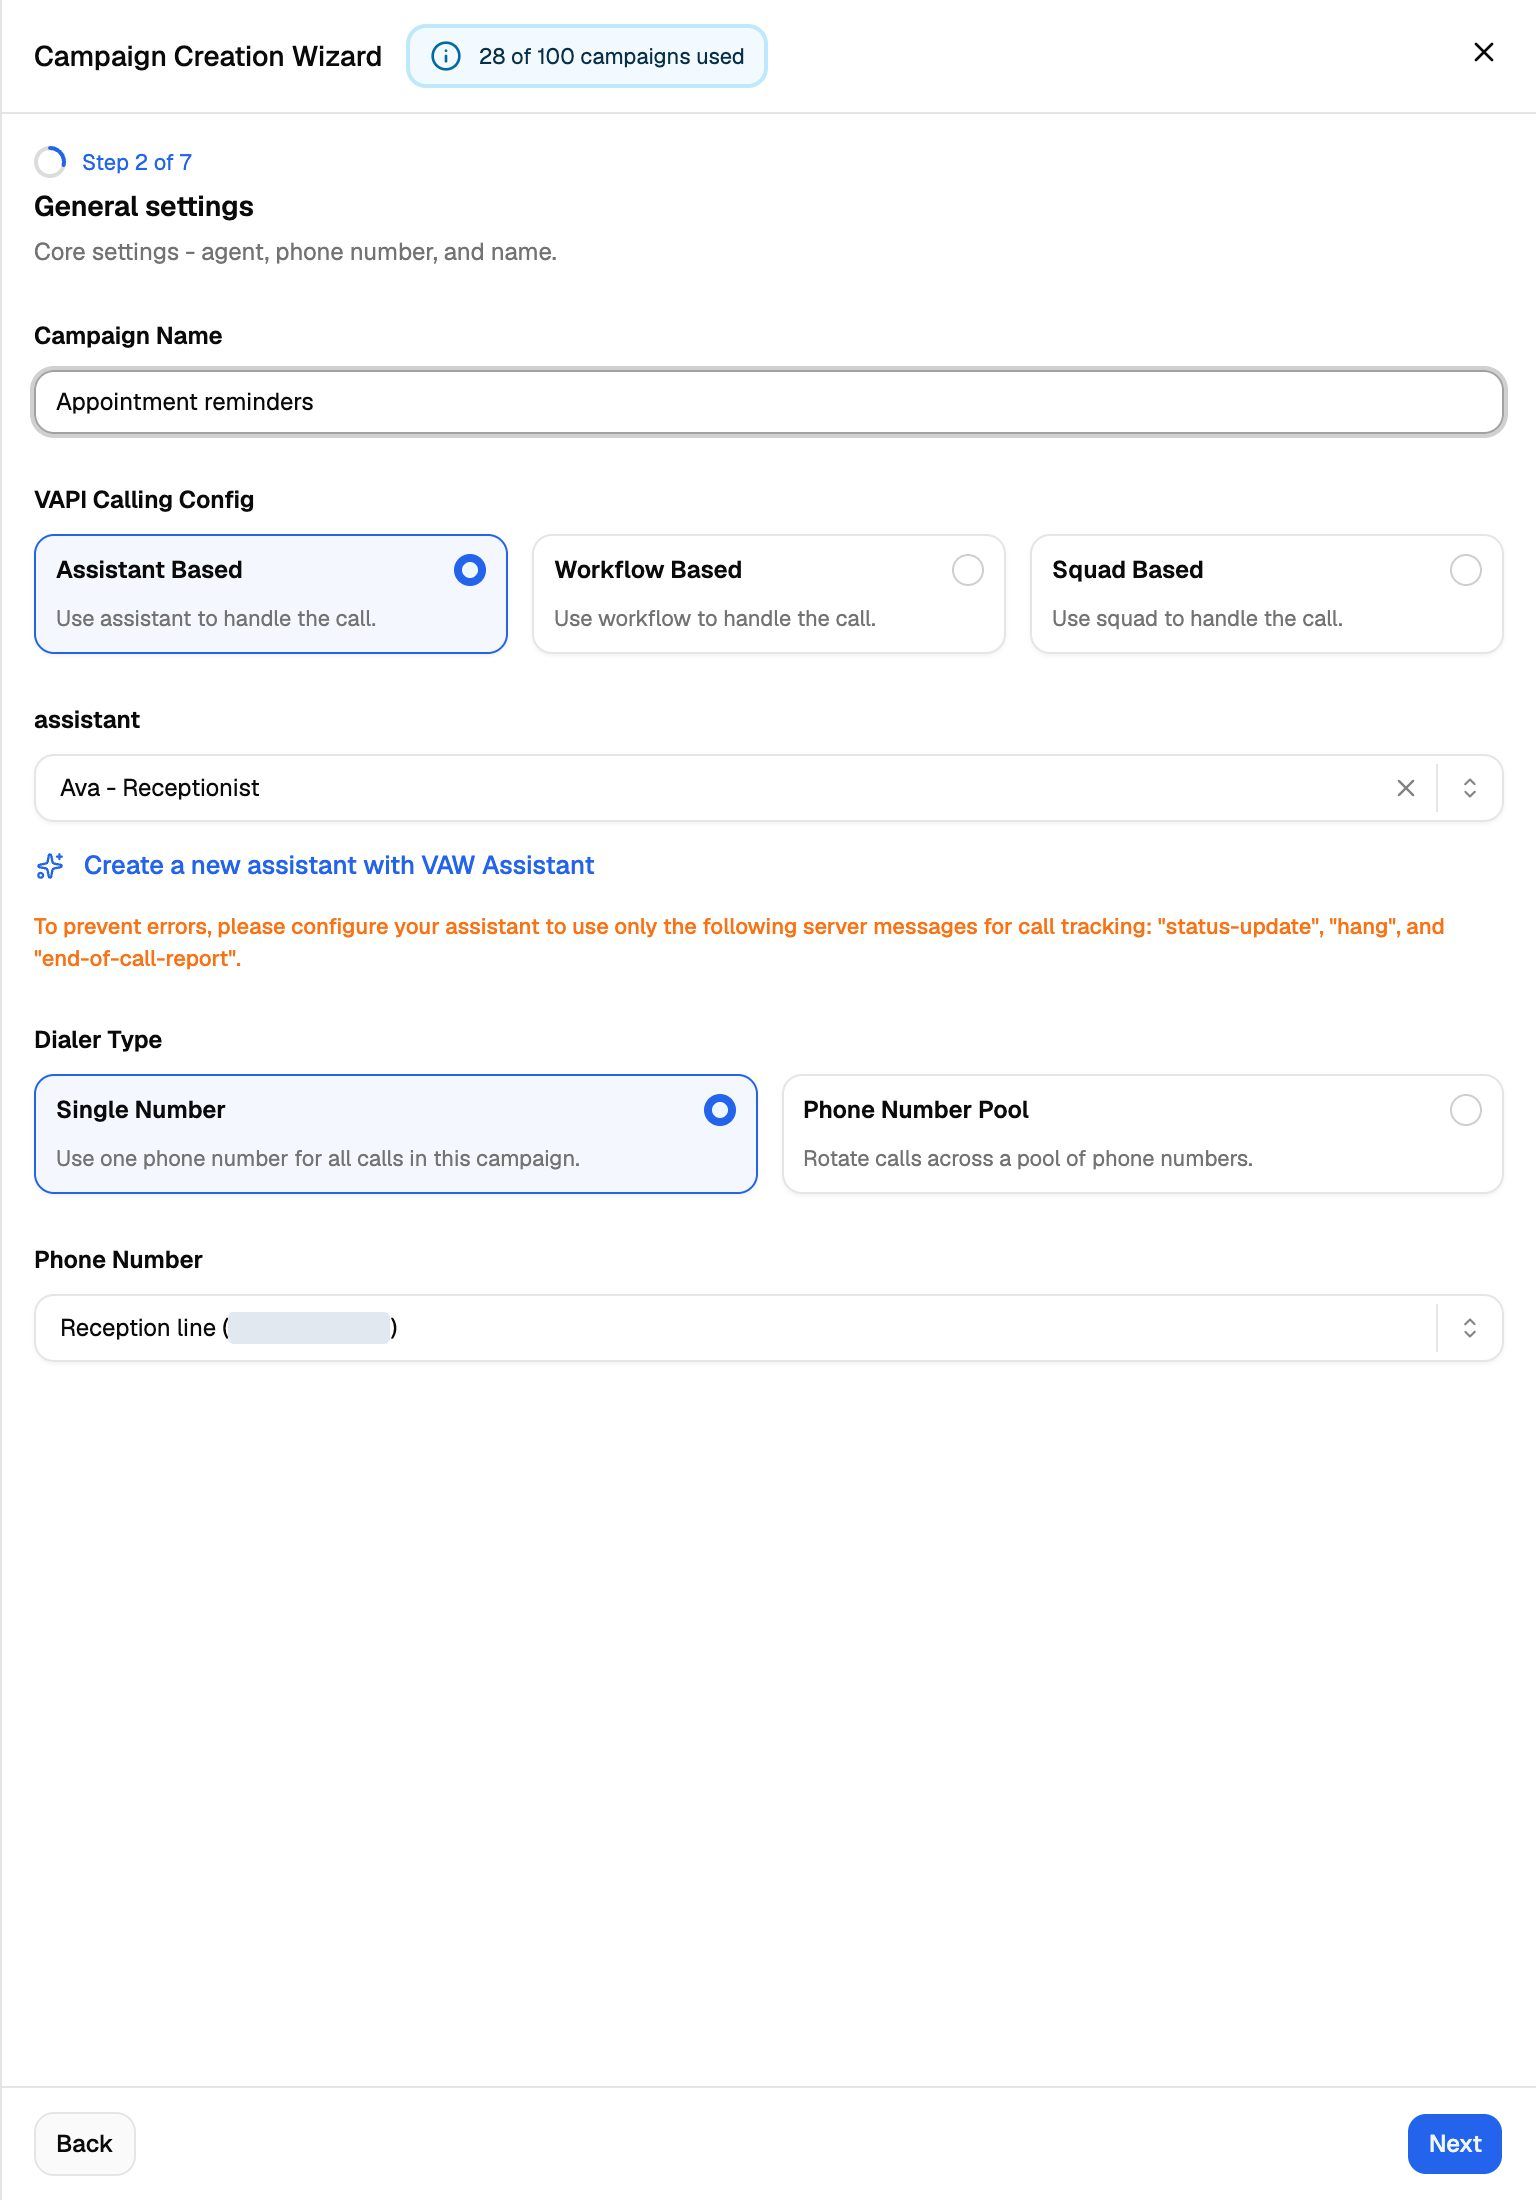
This step sets the campaign's name, agent and number.
- Campaign Name: a name you'll recognise, such as "Sales outbound Q2". Up to 40 characters.
- On Vapi only, VAPI Calling Config: choose Assistant Based, Workflow Based or Squad Based. The next field changes to Assistant, Workflow or Squad to match. See Vapi Workflows and Squads.
- Agent (or Assistant, Workflow or Squad on Vapi): pick who handles the calls. On Vapi, Retell AI and ElevenLabs, if your plan includes VAW Assistant, you'll also see Create a new agent with VAW Assistant (on Vapi, Create a new assistant with VAW Assistant) under the field, and a Pod with no agents shows a prompt to build one instead of an empty list. See Build a Provider Agent with VAW Assistant.
- Dialer Type: choose how calls use your numbers.
- Single Number: "Use one phone number for all calls in this campaign."
- Phone Number Pool: "Rotate calls across a pool of phone numbers." This needs a plan that includes Phone number pools. Without it, the card shows Upgrade required. See Rotate Caller IDs with Phone Number Pools.
- Phone Number or Phone Number Pool: pick the number, or the pool. The pool list shows how many numbers each pool holds.
- Click Next.
What's different on each engine:
The webhook-sync check
On provider Pods, VoiceAIWrapper can only track calls if your provider sends call events to it. When the agent or number you picked isn't set up for that yet, a yellow warning appears under the field:
- Sync our webhook to use this {agent}. Shown for an agent, assistant or workflow, with the URL it currently uses on the Current: line.
- {number} assistant(s) need webhook sync. Shown for a Vapi squad, with the assistants that aren't synced.
- Sync our webhook and remove default destination to use this phone number. Shown for Vapi and Retell AI numbers.
- Sync our webhook to use this phone number. Shown for other providers' numbers.
Click Sync now (or Sync All for a squad). You'll see Webhook updated successfully, and the warning goes away.
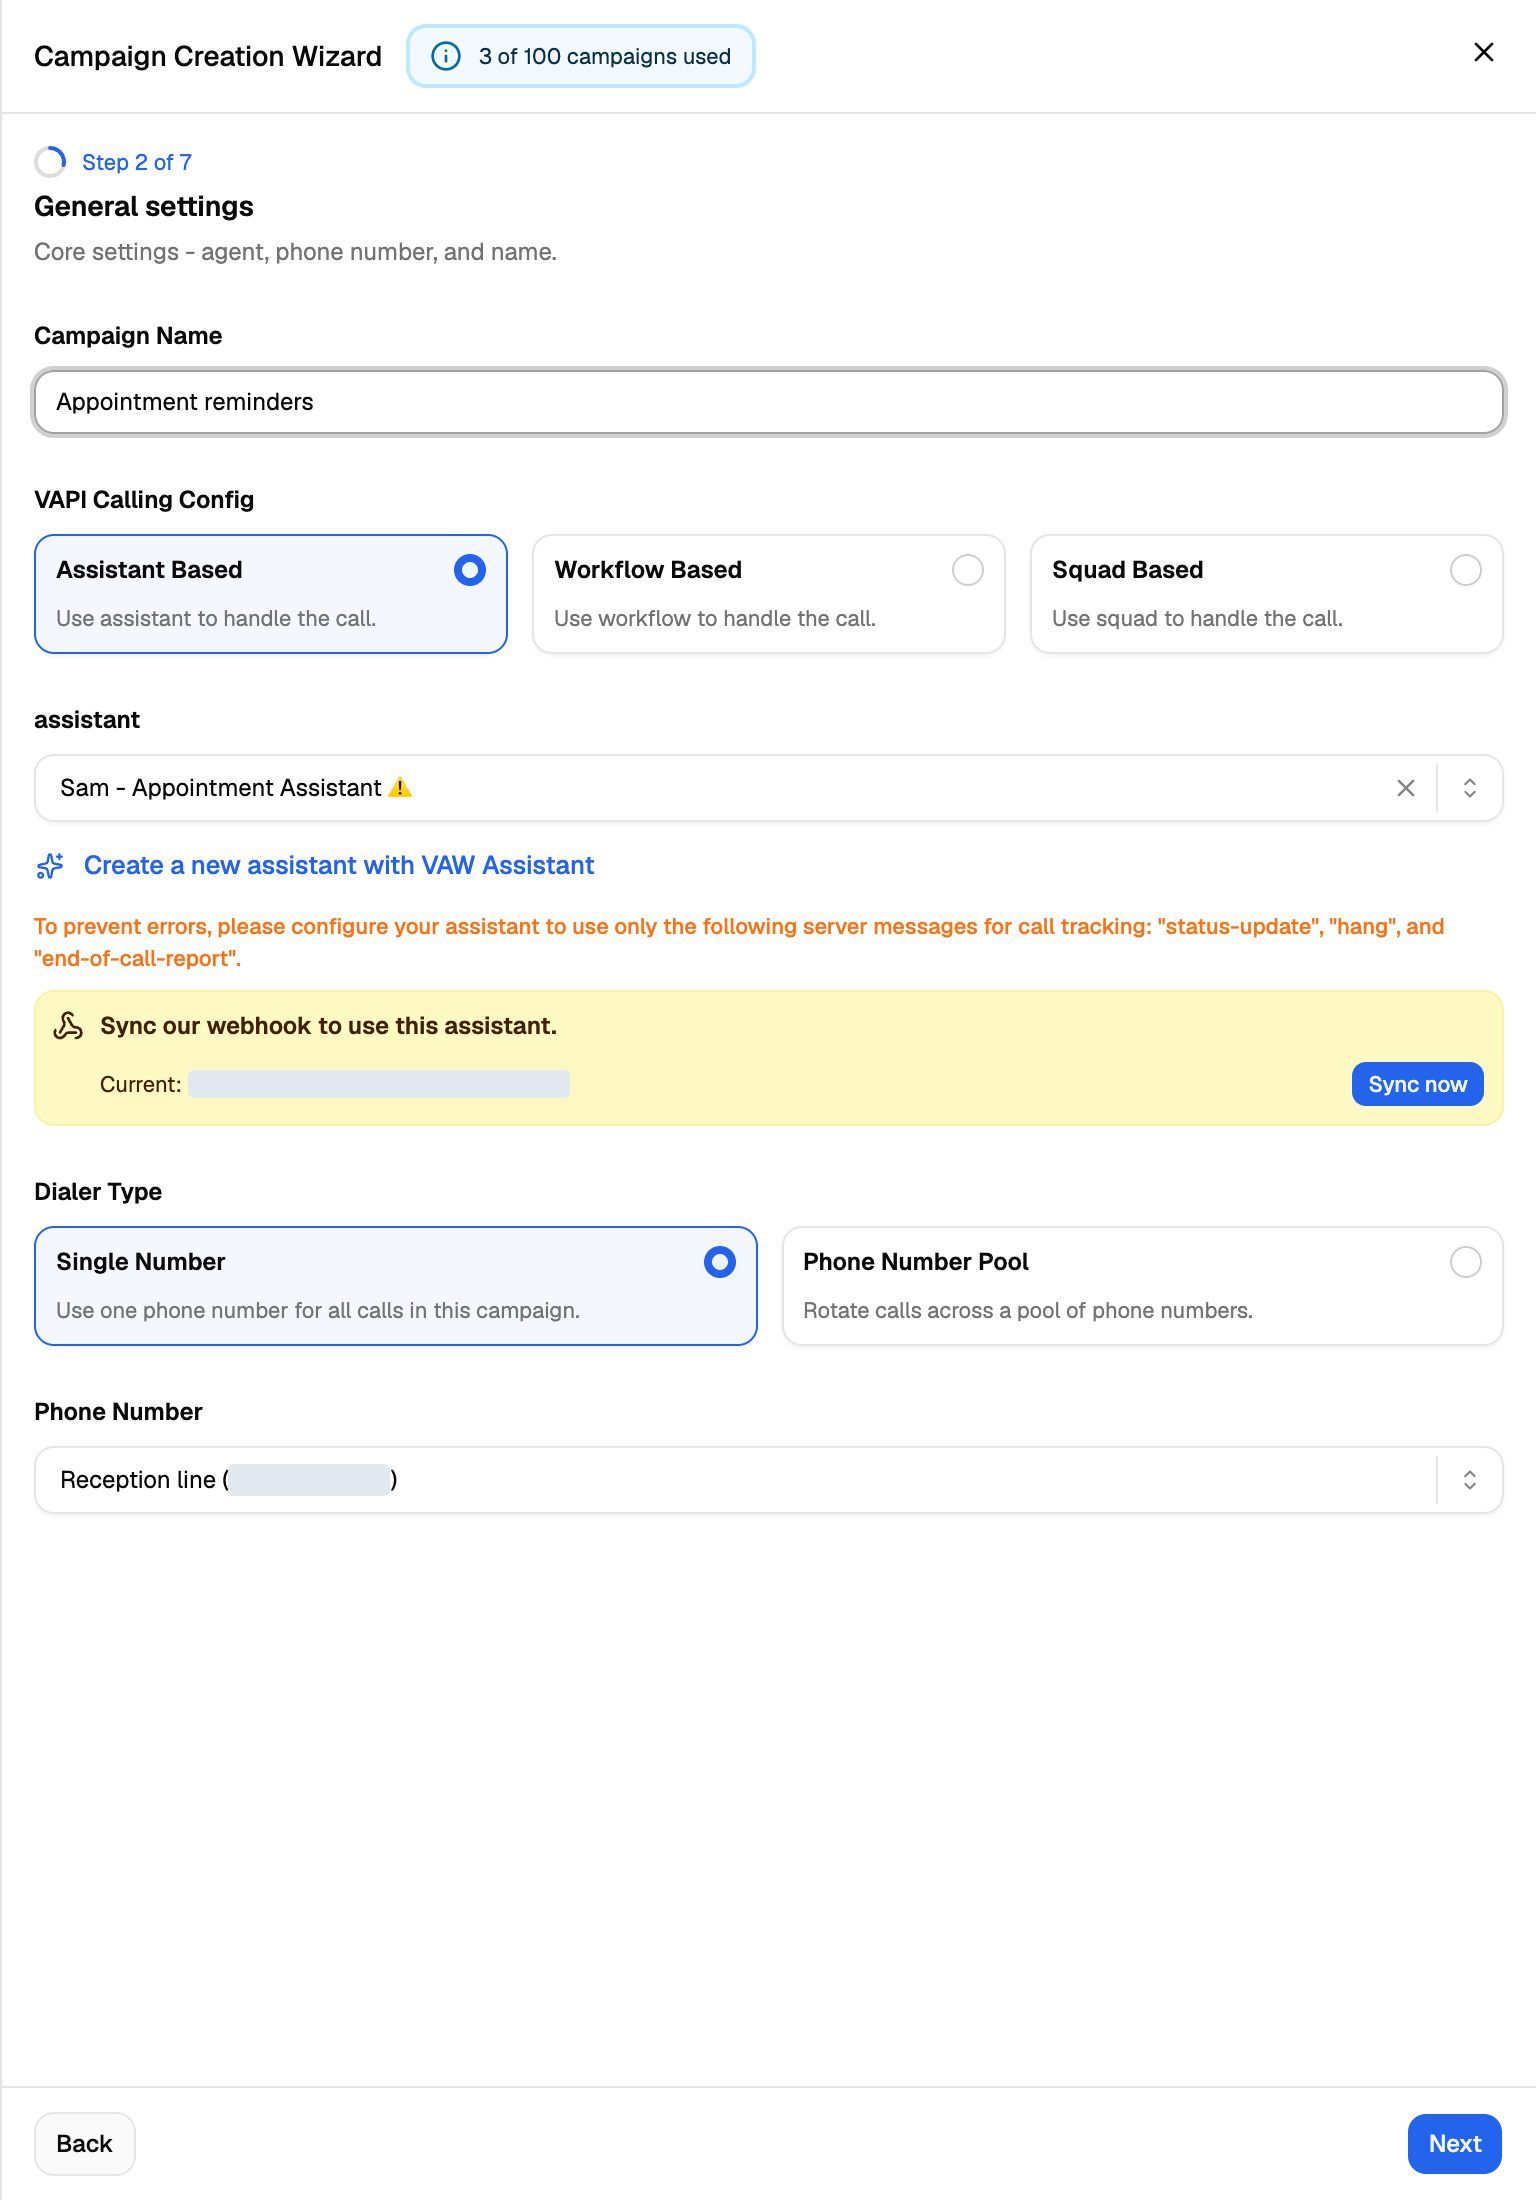
You can't continue until the agent and the number are both synced. If you click Next first, you'll see "Sync webhooks on the selected agent and phone number before continuing."
Syncing changes settings in your provider account. It replaces the webhook URL on that agent or number. On Vapi and Retell AI, syncing a number also removes its default destination (the agent it was assigned to), so inbound calls go through VoiceAIWrapper. If the agent was sending events to your own tool, copy the Current: URL first and paste it into Post-call event webhook in Step 5.
VAW Native has nothing to sync. For more, see Sync Webhooks So VoiceAIWrapper Can Track Calls.
Step 3: Schedule
Set when the campaign may call or answer:
The window and days are read in the campaign's time zone, not yours. For how each field works and what the calling status messages mean, see Set the Schedule and Calling Window.
Step 4: Outbound behaviour (outbound only)
Set how often each lead is tried:
Consider voicemail as answered isn't shown on VAW Native, which doesn't detect voicemail yet, or on Ultravox. On ElevenLabs, voicemail is only detected when Voicemail detection is on in the ElevenLabs agent. See Outbound Dialing Rules: Attempts, Redial Wait, Voicemail and Priority.
Step 5: Webhooks & email
Everything on this step is optional. Leave a field empty to skip it.
The post-call and pre-call webhooks each have a Custom headers area. Click Add header to send a header such as Authorization with every request. The Leads event webhook has no custom headers.
You can't use a VoiceAIWrapper webhook address here. If you try, you'll see "Looks like you are trying to add our webhook URL. This can create an infinite loop. Please use a different URL."
Call summary emails also need SendGrid connected and the Inbound Call Summary template turned on in your client emails. The wizard doesn't check this, but the campaign's Settings tab warns you if either is missing. See Call Summary Emails.
Add the Leads event webhook on the campaign's Settings tab after you create the campaign, and check it was saved.
For what each webhook sends and how to answer it, see Which Webhook Should I Use?.
Step 6: Success metric
Turn on Enable Call Success Metric to count some calls as successful in the campaign's Overview and Analytics tabs.
- On VAW Native, this switch is all you set: "Count a call as successful when its post-call analysis says the call succeeded."
- On other engines, add Success Values: type a value and press Enter for each one. A call counts as successful when the outcome your provider reports matches one of them. Vapi also asks for the VAPI Structured Output Name, and Bolna for the Bolna Extraction Key.
With the metric on, you need at least one success value ("At least one success value is required"). See Define a Campaign Success Metric.
Step 7: Review and create
The Review step lists everything you chose, grouped by step. Click the pencil icon next to a section to jump back and change it.
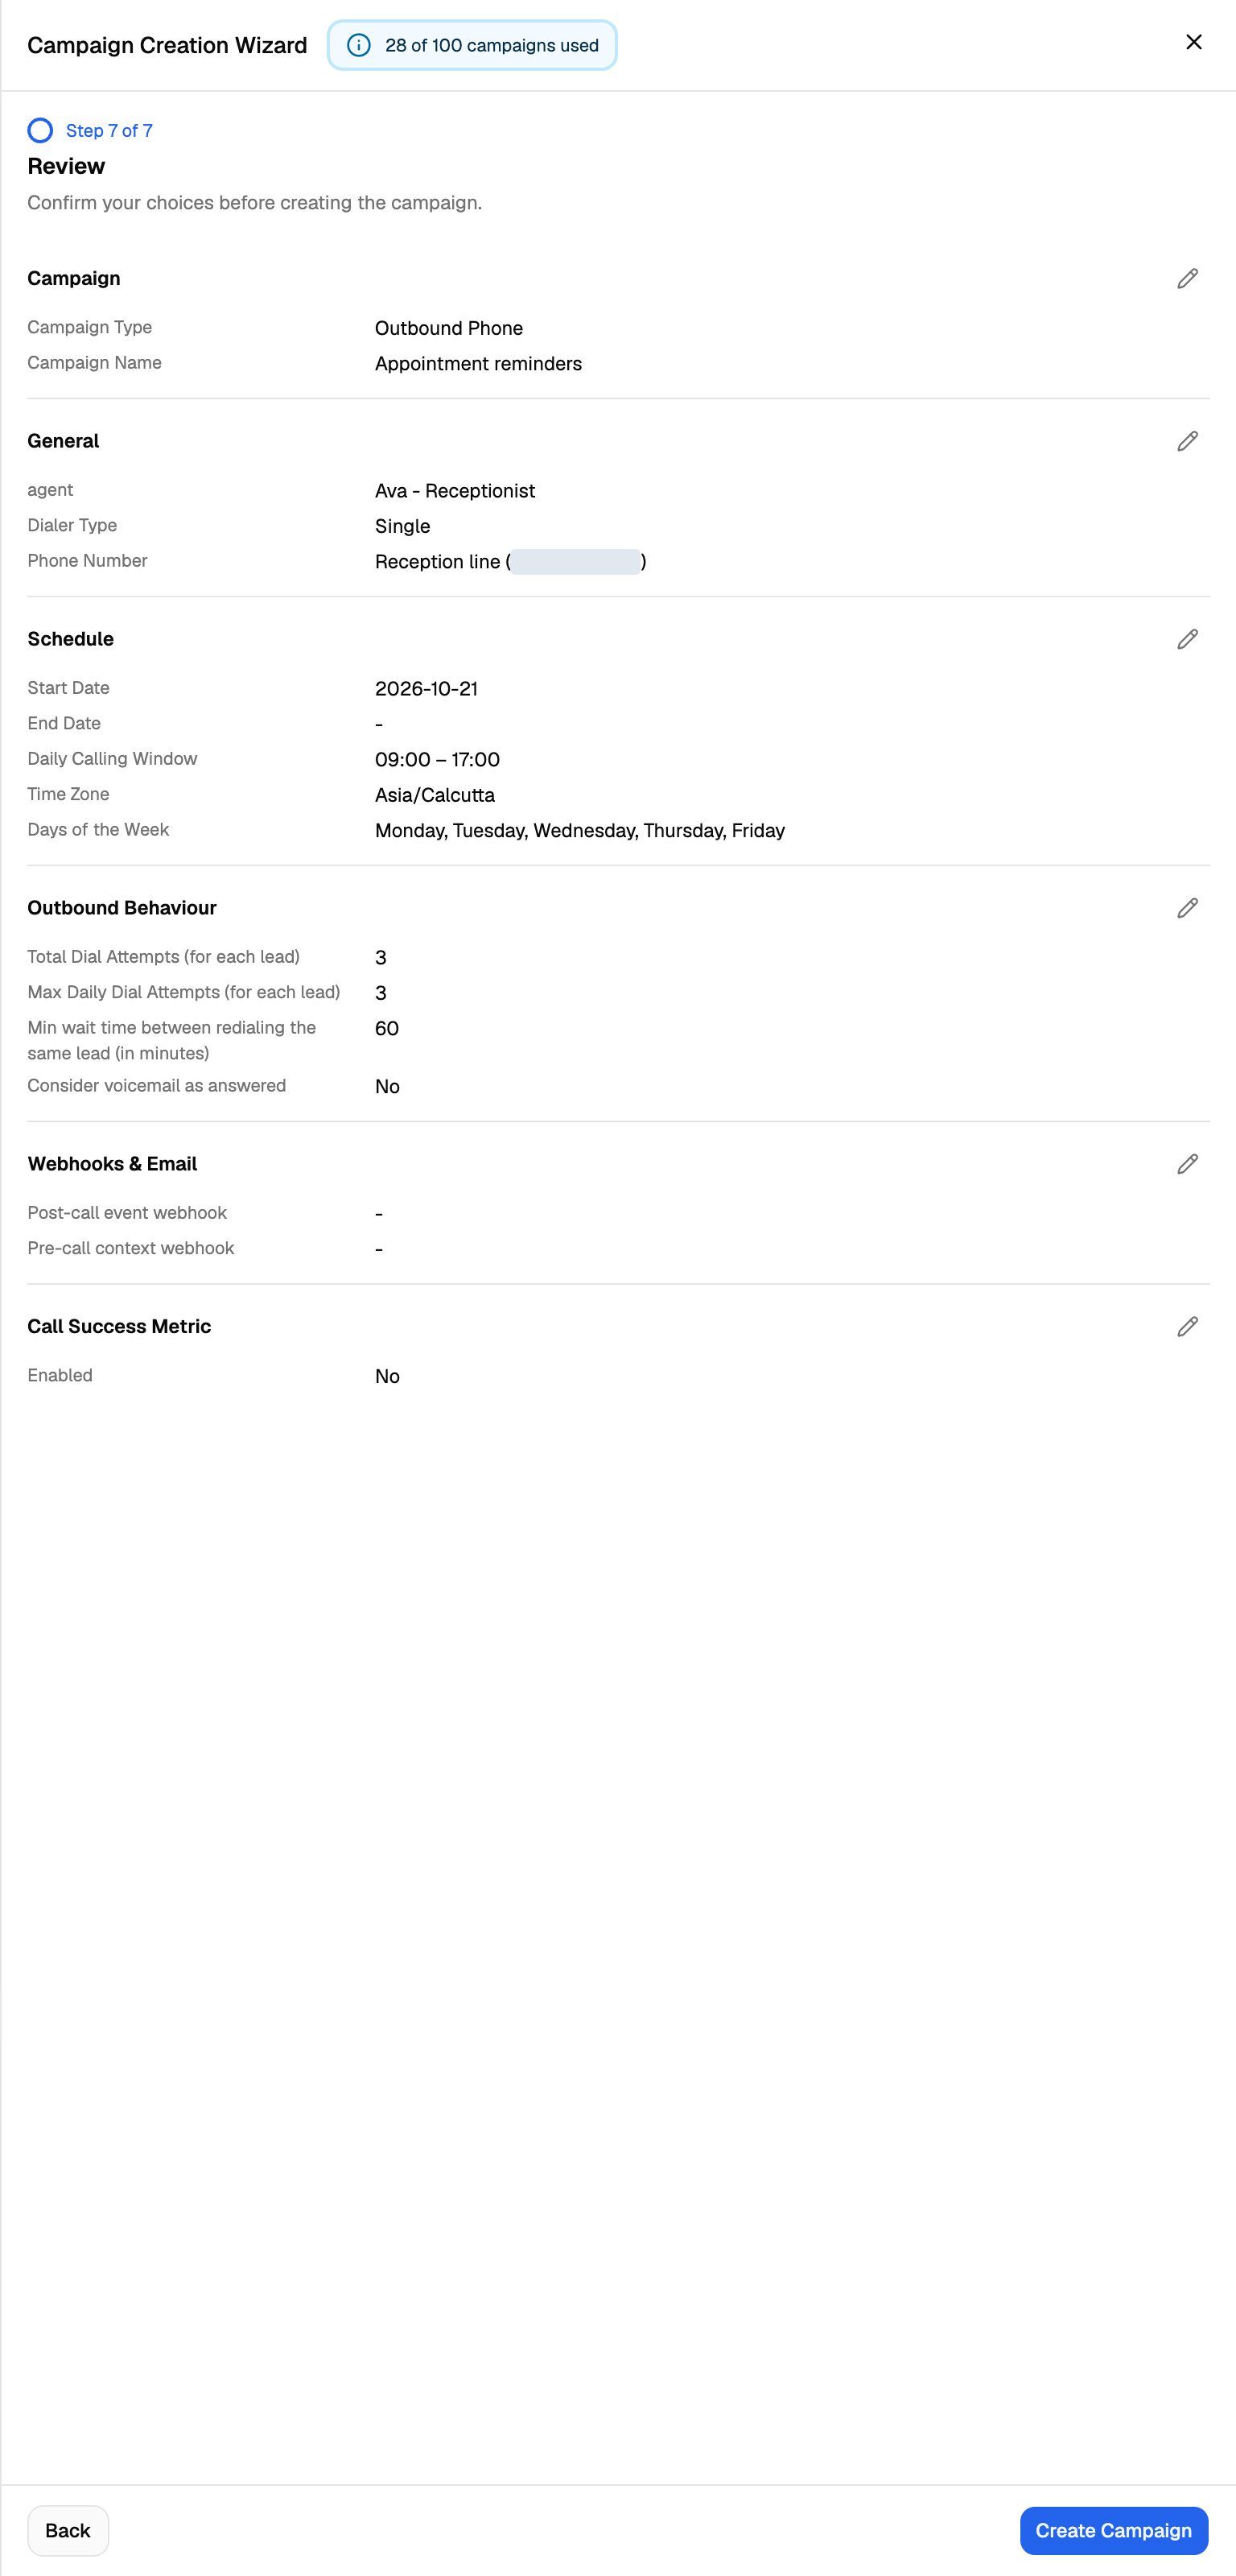
Click Create Campaign. The wizard checks every step again and jumps to the first one with a problem, if there is one. When the campaign is created, you'll see "Campaign created successfully", and the campaign opens on the tab you need next:
On ElevenLabs and Bolna, creating an Inbound Phone campaign assigns the agent to the number in your provider account straight away. The provider starts answering that number with this agent as soon as the campaign is created.
You can change any setting later on the campaign's Settings tab. Settings are locked while the campaign is scheduled or active, so move it back to draft or pause it first.
Troubleshooting
The Next button doesn't move me forward.
The Next button doesn't move me forward.
A field on the current step has a problem. Look for red text under the fields, such as "Name is required", "Assistant/Agent is required", "Phone number is required" or "Start Date is required". If a yellow sync warning is showing, click Sync now first.
The agent or number I want isn't in the list.
The agent or number I want isn't in the list.
The lists only show agents and numbers from the Pod you're in. On VAW Native, only Active numbers are listed, and a number another inbound campaign uses can't be picked. On other engines, check the agent or number exists in your provider account, then open the wizard again.
It says "End Time cannot be less than or equal to Start Time".
It says "End Time cannot be less than or equal to Start Time".
The To time must be later than the From time. A calling window can't run past midnight.
It says "End Date cannot be in the past".
It says "End Date cannot be in the past".
Pick a date after today, or leave End Date (Optional) empty. Today's date is usually rejected too, because the check compares the date with the current time.
Phone Number Pool shows "Upgrade required".
Phone Number Pool shows "Upgrade required".
Your plan doesn't include Phone number pools. Use Single Number, or upgrade. See Plan Limits and Upgrade Prompts.
Related articles
Was this helpful?
Still need help? Share an idea