Your First Agent: The Onboarding Wizard
Walk through the setup wizard every new account starts in: it reads your business site, asks six questions, builds a VAW Native agent and lets you test it.
Written By voiceaiwrapper
Last updated 26 days ago
When you create a new organization, VoiceAIWrapper starts you in a short setup wizard that builds your first agent with you. You give it your business site, it reads the site, asks you six quick questions, and builds a working agent on VAW Native. You then try the agent in your browser and choose how to put it to work.
Most people finish in a few minutes. Reading your site usually takes about a minute, and building the agent usually takes under a minute.
Applies to: VAW Native, the voice engine built into VoiceAIWrapper. The wizard builds in the VAW Native Pod every organization gets automatically. To build an agent in your own Vapi, Retell AI or ElevenLabs account, see Build a Provider Agent with VAW Assistant.
Reading your site and creating the agent in this wizard don't use AI credits. Test calls and chats do. New accounts get free AI credits to build and test agents. See How AI Credits Work.
Before you start
- Your business site address, such as
yourbusiness.com. The wizard needs one to start. If it can't read the site, you can type your business details in yourself instead. - A microphone, if you want to test with your voice. You can test by chat instead.
- Optional: a Cal.com account if you want the agent to book appointments.
The wizard opens automatically for the owner of a new organization. If you joined someone else's organization through an invitation, you skip it.
Step 1: Enter your business site
- On Now let's start creating your agent together, check the address in Website. It starts filled in with the domain of your email address. Change it if your business site is somewhere else.
- Click Read the site.
The wizard shows Reading the website while it fetches your pages and picks out your services, hours and contact details. This usually takes about a minute.
If you've built an agent from the same site before, you'll see "You built an agent from this site on {date}. Use those details and skip reading it again." Click Use saved details to skip the reading.
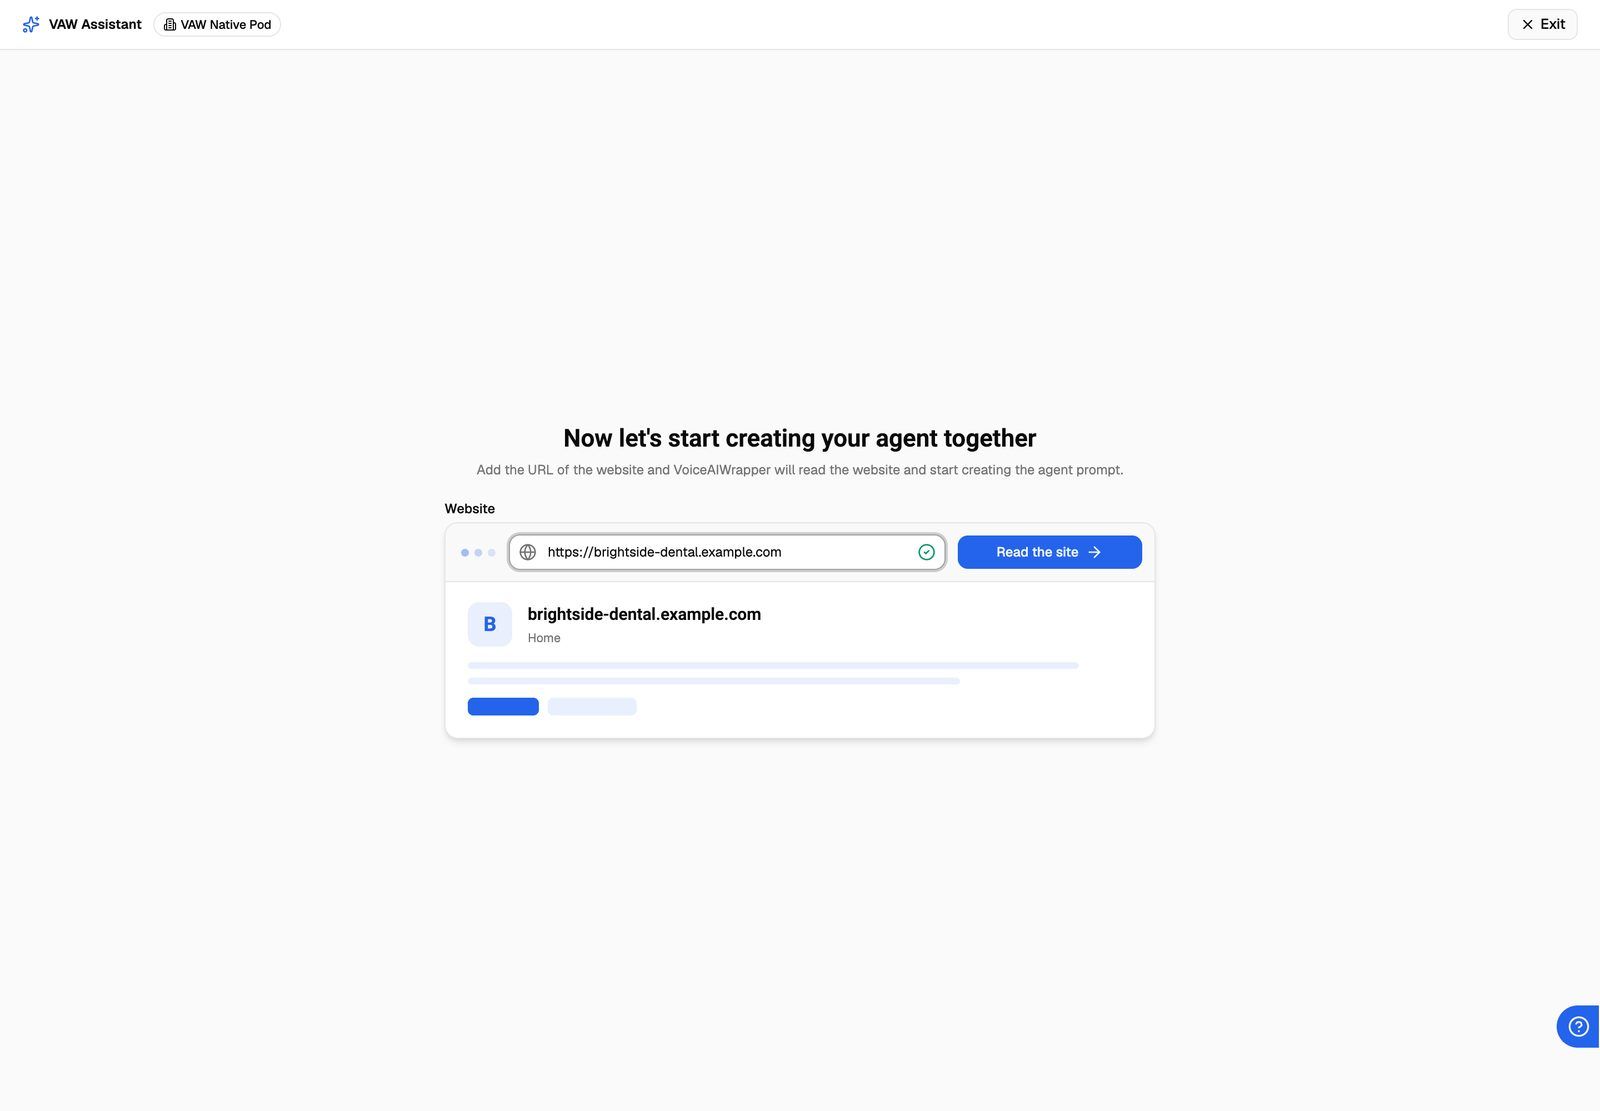
If the site can't be read, or reading takes too long, you'll see a message such as "We couldn't read {site}." Click enter the details yourself in the message to type your business details instead.
Step 2: Check what it found
Here is what I found summarizes what the wizard learned, starting with "I read N pages on {site} and here are my learnings." Open Pages I read to see which pages it used.
This is what your agent will tell callers, so check it:
-
Click See details to open Company overview and details.
-
Correct or fill in anything that's off:
-
Click Save details.
-
Click Proceed to the next step.
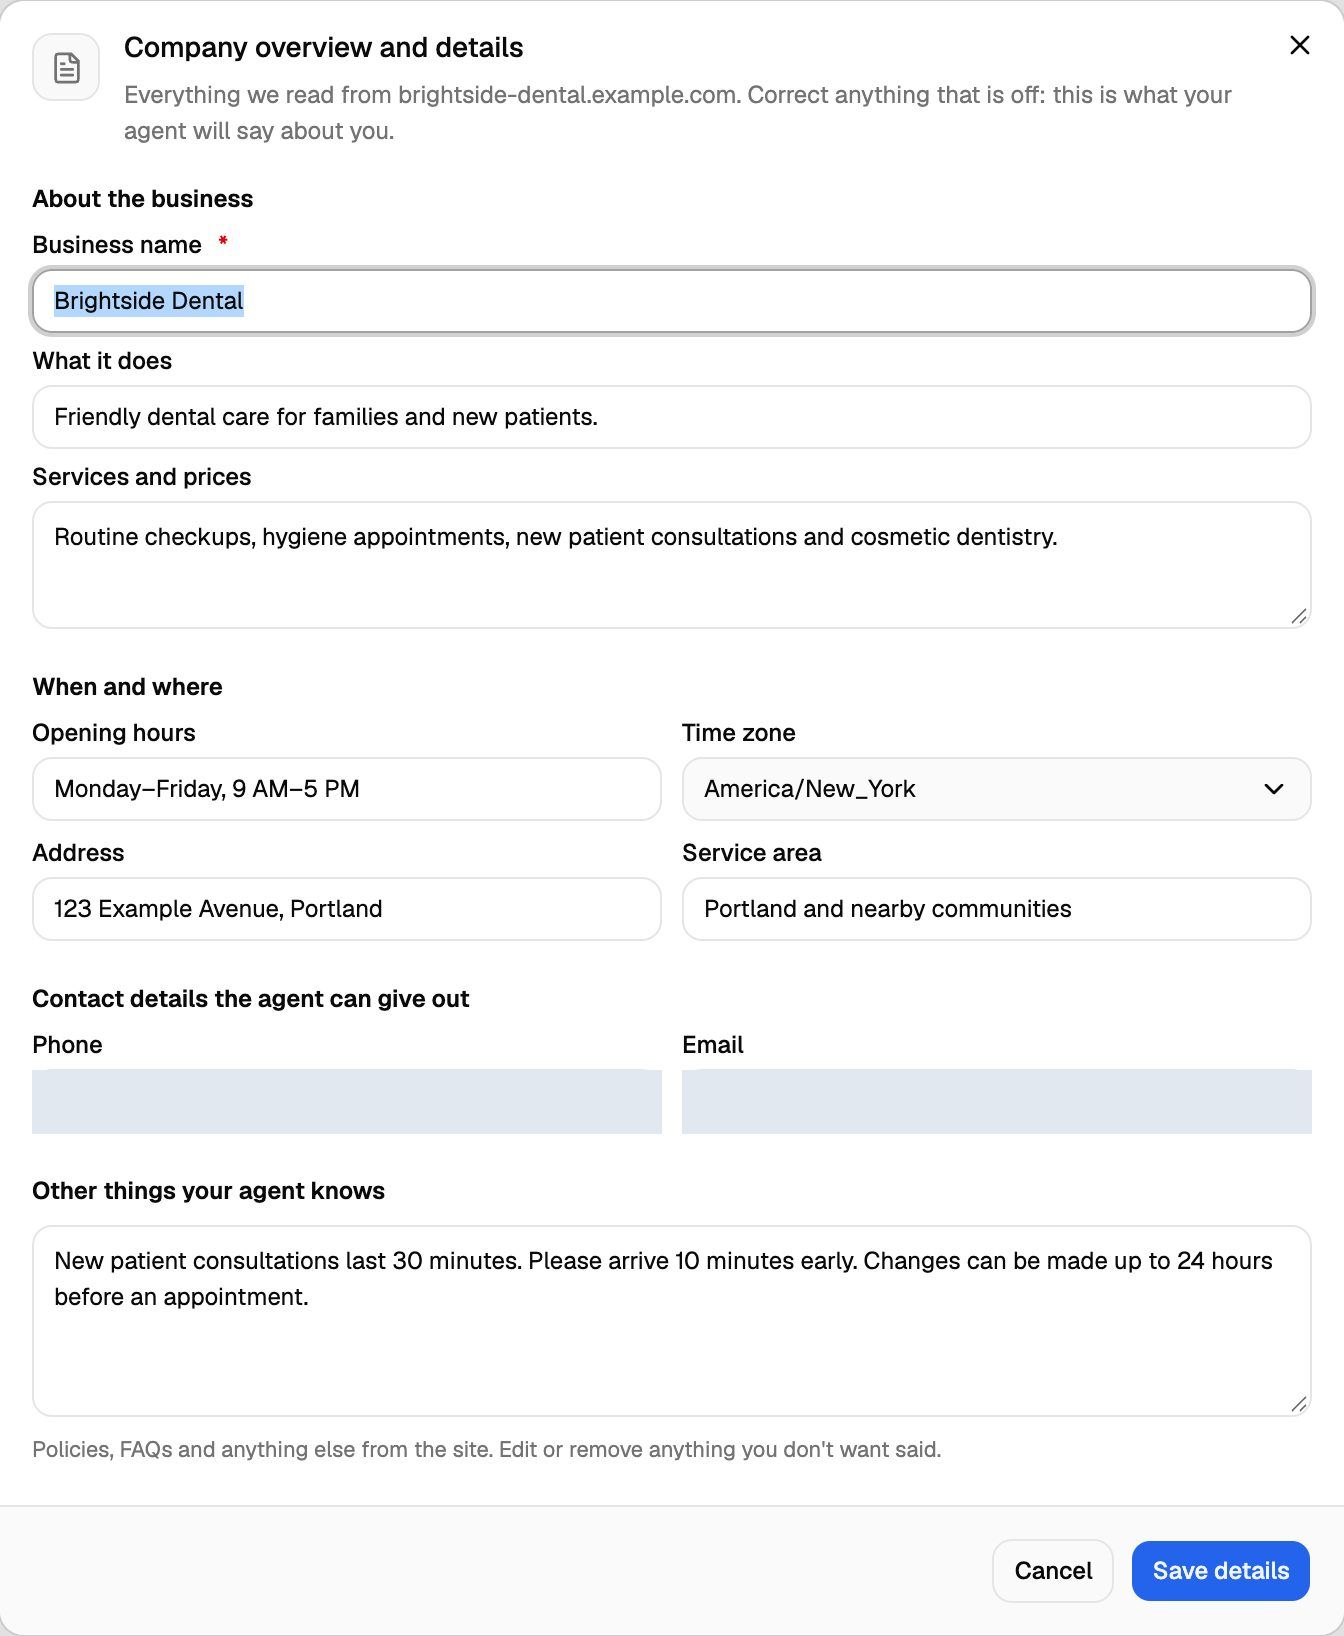
The Time zone is the agent's own time zone, used when callers ask whether you're open. You can change it on the agent later.
Step 3: Answer six questions
VAW Assistant now asks six questions in a chat.
After each answer, click Continue to the next step (on the last question, Done). To change an earlier answer, click it in the chat (it has a pencil icon) and click Save. If you switch between incoming and outgoing calls, you'll pick new jobs, because the two directions have different jobs.
When you've answered everything, you'll see "Great, this is all that was needed." Click Finish creating my agent.
Step 4: Add knowledge and tools (optional)
Give {name} more to work with lets you add knowledge and tools now. Both are optional, and you can add them later in the agent's settings.
Knowledge (what the agent can look up during a call):
- Your whole website: every page of your site.
- Upload files: PDF, Word, text, Markdown, HTML or CSV.
- Paste text: a policy, a price list, an FAQ.
- A knowledge base this Pod already has, if it has any.
Files take a minute or two to be ready, and a whole site a few minutes. The agent starts using them as soon as they're ready.
Tools (actions the agent can take):
- Book appointments with Cal.com: checks free times and books them in your calendar.
- Send details to your system, or look something up in it: a custom HTTP tool, tested before it's made.
- A tool this Pod already has, if it has any.
- Transfer calls and Send texts: these only show once the Pod has phone numbers, and they work on phone calls only, not on web or test calls.
Tools act on real systems. With Cal.com connected, test calls make real bookings in your calendar. A custom tool marked Creates or changes data changes data in your system when the agent uses it, including during tests.
Click Proceed to next step when you're done.
Step 5: Review and create the agent
Let's set up {name} shows everything the agent will be built from:
- What {name} will do on a call
- What {name} will find out
- Rules
- Knowledge sources and tools connected
- A call is considered successful when: the sentence used to judge whether a call went well.
Click Change or Add on any section to adjust it. You can also change the voice here.
Click Create my agent. Training your agent shows each part being set up, usually in under a minute. The wizard:
- Writes the agent's instructions and its greeting.
- Adds what it knows from your site, plus any knowledge you added.
- Sets up the details it finds out, so they're saved on every call log.
- Sets how calls are scored.
- Sets how calls end: the agent hangs up when the conversation is done, or after 30 seconds of silence.
- Creates a website widget for the agent, if it answers calls and your plan includes the web widget.
When it's ready, the wizard moves on to Meet {name} by itself. If a step finished with a warning (for example, a tool that couldn't be connected), the wizard stays on this screen so you can read it. Then click Meet {name} to continue.
Step 6: Meet and test your agent
Meet {name} shows how the agent introduces itself ("I answer calls for {business}." or "I make calls for {business}."), its opening line, and How {name} works: what it Collects, what counts as Success, what it Can do, what it Knows, and its full Instructions (click Read all).
Click Try {name} on a test call (or Hear {name} make a call for an agent that makes calls) to start the test. Or click Skip the test: the next screen then says {name} is ready and offers the same buttons as after a test (Step 7).
How the test works depends on the agent:
- An agent that answers calls: the test opens over a preview of your site, the way your visitors will see it. At the top, choose Voice call or Chat. If your site can be shown inside the preview, you can also switch between Your site and Simple preview (a plain page built from your details).
- If your plan includes the web widget, the agent's own widget sits in the corner. Open it and start talking or typing.
- If it doesn't, a Test {name} panel sits in the corner instead. Click Start test call to talk, or type a message to chat.
- An agent that makes calls: under Who is {name} calling?, fill in the details the agent uses (sample values are filled in for you), then click Start the call. You play the person being called, so say hello as if you'd just picked up.
All tests run in your browser. No real phone call is placed. You can also click Skip the test at the bottom of the test screen.
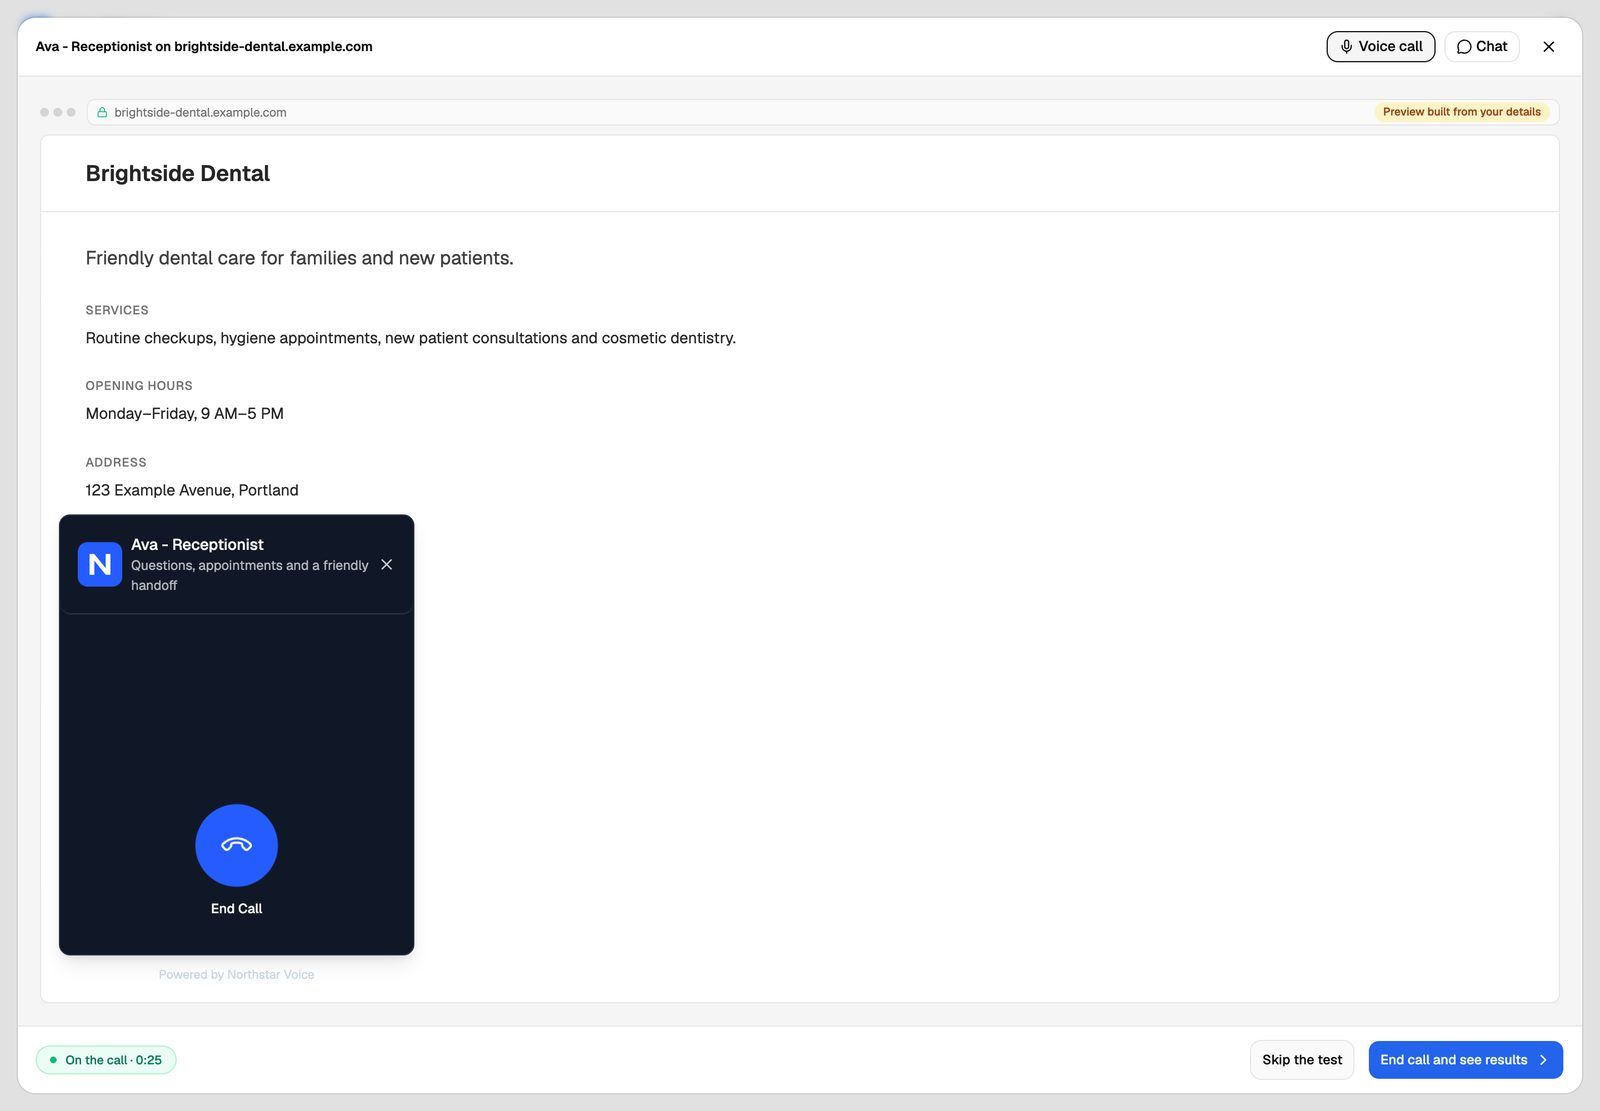
When you're done, click End call and see results (or End chat and see results).
Step 7: Read the results
The results screen tells you how the test went:
Below the heading you'll find:
- Goal: Goal met, Goal not met or Not judged.
- Collected: which details the agent found out, for example "2 of 3".
- Actions taken: tools the agent used, each marked Done or Failed.
- What happened: a summary, and the Full transcript.
The test stays in your logs either way. Click Try again to run another test (or Test {name} now if you skipped the test).
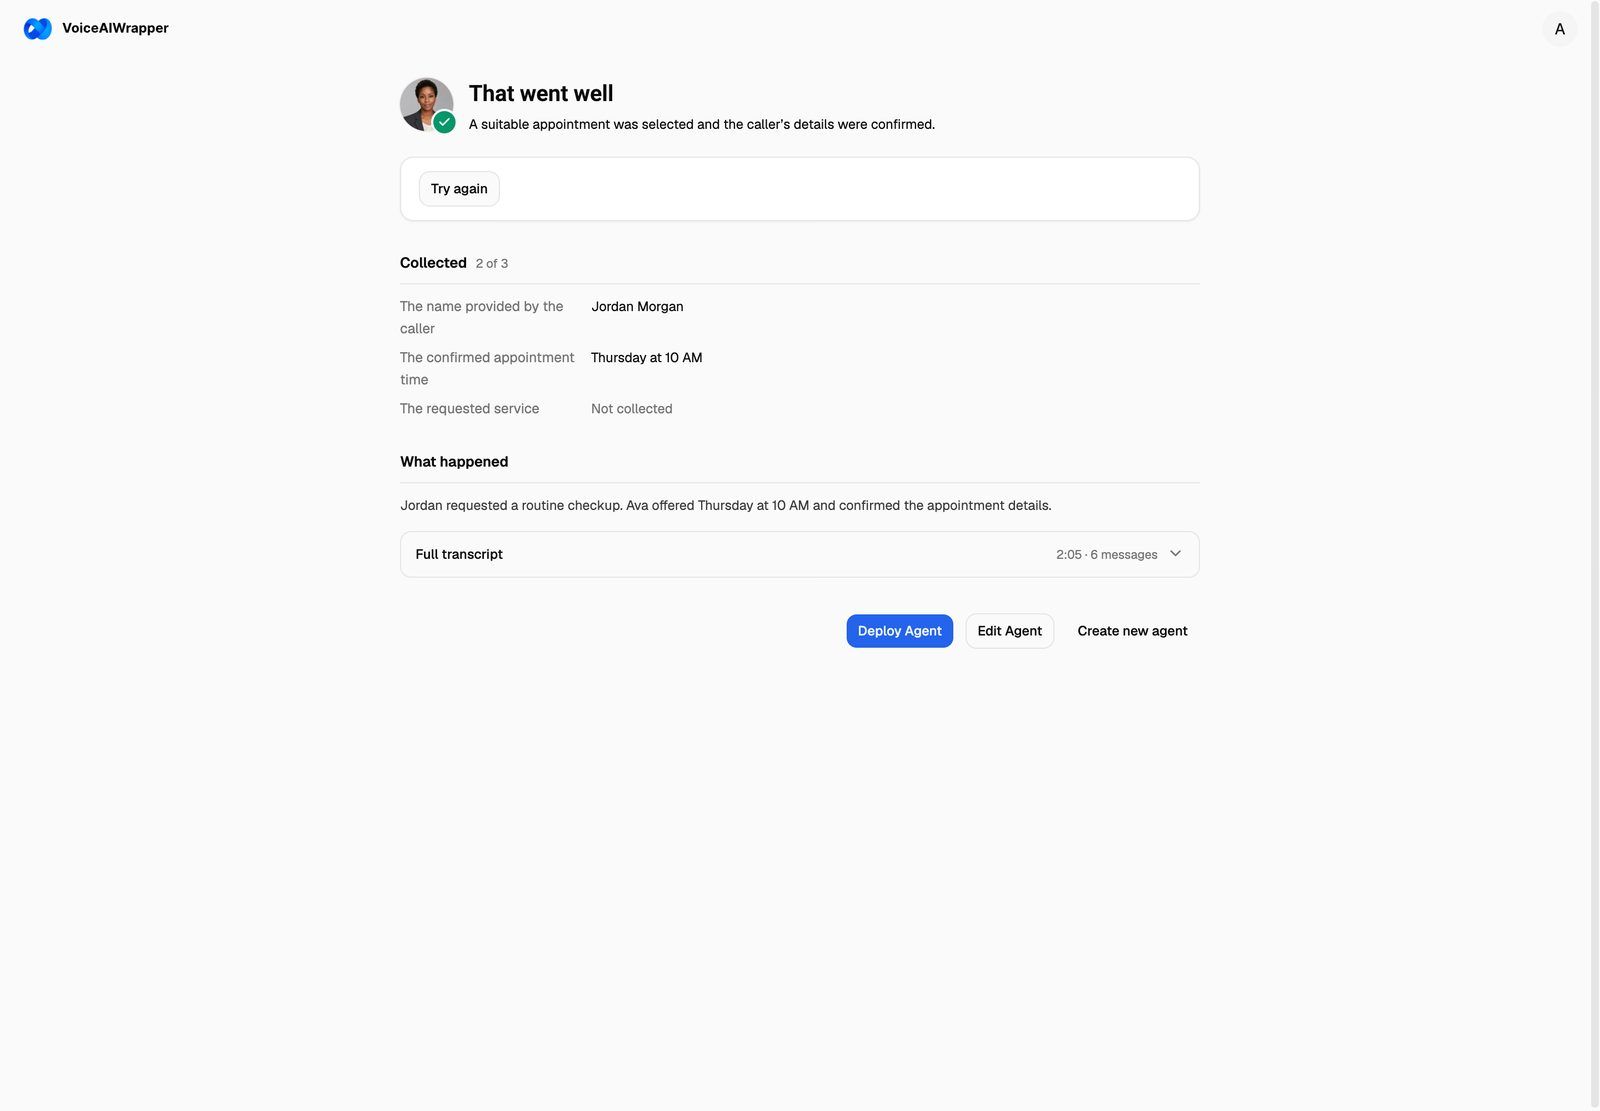
Then choose what to do next:
Step 8: Put your agent to work
Deploy {name} to work offers two ways to go live, depending on the agent:
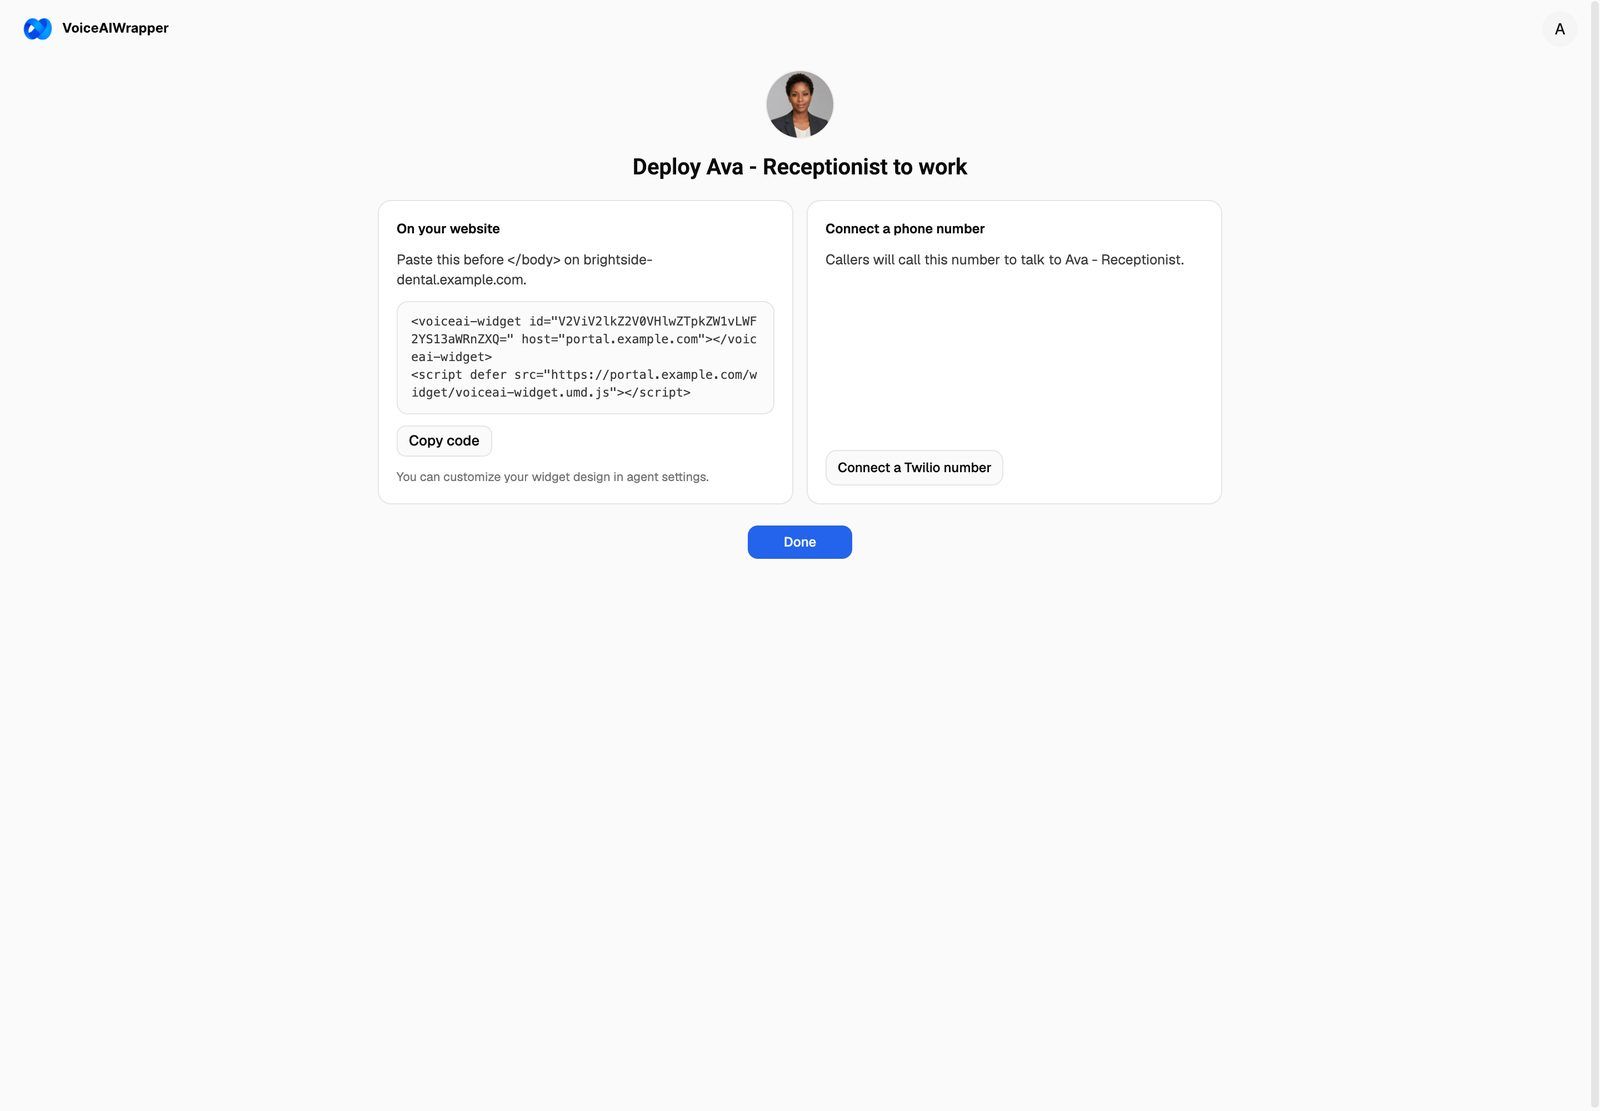
If your plan doesn't include the web widget, the On your website card says so, and you won't get an embed code.
Click Done to finish setup and open the agent's page. Connect a Twilio number and Create a campaign also finish setup: the first opens Phone Numbers, the second opens Campaigns.
Leaving and coming back
- Need a hand? If you stay on one screen for a few minutes, the wizard asks "Is there anything that's holding you up?" Type a message and click Send, click Book a call to talk to the VoiceAIWrapper team, or click Keep going.
- Logging out. The account menu at the top right has Log out. The wizard first asks what made you stop; you can answer or click Log out again. Next time you sign in, you pick up where you left off. Once your agent exists, you come back to Meet {name}.
- Skipping the wizard. Skip setup for now only appears when something goes wrong: a site that can't be read, a build that fails, or the error screen ("Something went wrong on our side."). It finishes setup and opens your agent if one was made, or the Agents page if not.
Troubleshooting
"We couldn't read {site}" or "Reading {site} took too long".
"We couldn't read {site}" or "Reading {site} took too long".
Check the address is right and the site is online, then click Read the site again. If it still fails, click enter the details yourself in the message and type your business details. The rest of the wizard works the same.
"You're out of credits for test calls."
"You're out of credits for test calls."
Test calls and chats use AI credits. Click Buy credits, or click Skip the test and test later from the agent's page. See How AI Credits Work.
"You've started too many conversations. Please wait a few minutes."
"You've started too many conversations. Please wait a few minutes."
You've started several test calls or chats in a short time. Wait a few minutes, then try again.
"You've reached today's limit for reading websites. Try again tomorrow."
"You've reached today's limit for reading websites. Try again tomorrow."
Each organization can read up to 30 sites a day, and create up to 30 agents a day ("You've reached today's limit for creating agents this way."). These limits also count agents built later with the AI Agent Builder. Try again the next day, or type the details in yourself.
"Your browser blocked the microphone. Allow it and try again."
"Your browser blocked the microphone. Allow it and try again."
Allow microphone access for VoiceAIWrapper in your browser's site settings, then click Try again. Or click Switch to chat to test by typing.
"Knowledge bases are turned off for this Pod".
"Knowledge bases are turned off for this Pod".
Your VAW Native Pod has knowledge bases switched off for calls, so the agent won't use the knowledge you add. Turn Knowledge bases on calls on in the Pod's settings. See Manage Pods: Rename, Update Keys, Switch and Delete.
Can I change the agent after the wizard?
Can I change the agent after the wizard?
Yes. Everything the wizard set up (prompt, greeting, voice, language, knowledge, tools and analysis) can be changed on the agent's page. See Write the Prompt and Greeting.
Related articles
Was this helpful?
Still need help? Share an idea