Automation Forms for Self-Serve Clients
Give self-serve clients forms in their portal that send each submission to your webhook, so your automations can create or update agents, tools and knowledge bases.
Written By voiceaiwrapper
Last updated 26 days ago
Self-serve clients sign up without talking to you, so they need a way to ask for changes on their own. Automation forms are forms in the client's portal that send every submission to a webhook. Your automation (in Make, n8n, Zapier or your own code) receives the answers and does the work, such as creating a new agent, updating a prompt, adding a tool or loading documents into a knowledge base.
The form collects the request and passes it on. The work itself happens in the automation you connect to the webhook.
Available on: plans that include Client forms. Without it, clicking Create Form shows an upgrade prompt. Your plan may also limit how many forms you can have.
Before you start
- A webhook URL from the tool that will handle submissions, for example a Make or n8n webhook trigger. See Connect Make, n8n, Zapier and Other Tools.
- Stripe connected, so the SaaS Creator tab shows its sections. See Connect Your Stripe Account.
- Custom pages on your plan. Clients only see a form once you put it on a custom page, which needs a plan that includes Custom client-portal menu items.
How automation forms relate to client forms
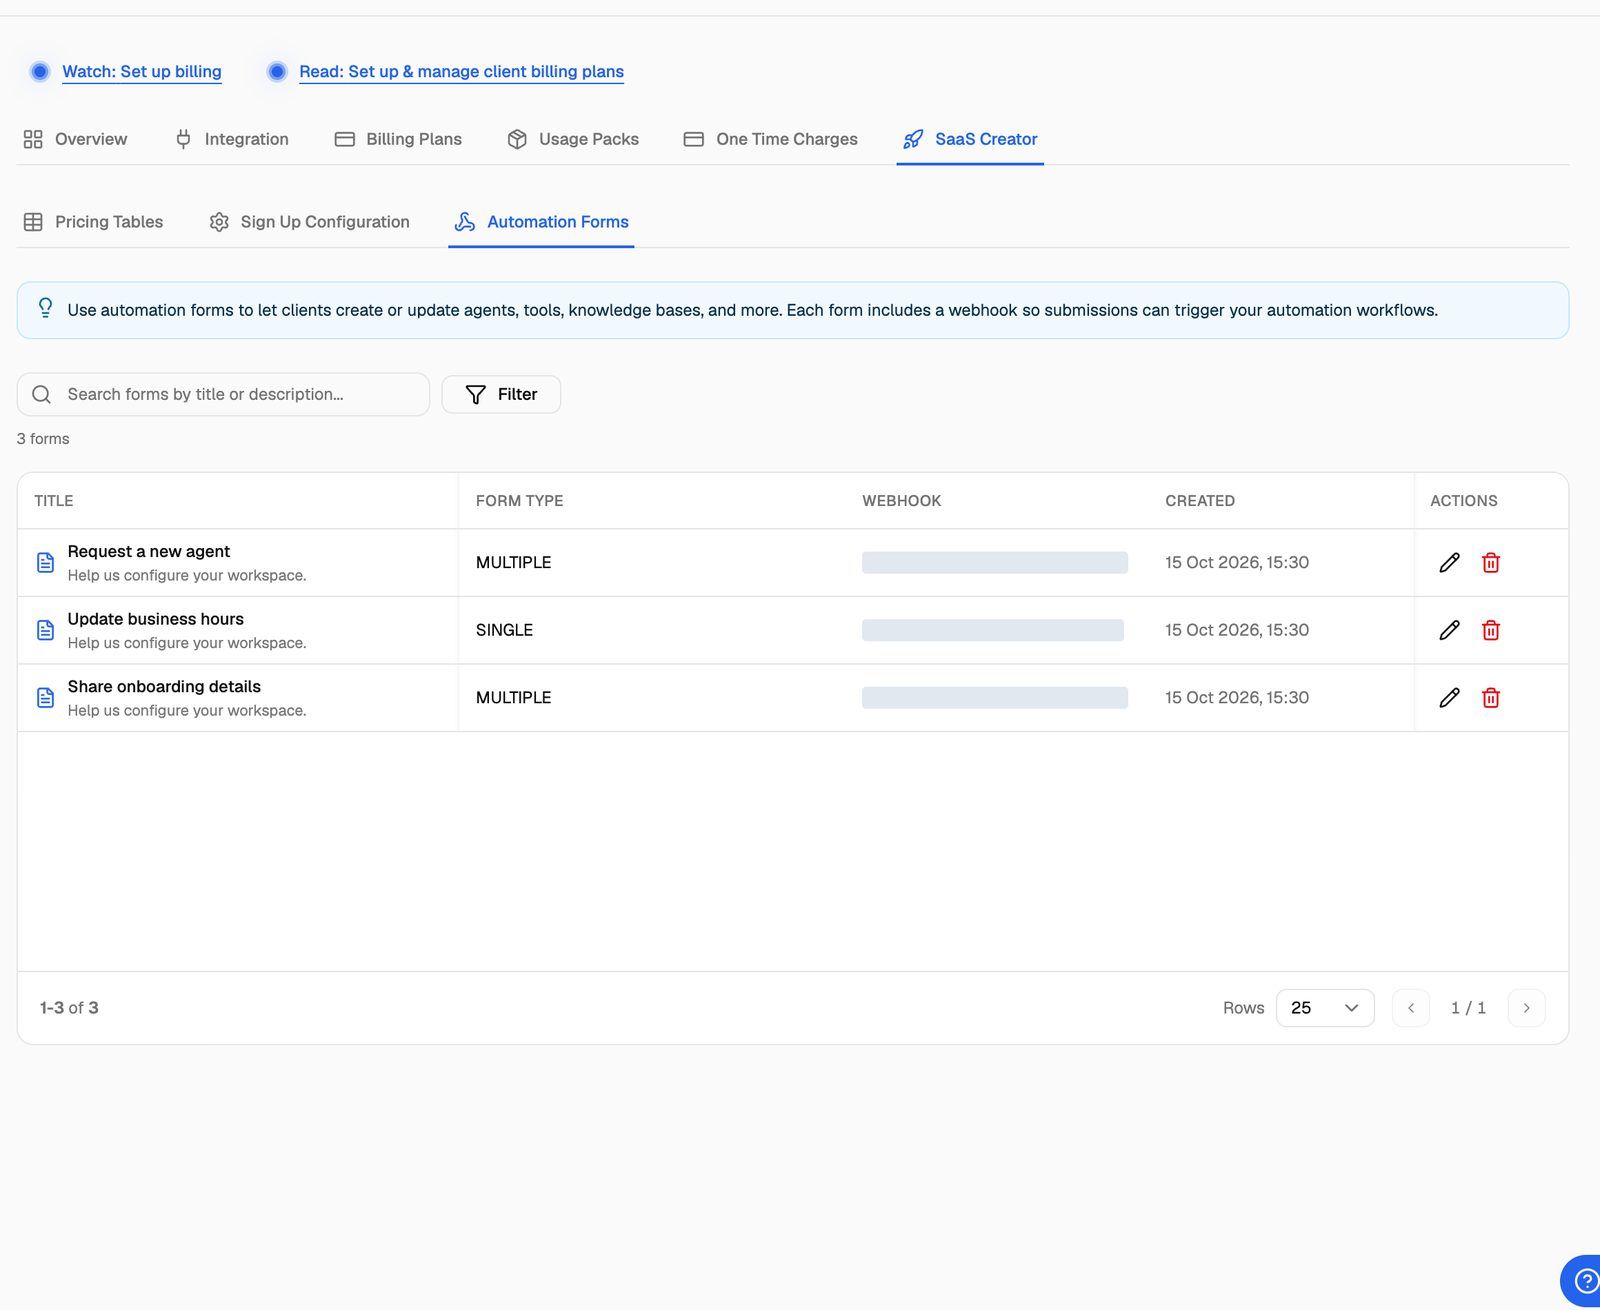
Automation forms are ordinary client forms that have a webhook. The Automation Forms list shows every client form with a webhook URL, wherever you created it. The difference when you create one here is that the webhook URL is required.
Click View all forms to open Client Portal → Forms, which lists all your forms, with or without a webhook. If you remove the webhook URL from an automation form, it drops off the Automation Forms list but stays under Forms.
Step 1: Create the form
- In the sidebar, open Billing Configuration → Stripe.
- Open the SaaS Creator tab, then Automation Forms.
- Click Create Form.
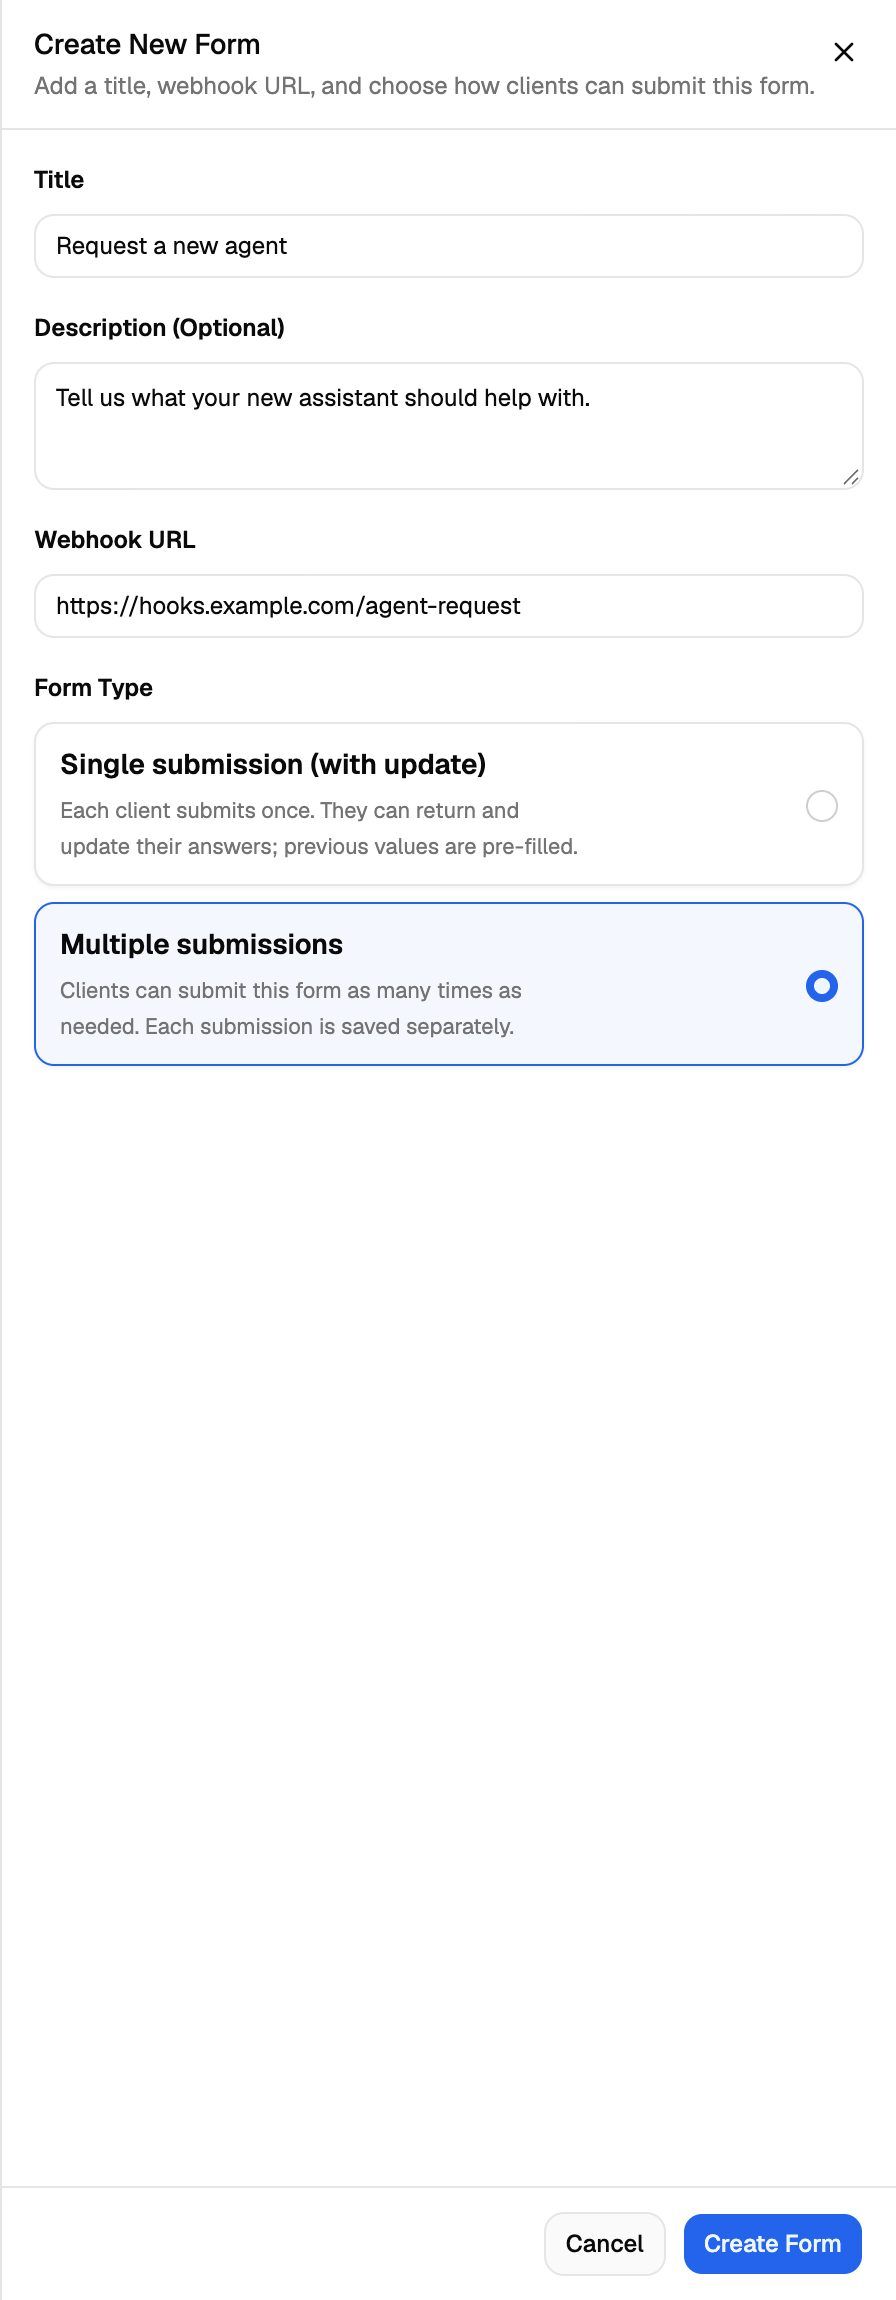
- In Create New Form, fill in:
- Title: what the client sees, for example "Request a new agent".
- Description (Optional): a short explanation of what the form is for.
- Webhook URL: where submissions are sent. It must be a full URL; otherwise you'll see "Please enter a valid webhook URL".
- Form Type: see the table below.
- Click Create Form. You'll see "Form created successfully".
The new form starts empty. Click it in the list to add fields.
Step 2: Add fields and test the form
Click the form to open it. It has three tabs: Edit, Preview and Submissions. Build the form on Edit and click Save. The back arrow returns you to Automation Forms.
Give each field a clear Field ID, such as agent_name or business_hours. The webhook sends answers under these IDs, so they're what your automation reads. The form builder is covered in full in Build Client Forms.
To test the whole flow, fill in the form on the Preview tab and submit it. This sends a real request to your webhook, marked as a test, so you can build your automation against it.
Step 3: Handle submissions in your automation
Each submission is sent to your webhook as a POST request with a JSON body:
{
  "form_id": "Q2xpZW50Rm9ybVR5cGU6MTI=",
  "is_test": false,
  "submission_type": "new",
  "form_data": { "agent_name": "Front desk", "business_hours": "Mon-Fri 9-5" },
  "client": {
    "id": "Q2xpZW50VHlwZTo0NQ==",
    "name": "owner@acmedental.com",
    "primary_email": "owner@acmedental.com",
    "client_type": "SAAS",
    "enabled": true
  },
  "metadata": { "client_configuration_id": "Q2xpZW50QXNzZXRHcm91cFR5cGU6Nzg=" }
}
What your automation can rely on:
form_dataholds the answers, keyed by each field's Field ID.clienttells you who sent it. For self-serve clients,client_typeisSAASand the name starts out as their email address.metadata.client_configuration_ididentifies the workspace the client submitted the form from.submission_typeisnewfor a first submission andupdatewhen a client changes a Single submission (with update) form. Use it to decide whether to create something or update it.is_testistruefor submissions you make from Preview. Test submissions have noclient,submission_typeor workspace ID (allnull), so skip them or route them to a test branch.
A delivery counts as successful when your endpoint answers with a status code below 400 within 30 seconds. If it fails, it's retried up to 3 more times, with a longer wait each time.
Have your automation do the real work through your own provider account or the API, then email the client or update a portal page to confirm it's done. The form itself only confirms that the request was received.
Step 4: Put the form in your clients' portal
Clients don't see a form until it's on a custom page:
- Open Client Portal → Custom Pages and add a page.
- Choose Form to show one form, or Form Group to show several forms, each on its own sub-page.
- Select your form and set the page path.
- Under Sidebar Visibility, choose who sees it: Visible to All, or Custom to pick clients or plans. Visible to Specific Billing Plans is useful for self-serve clients: for example, show an "Add a knowledge base document" form only to clients on a plan that includes it.
Full steps are in Add Custom Pages and Links to the Portal.
Check what was sent
Open the form and go to Submissions. Each submission shows the client, their answers, and a Webhook Delivery status of Delivered, Failed or Pending, with your endpoint's response. Use this when a client says nothing happened after they submitted.
Deleting an automation form (the delete icon in the Actions column) also deletes all of its submissions and removes the form from any custom page or form group that shows it, so clients can no longer reach it. This can't be undone.
Frequently asked questions
Clicking Create Form shows an upgrade prompt.
Clicking Create Form shows an upgrade prompt.
Either your plan doesn't include Client forms, or you've reached the number of forms your plan allows. Forms you created under Client Portal → Forms count toward the same limit. See A Feature Is Locked or Asks Me to Upgrade.
Can a form create an agent directly, without a webhook?
Can a form create an agent directly, without a webhook?
No. The form collects the request and sends it to your webhook. Creating or changing the agent, tool or knowledge base is done by the automation behind that webhook.
The submission shows Failed.
The submission shows Failed.
Open the submission and look at Webhook Response for the status code or error your endpoint returned. Fix the endpoint, then send a test from the Preview tab. See My Webhook Isn't Receiving Data.
A form I created disappeared from Automation Forms.
A form I created disappeared from Automation Forms.
Its webhook URL was probably removed. The form still exists under Client Portal → Forms. Open it, click Webhook on the Edit tab, add the URL again and click Save Webhook.
Related articles
Was this helpful?
Still need help? Share an idea