Connect Vapi
Connect your Vapi organization as a Pod: where to find the organization ID and API keys, when to use the EU domain, and how to fix connection errors.
Written By voiceaiwrapper
Last updated 26 days ago
Connect your Vapi organization to VoiceAIWrapper so you can run campaigns, give clients access and track calls for the assistants you've built in Vapi. You add Vapi as a Pod (an engine or provider connection) by pasting four values from your Vapi dashboard. It takes about 5 minutes.
Available on: plans that include Vapi. Without it, the VAPI card shows Not in your plan and can't be selected. On some plans, each provider connection also uses one BYOK connection add-on. When they're all in use, clicking Next opens an upgrade prompt instead of the credentials form.
Applies to: BYOK Pods on Vapi. Your built-in VAW Native Pod needs no keys. See What Is a Voice AI Pod?
Before you start
You'll need:
- A Vapi account with the organization you want to connect, and access to its settings and API keys.
- To know your Vapi region. If you sign in at
dashboard.eu.vapi.ai, your organization is in the EU region. - Your Vapi concurrency limit: how many calls your Vapi organization can run at once.
- A Vapi organization that isn't connected anywhere else in VoiceAIWrapper. Each Vapi organization can be connected to only one Pod, across all VoiceAIWrapper organizations.
Step 1: Choose Vapi
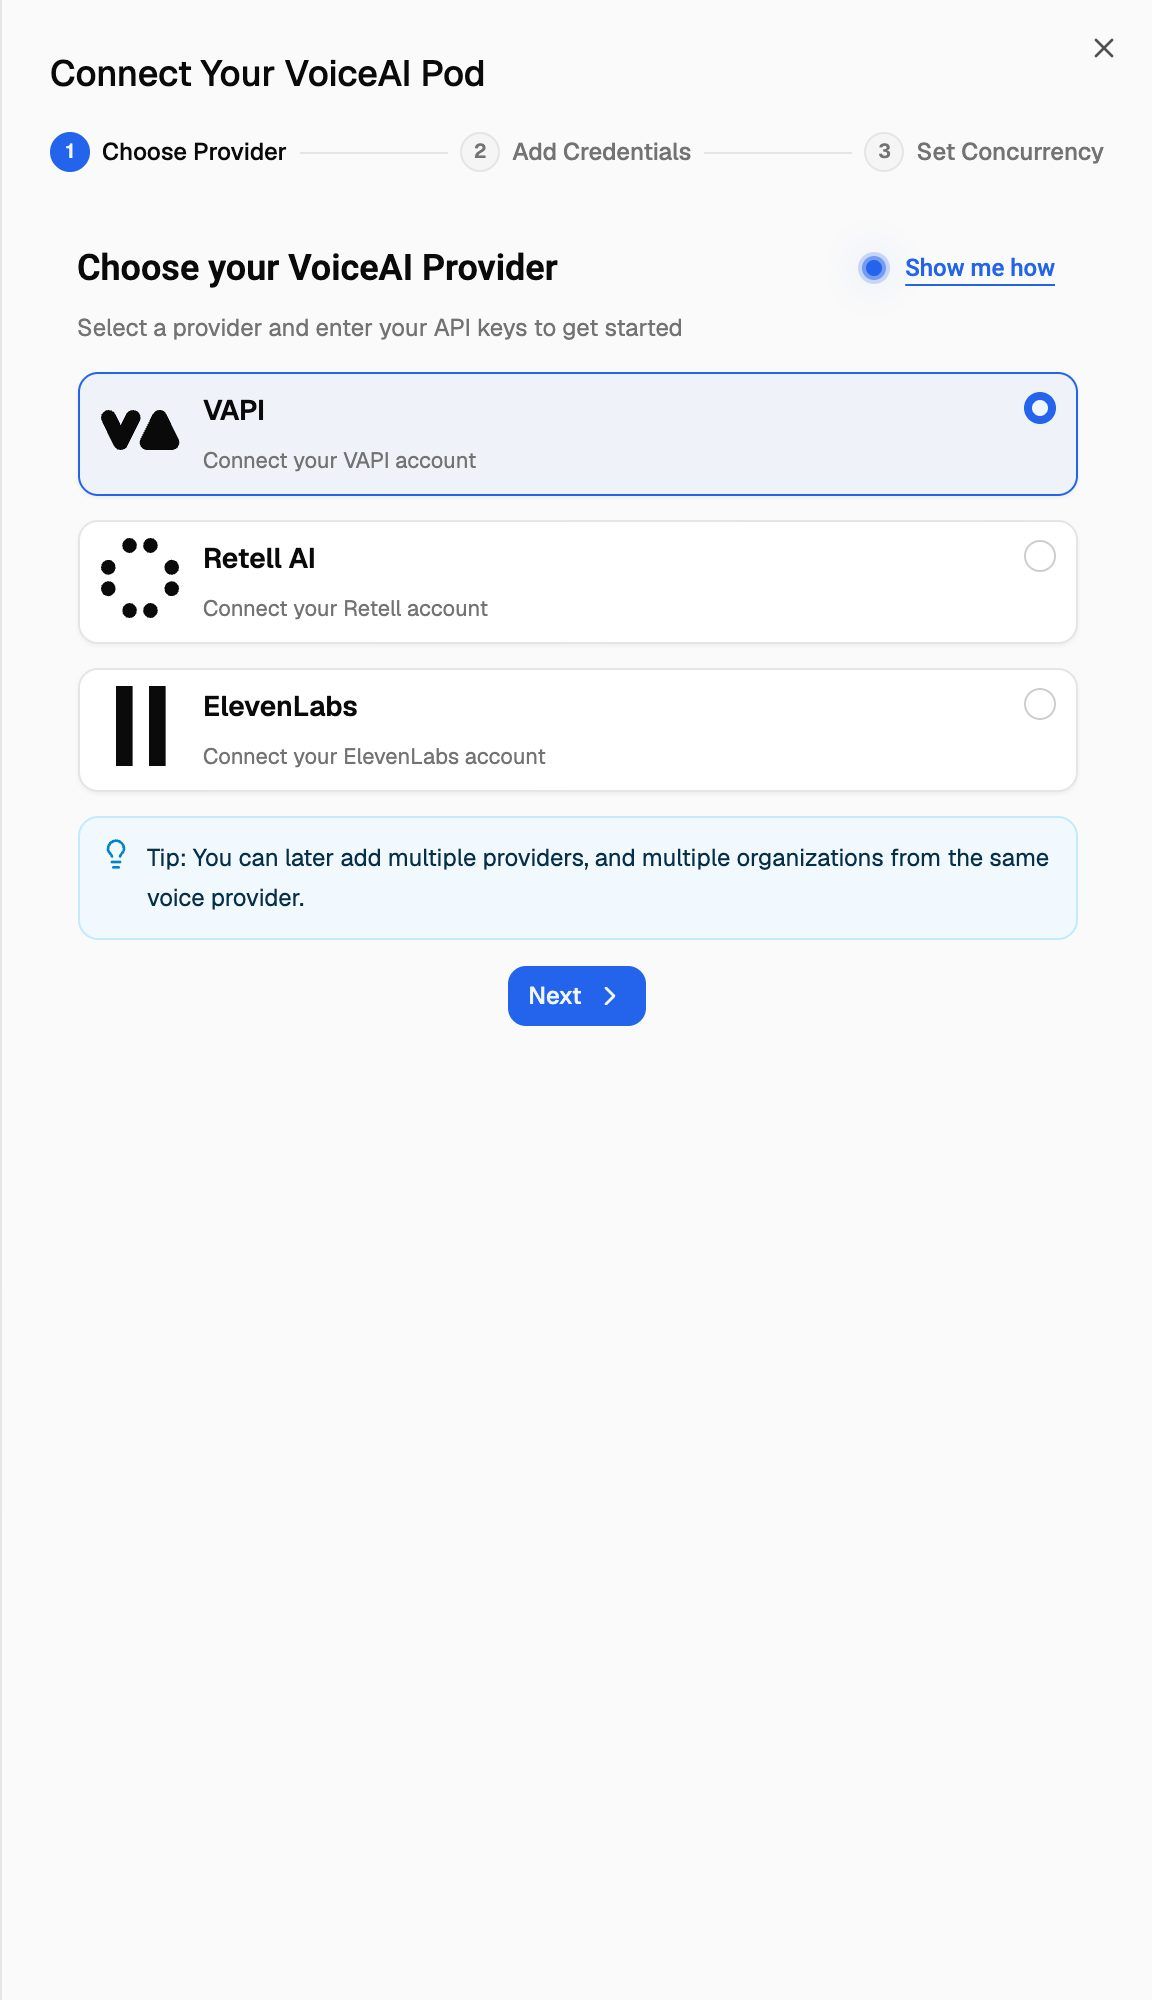
- In the header, click the Pod selector, then click Add Pod. On a phone, the Pod selector is at the top of the sidebar menu. The Connect Your VoiceAI Pod drawer opens on Choose Provider.
- Select VAPI ("Connect your VAPI account").
- Click Next.
Step 2: Enter your Vapi credentials
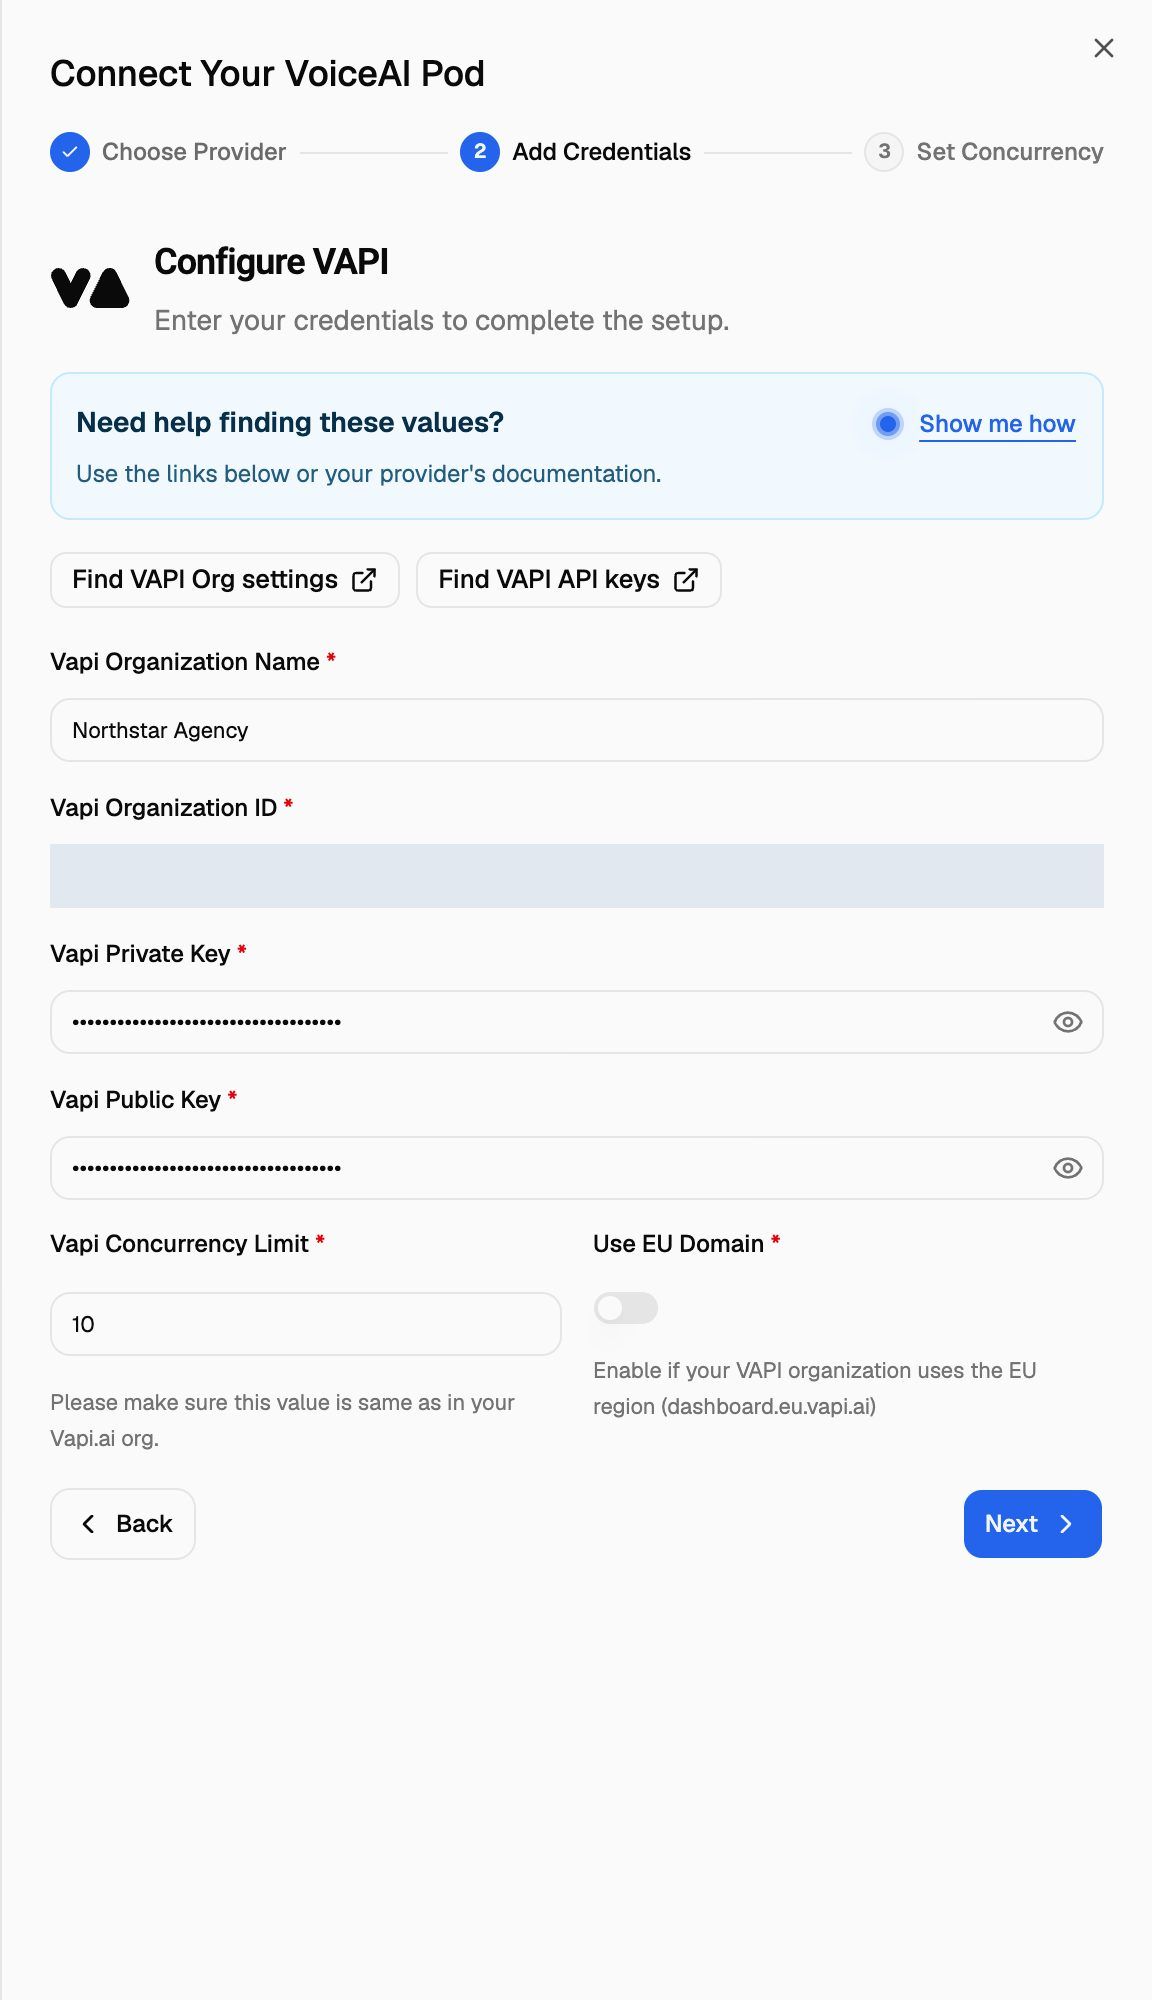
The Configure VAPI step asks for six values. Two buttons above the fields open the right Vapi pages in a new tab: Find VAPI Org settings and Find VAPI API keys. They open the standard dashboard, so if your organization is in the EU region, open dashboard.eu.vapi.ai yourself.
The organization ID and both keys are long codes in the format xxxxxxxx-xxxx-xxxx-xxxx-xxxxxxxxxxxx. Copy them exactly.
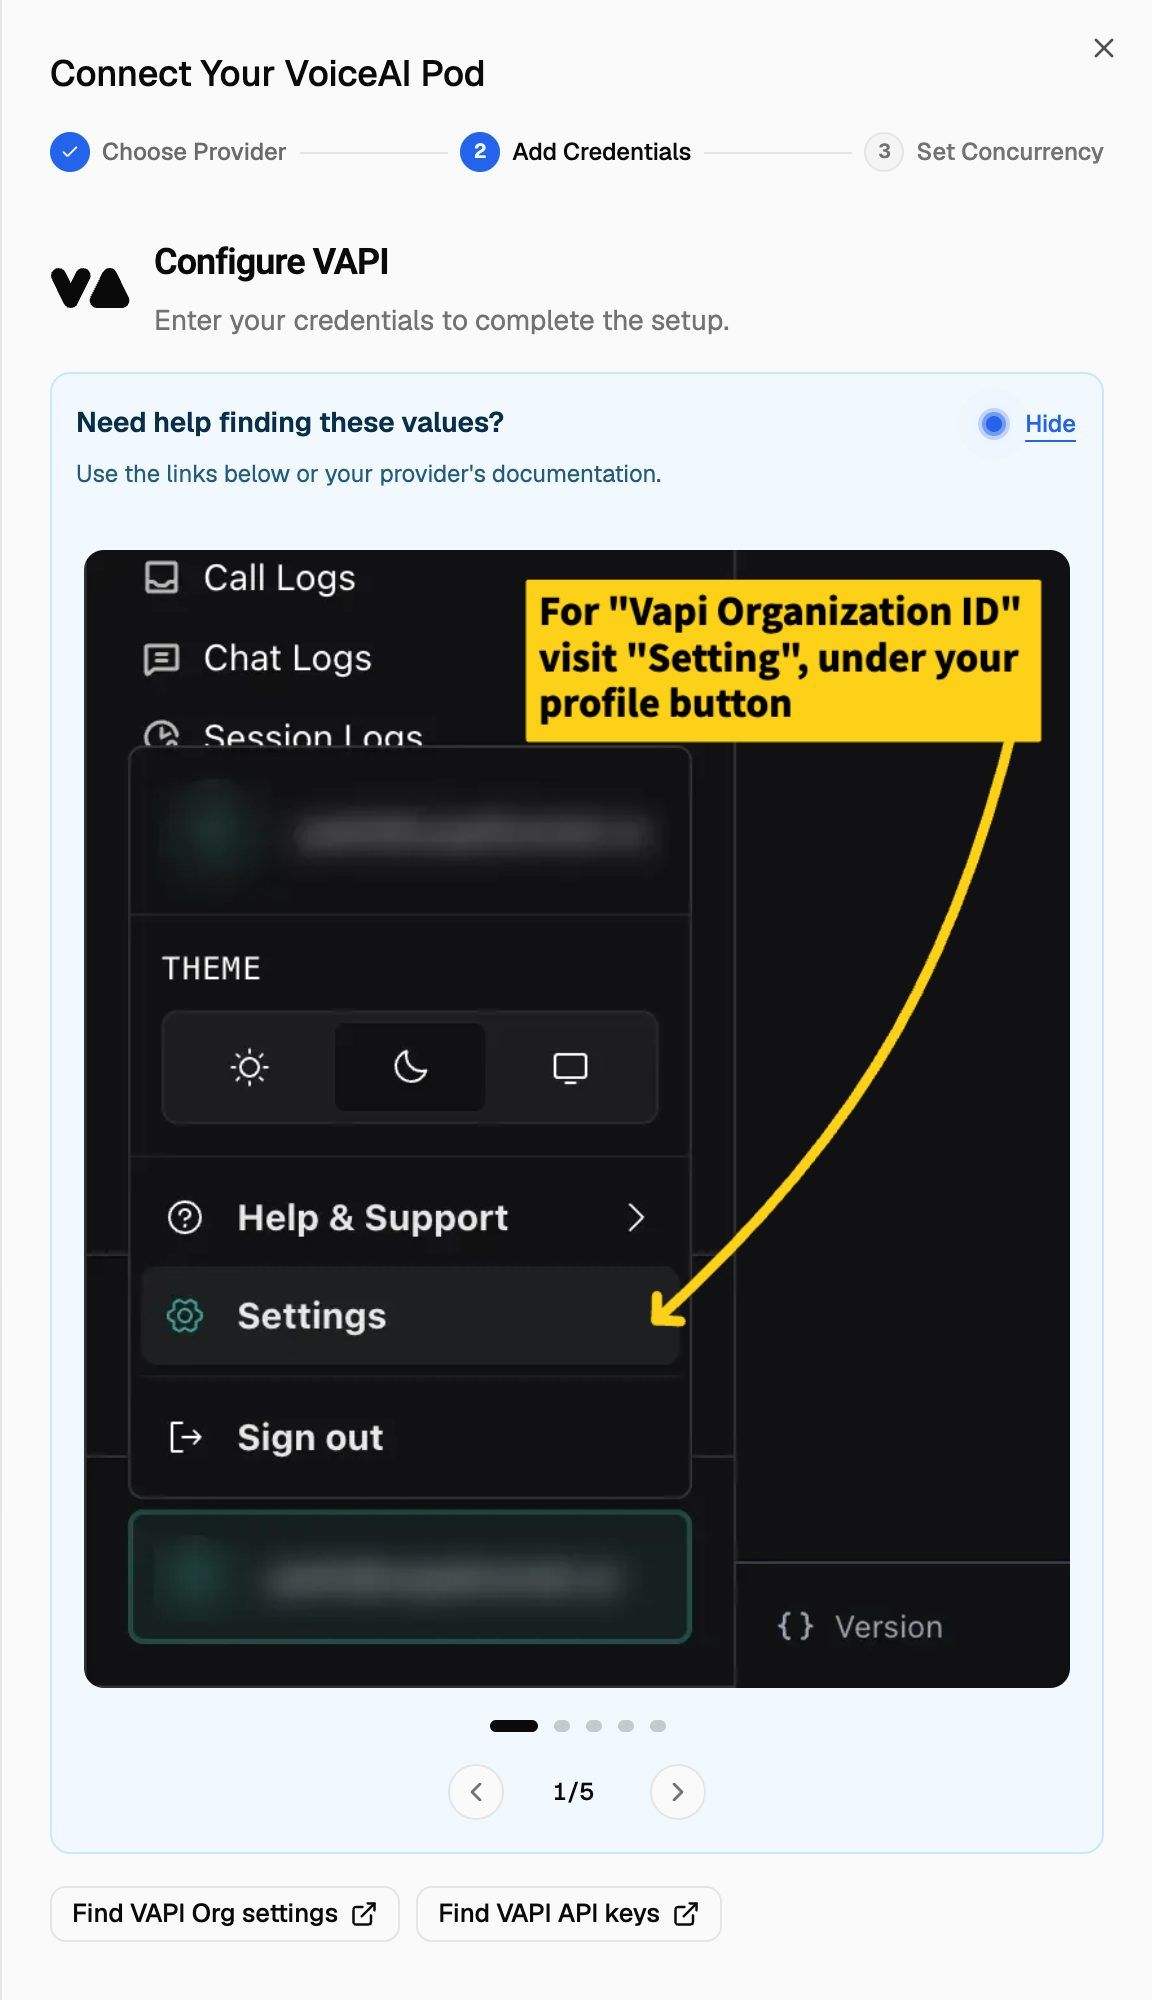
Not sure where a value is? Click Show me how in the Need help finding these values? box. A step-by-step slideshow shows each screen in Vapi.
When everything is filled in, click Next. VoiceAIWrapper checks that the organization isn't already connected and that the private key works by reading your assistants. If both pass, you'll see "VoiceAI pod credential created successfully" and move to the last step.
Step 3: Split your concurrency
The Set Concurrency step shows your Total (the Vapi Concurrency Limit you entered) and how it's divided between Outbound and Inbound calls. It starts split evenly, with any odd line going to outbound.
- Change Outbound or Inbound. The other one adjusts so they always add up to the total.
- Click Complete Setup.
You'll see "Concurrency distribution updated successfully". To learn how the split affects campaigns, see Split Concurrency Between Inbound and Outbound Calls.
After you connect
- Your assistants appear automatically. Open Assistants in the Pod. Any assistant you create in Vapi later shows up there too.
- Sync webhooks before you use an assistant or number. VoiceAIWrapper needs to receive call events from Vapi. See Sync Webhooks So VoiceAIWrapper Can Track Calls.
- Phone numbers come from Vapi. You buy or import them in Vapi. See Phone Numbers on Vapi, Retell, ElevenLabs and Bolna.
Troubleshooting
A field says "Invalid Organization ID", "Invalid Private Key" or "Invalid Public Key" while I type.
A field says "Invalid Organization ID", "Invalid Private Key" or "Invalid Public Key" while I type.
The value isn't in the expected format. Vapi IDs and keys look like xxxxxxxx-xxxx-xxxx-xxxx-xxxxxxxxxxxx. Check that you copied the whole value, with no extra spaces or characters, and that you didn't paste the organization name or another field by mistake.
I click Next and get "Invalid Private Key".
I click Next and get "Invalid Private Key".
VoiceAIWrapper couldn't read your assistants with that key. Check that:
- You copied the Private Key, not the Public Key, into Vapi Private Key.
- The key belongs to the organization whose ID you entered and hasn't been deleted in Vapi.
- Use EU Domain matches your region. An EU organization needs it on; other organizations need it off.
I get "Organization Id, Public Key or Private Key already exists".
I get "Organization Id, Public Key or Private Key already exists".
This Vapi organization, or one of its keys, is already connected to a Pod. That Pod can be in this organization or in another VoiceAIWrapper organization, including one you own. Use the existing Pod, or delete it first and then connect again. Deleting a Pod also deletes its campaigns, calls and analytics, so read Manage Pods: Rename, Update Keys, Switch and Delete before you do.
I see an upgrade prompt or "Not in your plan".
I see an upgrade prompt or "Not in your plan".
Your plan doesn't include Vapi, or every BYOK connection on your plan is already used by another Pod. The upgrade prompt shows how to unlock it, for example by adding a BYOK connection or moving to a plan that includes Vapi. Only an organization owner or admin can upgrade. See Add-Ons: BYOK Connections, Client Accounts and Team Members.
My Vapi concurrency changed, or I rotated my keys in Vapi.
My Vapi concurrency changed, or I rotated my keys in Vapi.
Open the Pod selector and click the pencil (or Edit) for the Vapi Pod. The Update VoiceAI Pod drawer opens on Update Credentials. Change the keys or Vapi Concurrency Limit, click Next, check the split on Set Concurrency, then click Update Concurrency.
More connection errors are covered in Errors When Connecting a Provider.
Related articles
Was this helpful?
Still need help? Share an idea